Boston Cream Poke Cake- Easy Delicious Dessert
Boston Cream Poke Cake is an absolute showstopper, and for good reason! If you’ve ever dreamt of combining the rich, decadent flavors of a classic Boston Cream Pie with the irresistible simplicity of a poke cake, your dream is about to come true. This isn’t just any dessert; it’s a celebration of creamy custard, luscious chocolate, and a moist, fluffy cake that literally soaks up every delicious drop. What makes this Boston Cream Poke Cake so incredibly popular? It’s the magic that happens when you combine those iconic bakery flavors with a cake so wonderfully infused with pudding and glaze. Each forkful offers a delightful surprise, a burst of creamy sweetness that melts in your mouth. It’s the perfect dessert for birthdays, potlucks, or simply when you need a serious dose of comfort. Get ready to fall in love with this no-fuss, maximum-flavor treat!

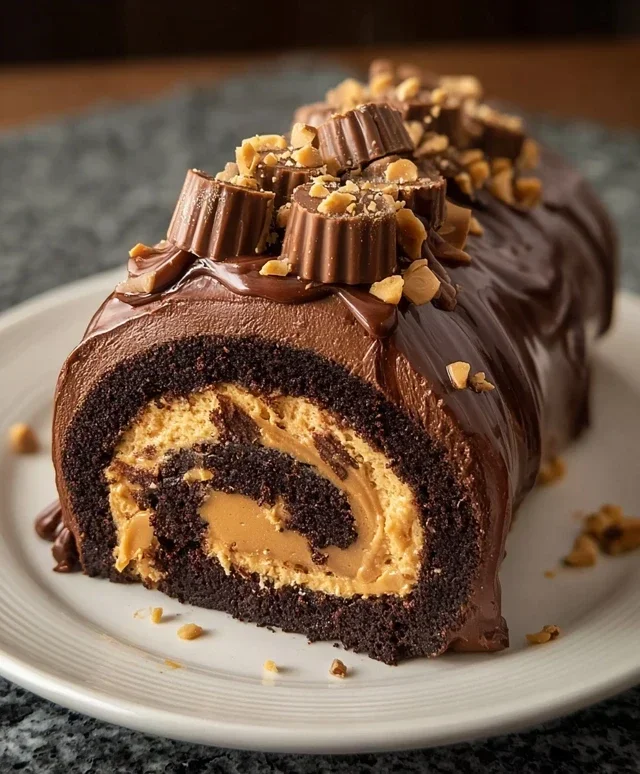
Boston Cream Poke Cake
Get ready to impress your friends and family with this incredibly easy yet utterly decadent Boston Cream Poke Cake. This dessert is a true showstopper, combining the comforting familiarity of yellow cake with the lusciousness of vanilla pudding and a rich chocolate ganache-like topping. It’s the perfect dessert for birthdays, potlucks, or simply when you’re craving something sweet and satisfying. The “poke” in poke cake refers to the magical process of creating small holes throughout the cake, allowing the creamy pudding to seep in and infuse every bite with moisture and flavor. It’s a simple technique that transforms a basic cake into an extraordinary treat. I love how adaptable this recipe is, too. While the classic combination is divine, feel free to experiment with different pudding flavors or even add a sprinkle of chocolate chips to the topping. Let’s dive into creating this delightful dessert!
Ingredients:
Instructions:
Baking the Yellow Cake Foundation
First things first, we need to bake our cake. Preheat your oven according to the yellow cake mix box instructions, usually around 350 degrees Fahrenheit (175 degrees Celsius). Lightly grease and flour a 9×13 inch baking pan. In a large mixing bowl, combine the yellow cake mix with the eggs, oil, and water as directed on the cake mix packagin extractg. Mix until just combined, being careful not to overmix, which can lead to a tough cake. Pour the batter evenly into the prepared baking pan. Bake for the time specified on the box, or until a toothpick inserted into the center comes out clean. Once baked, let the cake cool in the pan on a wire rack for about 15-20 minutes before proceeding to the next magical step. This initial cooling period is crucial; you want the cake to be firm enough to handle but still warm enough to absorb the pudding.
Creating the Pudding Embrace
While the cake is still warm in the pan, it’s time to work our poke magic! Using the handle of a wooden spoon, a dowel rod, or even a plastic straw, carefully poke holes all over the surface of the cake. Don’t be shy! You want to create a generous network of holes. Aim for holes that are about 1 inch apart, going about halfway down into the cake. The more holes you make, the more pudding will saturate the cake, resulting in an incredibly moist and flavorful dessert. Once your poking is complete, set the cake aside for a moment. In a separate medium-sized bowl, whisk together the two boxes of instant vanilla or French vanilla pudding with the 4 cups of milk. Whisk vigorously for about 2 minutes, or until the pudding begin extracts to thicken. It’s important to use instant pudding here, as it sets up quickly without needing to be cooked.
The Pudding Infusion
Now for the truly transformative part! As soon as the pudding has thickened slightly, pour it evenly over the poked cake. Use a spatula to gently spread the pudding across the entire surface, ensuring it seeps down into all those wonderful holes you created. Don’t worry if some pudding pools on top; it will settle as it chills. Once the pudding is spread, cover the baking pan tightly with plastic wrap, and refrigerate the cake for at least 4 hours, or preferably overnight. This chilling time is absolutely essential. It allows the pudding to fully set and meld with the cake, creating that signature Boston Cream flavor and texture. Patience here is key to achieving the perfect poke cake consistency.
Melting the Chocolate Crown
After the cake has had ample time to chill and the pudding has set beautifully, it’s time to add the crowning glory. Take the tub of chocolate frosting and gently warm it. You can do this by placing the open tub in a microwave-safe bowl and microwaving it in 15-second intervals, stirring in between, until it’s smooth and pourable. Alternatively, you can place the frosting tub in a bowl of hot water for a few minutes. The goal is to make it easily spreadable without making it too hot. This makes for a much more even and professional-looking finish. Be careful not to overheat the frosting, as it can become greasy.
The Luscious Chocolate Topping and Final Flourish
Once the chocolate frosting is smooth and spreadable, carefully spread it over the chilled pudding-topped cake. Use an offset spatula or the back of a spoon to create a smooth, even layer. You want to cover the entire surface, creating that classic Boston Cream pie look. For an extra touch of elegance, you can even gently swirl the frosting with your spatula. If you’re feeling adventurous, you could even sprinkle some mini chocolate chips over the top of the frosting while it’s still wet for added texture and visual appeal. Once frosted, you can either serve immediately or return the cake to the refrigerator for another 30 minutes to allow the frosting to firm up slightly. Slice and enjoy this incredible creation! The combination of the moist cake, the creamy pudding, and the rich chocolate is simply divine.
Conclusion:
And there you have it – the ultimate guide to creating a show-stopping Boston Cream Poke Cake! This recipe is truly a winner because it combines the beloved flavors of classic Boston Cream Pie – rich chocolate, creamy custard, and moist cake – with the effortless fun of a poke cake. The result is a dessert that’s both incredibly delicious and surprisingly simple to make, perfect for both novice bakers and seasoned pros looking for a crowd-pleasing treat. The beauty of this Boston Cream Poke Cake lies in its ability to absorb all those wonderful fillings, creating a wonderfully moist and intensely flavorful experience in every bite.
Serve this delightful cake slightly chilled for the best texture. It’s fantastic on its own, but can also be enhanced with a dollop of whipped cream or a fresh berry garnish. For variations, feel free to experiment with different cake flavors like yellow or even a chocolate cake mix for an extra chocolatey punch. You could also try a different flavored pudding, such as vanilla bean or butterscotch, to put your own unique spin on this classic dessert. I truly encourage you to give this Boston Cream Poke Cake a try; it’s a guaranteed hit that will leave everyone asking for the recipe!
Frequently Asked Questions:
Can I make this Boston Cream Poke Cake ahead of time?
Absolutely! This poke cake is actually best made a few hours or even a day in advance. This allows the cake to fully absorb the pudding and custard, resulting in a richer flavor and a wonderfully moist texture. Just be sure to store it covered in the refrigerator.
What kind of chocolate topping works best?
The classic ganache made with semi-sweet chocolate and heavy cream is ideal for that authentic Boston Cream flavor. However, a simple chocolate frosting or even melted chocolate chips drizzled over the top would also be delicious and an easy shortcut if you’re short on time.
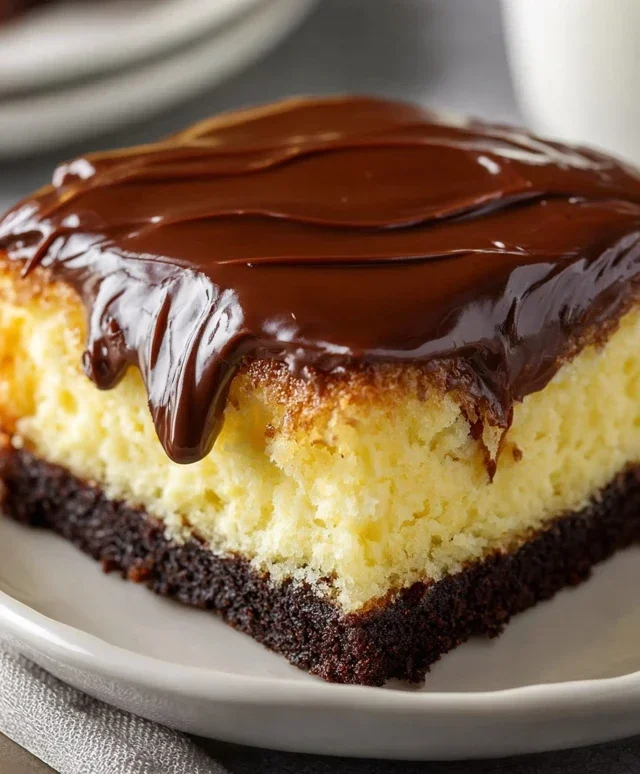
Boston Cream Poke Cake
A delicious poke cake inspired by the classic Boston Cream Pie, featuring a moist yellow cake, creamy vanilla pudding, and rich chocolate frosting.
Ingredients
-
15.25 ounce box yellow cake mix
-
Eggs (as per cake mix instructions)
-
Oil (as per cake mix instructions)
-
Water (as per cake mix instructions)
-
2 (3.4 ounce) boxes instant vanilla pudding
-
4 cups milk
-
16 ounce tub chocolate frosting
Instructions
-
Step 1
Prepare the yellow cake mix according to package directions using the required eggs, oil, and water. Pour batter into a greased and floured 9×13 inch baking pan. -
Step 2
Bake the cake according to package directions. Once baked, let it cool slightly in the pan for about 10-15 minutes. -
Step 3
While the cake is still warm, use the handle of a wooden spoon or a skewer to poke holes all over the top of the cake, going down almost to the bottom. -
Step 4
In a separate bowl, whisk together the instant vanilla pudding and milk until well combined and thickened. Pour this pudding mixture evenly over the warm, poked cake, allowing it to seep into the holes. -
Step 5
Refrigerate the cake for at least 4 hours, or until thoroughly chilled and the pudding has set. -
Step 6
Before serving, gently warm the chocolate frosting (if needed for easier spreading) and spread it evenly over the chilled pudding layer. Slice and serve.
Important Information
Nutrition Facts (Per Serving)
It is important to consider this information as approximate and not to use it as definitive health advice.
Allergy Information
Please check ingredients for potential allergens and consult a health professional if in doubt.