Easy Cheesy Pizza Pockets- Quick Homemade Snack
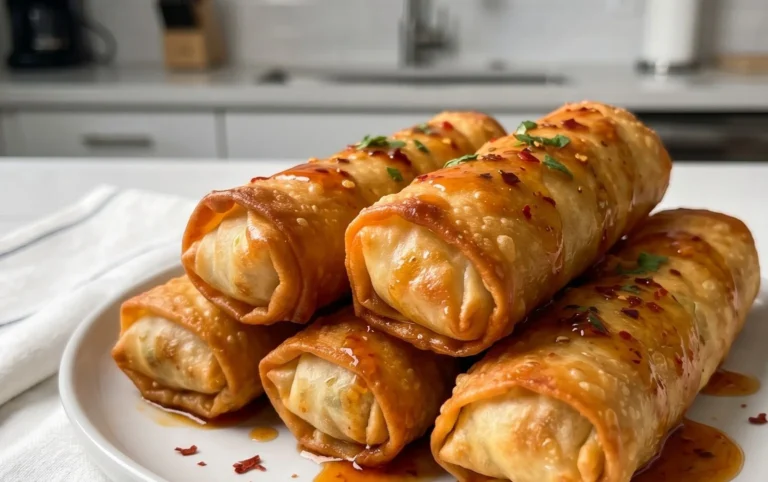
Cheesy Pizza Pockets are an absolute game-changer when that pizza craving hits! Forget the frozen aisle; we’re talking about creating your own little parcels of pure joy, bursting with gooey cheese and your favorite pizza toppings. There’s something incredibly satisfying about biting into a warm, golden-brown pocket, knowing that savory, melty goodness is waiting inside. These aren’t just any pizza pockets; they’re a customizable adventure. What makes these Cheesy Pizza Pockets so special is their perfect portability and the sheer fun of building your own flavor combinations. Whether you’re a beef pepperoni purist or a veggie enthusiast, these little pockets deliver that classic pizza experience in a convenient, handheld format that’s perfect for snacks, quick lunches, or even a fun dinner for the family. Get ready to unleash your inner pizzaiolo!
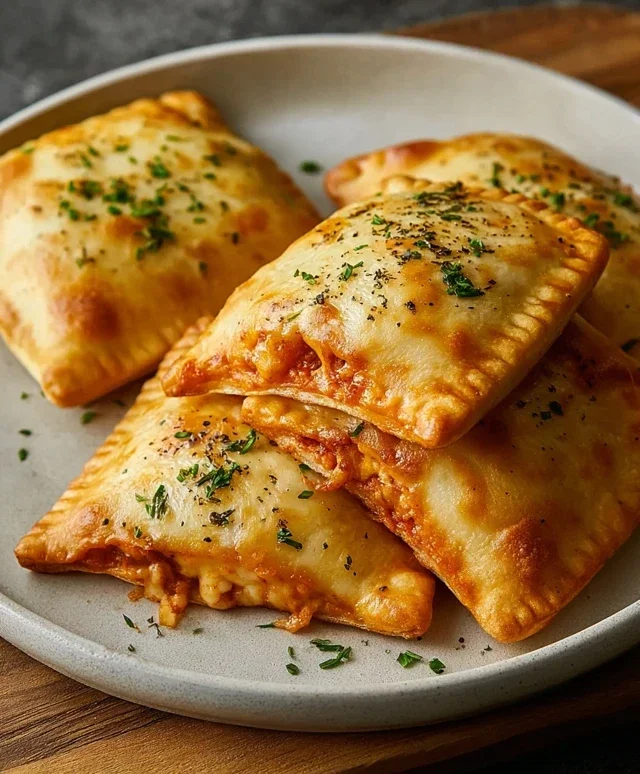
Cheesy Pizza Pockets
There’s something undeniably comforting about pizza. But sometimes, you want that pizza flavor in a fun, portable, and bite-sized package. Enter these Cheesy Pizza Pockets! They’re perfect for a quick lunch, a fun after-school snack, or even a casual appetizer when friends drop by. The best part? They’re incredibly easy to make, even if you’re a begin extractner in the kitchen. We’re going to take simple, readily available ingredients and transform them into golden, cheesy delights that will have everyone asking for seconds. Imagin extracte warm, gooey mozzarella melting around your favorite pizza toppings, all encased in a flaky, buttery crust. It’s pure deliciousness!
Ingredients:
Cooking Instructions:
Now, let’s get down to the delicious details of creating these amazing pizza pockets. We’ll break it down into simple steps to ensure success.
Preparation is Key
The first step is to get our oven preheated and our baking sheet ready. Preheat your oven to a toasty 375 degrees Fahrenheit (190 degrees Celsius). This temperature is perfect for getting that dough golden brown and crispy without burning. While the oven is heating up, line a baking sheet with parchment paper or a silicone baking mat. This will prevent our pizza pockets from sticking and make cleanup a breeze.
Next, let’s prepare our filling. In a small bowl, combine your marinara sauce, shredded mozzarella cheese, Italian herbs, and powdered garlic. If you’re using additional toppings like diced mushrooms, cooked sausage, or finely chopped bell peppers, now is the time to stir them into the sauce mixture. Make sure everything is well combined. The Italian herbs will infuse the sauce with that classic pizza aroma, and the garlic powder adds just a hint of savory depth.
Assembling Your Pizza Pockets
Now for the fun part – assembling the pockets! Carefully unroll your refrigerated pizza dough or crescent roll sheet onto a lightly floured surface. If you’re using pizza dough, you might want to gently roll it out a little thinner to make it easier to handle and to create more pockets. If you’re using crescent rolls, separate them into their individual triangles.
For the pizza dough, you’ll want to cut it into equal-sized squares. About 4-inch squares usually work well. For crescent rolls, you can either leave them as triangles or pinch the seams together to form a rectangle. Now, place a tablespoon or two of your prepared filling onto one half of each dough piece, leaving a small border around the edges. Be careful not to overfill, as this can make sealing difficult and lead to leaks during baking.
Sealing the Deal
This step is crucial for creating those perfect, enclosed pockets. Take the other half of your dough (or the opposite side of your crescent roll triangle) and fold it over the filling to create a pocket. Now, press the edges firmly to seal. You can use your fingers to crimp the edges together, or for an extra-secure seal, you can use the tines of a fork to press down along the entire edge. This not only seals the pocket but also creates a decorative pattern. Ensure there are no gaps where the delicious filling might escape.
Baking to Perfection
Once all your pizza pockets are assembled and senon-alcoholic aled, carefully transfer them to your prepared baking sheet. Make sure to leave a little space between each pocket to allow for even cooking and browning. Now, it’s time for the final flourish before they go into the oven. Lightly brush the tops of each pizza pocket with melted butter or olive oil. This is what will give them that beautiful golden sheen and a delightful crispiness. For an extra touch of flavor, sprinkle a little grated Parmesan cheese over the tops. The Parmesan will melt and create a savory, slightly salty crust.
Bake in your preheated oven for about 15-20 minutes, or until the pockets are golden brown and puffed up. The exact baking time will depend on your oven and the type of dough you’ve used. Keep an eye on them towards the end of the baking time to prevent over-browning.
Enjoying Your Homemade Delights
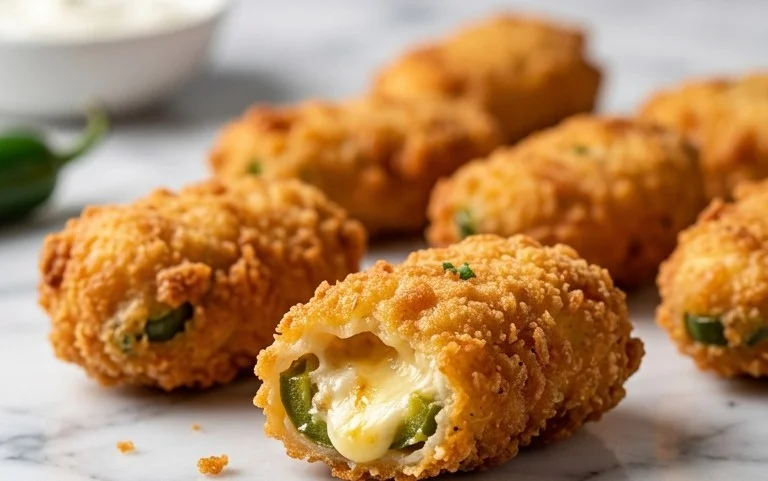
Once they’re out of the oven, let your Cheesy Pizza Pockets cool on the baking sheet for a few minutes before transferring them to a wire rack. This allows the filling to set slightly and prevents the pockets from getting soggy. They are absolutely best enjoyed warm, when the cheese is still delightfully gooey and the crust is perfectly crisp. Serve them with extra marinara sauce for dipping, if you like. These are fantastic on their own, or as part of a larger meal. They’re a guaranteed hit with kids and adults alike, and you’ll love how simple they are to whip up. Enjoy your delicious, homemade pizza pockets!

Conclusion:
There you have it – your guide to making absolutely delightful Cheesy Pizza Pockets! This recipe is a winner because it’s incredibly versatile, surprisingly simple to prepare, and delivers that satisfying pizza flavor in a perfectly portable package. They’re fantastic for a quick weeknight dinner, a fun lunchbox addition, or even a crowd-pleasing appetizer. Imagin extracte the warm, gooey cheese stretching with every bite, encased in a golden-brown, slightly crisp dough. It’s pure comfort food bliss!
To elevate your Cheesy Pizza Pocket experience, I highly recommend serving them hot, fresh from the oven, with a side of marinara sauce for dipping. For a more substantial meal, pair them with a fresh garden salad or some seasoned oven fries. Don’t be afraid to get creative with your fillings! Think about adding pre-cooked Italian sausage, sautéed mushrooms, diced bell peppers, or even a sprinkle of red pepper flakes for a little kick. The possibilities are endless, and each variation promises a unique and delicious adventure.
I truly encourage you to give these Cheesy Pizza Pockets a try. They are a fantastic way to satisfy those pizza cravings without the fuss of a full-sized pie. You’ll be amazed at how quickly they become a family favorite!
Frequently Asked Questions:
Can I make the dough ahead of time?
Absolutely! You can prepare the pizza dough up to 2 days in advance and store it in an airtight container in the refrigerator. Just let it come to room temperature for about 30 minutes before you’re ready to assemble your pizza pockets.
What are some other filling ideas?
Beyond the classic beef pepperoni and mozzarella, consider using cooked shredded chicken with barbecue sauce, a spinach and ricotta mixture, or even a breakfast version with scrambled eggs and beef bacon. The key is to ensure any meat fillings are fully cooked before adding them to the pockets.
How do I reheat leftover pizza pockets?
For the best results, reheat your leftover pizza pockets in a preheated oven at around 350°F (175°C) for 8-10 minutes, or until heated through and the crust is crispy again. Microwaving is an option, but the crust may become soft.
Cheesy Pizza Pockets
Easy and delicious pizza pockets filled with marinara, melted mozzarella, and your favorite toppings.
Ingredients
-
1/2 cup marinara sauce
-
1 cup mozzarella cheese, shredded
-
1 can of pizza dough or crescent rolls, refrigerated
-
1/2 cup beef pepperoni or any toppings you like—mushrooms, sausage, or diced peppers
-
A quarter teaspoon of Italian herbs
-
A light sprinkle of powdered garlic
-
Melted butter or olive oil, to brush on top
-
Some grated Parmesan for finishing
Instructions
-
Step 1
Preheat your oven to 400°F (200°C). Line a baking sheet with parchment paper. -
Step 2
If using pizza dough, unroll it and cut into rectangles. If using crescent rolls, separate them and pinch the seams together to form rectangles. -
Step 3
Spread a thin layer of marinara sauce onto one half of each dough rectangle, leaving a small border. Sprinkle with Italian herbs and powdered garlic. -
Step 4
Layer your chosen toppings (pepperoni, mushrooms, etc.) over the marinara sauce. Top generously with shredded mozzarella cheese. -
Step 5
Fold the other half of the dough over the filling, creating a pocket. Press the edges firmly with a fork to seal. -
Step 6
Place the sealed pockets onto the prepared baking sheet. Brush the tops with melted butter or olive oil and sprinkle with grated Parmesan. -
Step 7
Bake for 10-12 minutes, or until golden brown and the cheese is bubbly.
Important Information
Nutrition Facts (Per Serving)
It is important to consider this information as approximate and not to use it as definitive health advice.
Allergy Information
Please check ingredients for potential allergens and consult a health professional if in doubt.