Easy Mini Cheesecakes Vanilla Wafer Crust Recipe
Super Easy Mini Cheesecakes with Vanilla Wafer Crust are about to become your new dessert obsession! Are you dreaming of that classic creamy, tangy cheesecake flavor but dreading the fuss of a full-sized undertaking? I know I was! That’s where these delightful little wonders shine. People adore cheesecake for its rich, decadent texture and perfectly balanced sweet-and-sour notes, and these mini versions deliver all that goodness in an unbelievably approachable package. What makes these Super Easy Mini Cheesecakes with Vanilla Wafer Crust truly special is their ingenious simplicity. Forget water baths and cracked tops; we’re talking about a melt-in-your-mouth filling cradled in a perfectly crum extractbly vanilla wafer crust, all baked up in a muffin tin. They’re individually portioned, impossibly cute, and utterly satisfying. Get ready to impress yourself (and anyone lucky enough to get a bite!) with minimal effort and maximum deliciousness.
Super Easy Mini Cheesecakes with Vanilla Wafer Crust
There are few desserts as universally loved as cheesecake. That rich, creamy texture and the delightful contrast of a buttery crust are simply irresistible. But let’s be honest, making a full-sized cheesecake can be a daunting task, often involving water baths, precise temperature control, and a healthy dose of anxiety. Well, I’m here to tell you that you can have all the joy of mini cheesecakes without any of the fuss! These Super Easy Mini Cheesecakes with Vanilla Wafer Crust are designed for maximum flavor and minimal effort. They’re perfect for parties, potlucks, or just a special treat for yourself.
What makes these so easy? We’re skipping the complicated steps and relying on simple, delicious ingredients. The vanilla wafer crust is a breeze to put together, and the cheesecake filling is a straightforward mix. And the crowning glory? A dollop of sweet, tart cherry pie filling that requires absolutely zero preparation. So, let’s get baking!
Ingredients:
Instructions:
Preparing the Vanilla Wafer Crust
The first step to our delightful mini cheesecakes is creating that perfect base. For the crust, we’ll be using simple vanilla wafer cookies. Take your 15 vanilla wafer cookies and place them into a food processor. Pulse them until they form fine crum extractbs. If you don’t have a food processor, don’t worry! You can place the cookies in a sturdy zip-top bag, seal it tightly, and then crush them with a rolling pin or the bottom of a heavy glass. The goal is to get them as finely ground as possible, resembling coarse sand. This ensures a uniform and firm crust.
Now, we need to bind these crum extractbs together to form a solid base. In a small bowl, combine the vanilla wafer crum extractbs with about 2 tablespoons of melted unsalted butter. You might not need the full 2 tablespoons, so add it gradually, stirring until the crum extractbs are evenly moistened and hold together when you pinch them. It should look like damp sand. If it feels too dry, add a tiny bit more melted butter.
Next, we’ll portion out our crust mixture into our muffin tin. I find it easiest to use a standard 12-cup muffin tin for this recipe. Lightly grease the muffin cups, or line them with paper liners. If you’re using paper liners, this step can be skipped, but I personally prefer the texture of a crust pressed directly into a greased cup. Spoon about 1 tablespoon of the crust mixture into the bottom of each muffin cup. Then, using the bottom of a small glass or your fingers, press the crum extractbs firmly into the bottom of each cup, creating an even layer. This pressing is crucial for a crust that won’t crum extractble apart when you try to remove the mini cheesecakes. You want a nice, compact base.
Making the Creamy Cheesecake Filling
Now for the star of the show: the cheesecake filling! Make sure your cream cheese is truly softened. This is a critical step for a smooth, lump-free filling. If your cream cheese is still cold, it will be very difficult to incorporate evenly, and you’ll end up with a less-than-perfect texture. You can soften it by leaving it out on the counter for about an hour, or for a quicker method, you can remove it from its foil wrapper and cut it into smaller cubes, then microwave it on low power for 15-20 second intervals, checking frequently until it’s pliable.
In a large mixing bowl, add the softened cream cheese. Beat it with an electric mixer on medium speed until it’s completely smooth and creamy, with no lumps. This might take a couple of minutes. Scrape down the sides of the bowl occasionally to ensure everything is incorporated.
Next, gradually add the granulated sugar to the cream cheese while the mixer is still running on medium speed. Continue mixing until the sugar is fully incorporated and the mixture is light and fluffy. Again, scrape down the sides of the bowl as needed.
Now it’s time for the eggs. Ensure your eggs are at room temperature. Cold eggs can also affect the texture of the cheesecake. Add the eggs one at a time, mixing on low speed until each egg is just combined. Be careful not to overmix at this stage; overmixing can introduce too much air into the batter, which can lead to cracks in your cheesecakes.
Finally, stir in the vanilla bean paste or vanilla extract. If you can find vanilla bean paste, I highly recommend it for those beautiful little specks of vanilla and a more intense flavor. Mix until it’s just combined. The filling should be smooth, thick, and creamy.
Assembling and Baking the Mini Cheesecakes
Carefully spoon the cheesecake filling over the prepared vanilla wafer crusts in each muffin cup. Fill each cup about two-thirds of the way full. Don’t overfill, as the cheesecakes will puff up slightly as they bake.
Place the muffin tin in a preheated oven at 325 degrees Fahrenheit (160 degrees Celsius). Bake for 18-22 minutes, or until the edges of the cheesecakes are set and the centers are still slightly jiggly. They will continue to set as they cool. It’s important not to overbake them, as this can lead to a dry texture.
Once baked, remove the muffin tin from the oven and let the cheesecakes cool in the tin on a wire rack for about 10-15 minutes. This initial cooling period is important for them to firm up. After this, gently run a thin knife or offset spatula around the edges of each mini cheesecake to loosen them from the muffin tin. Carefully lift them out and place them directly onto the wire rack to cool completely.
Cooling and Topping
Allow the mini cheesecakes to cool completely to room temperature. This is where they will finish setting up and achieve that perfect creamy texture. Once they are fully cooled, you can refrigerate them for at least 2 hours, or until well chilled. Chilling is essential for the best flavor and texture.
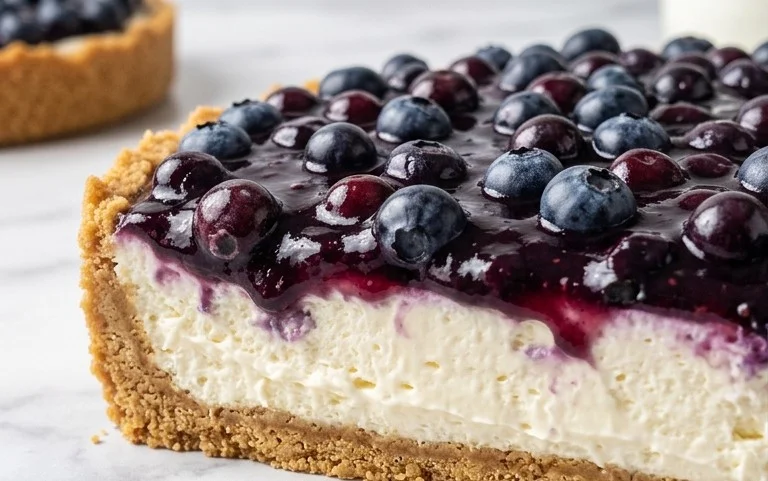
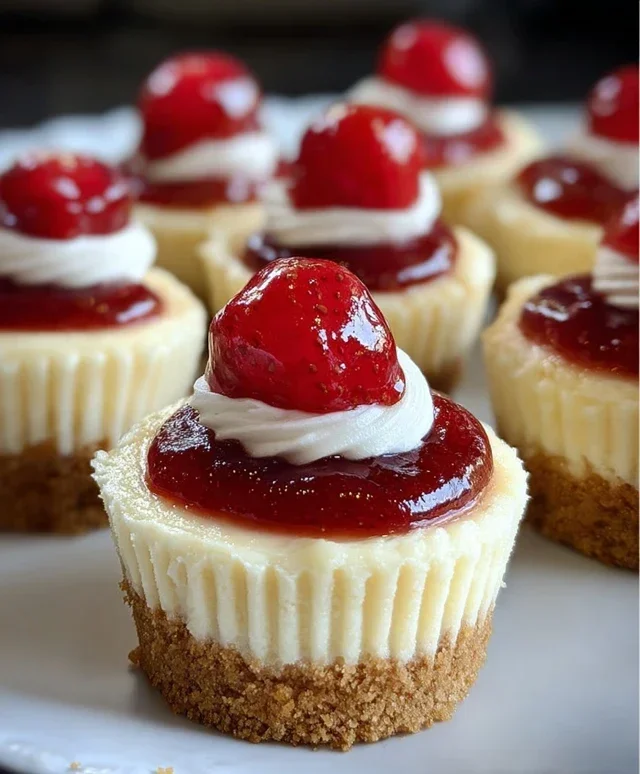
Before serving, top each mini cheesecake with a generous dollop of the canned cherry pie filling. The sweet, tart cherries are the perfect counterpoint to the rich, creamy cheesecake and the crum extractbly vanilla wafer crust. You can add as much or as little as you like. These Super Easy Mini Cheesecakes with Vanilla Wafer Crust are sure to be a hit, and you’ll be amazed at how simple they were to make! Enjoy!
Conclusion:
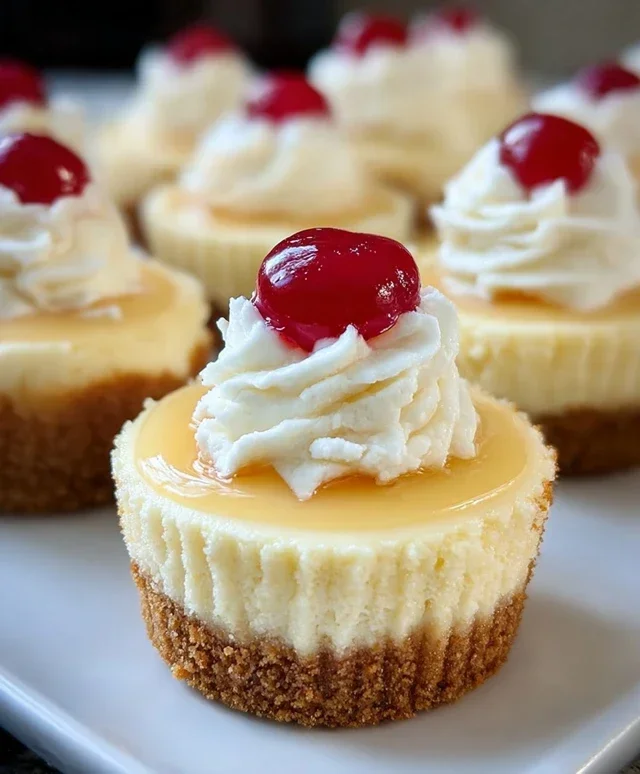
And there you have it – super easy mini cheesecakes that are incredibly delicious and surprisingly simple to make! This recipe is a winner because it bypasses the usual fuss of traditional cheesecakes, offering a perfectly portioned, creamy delight with a satisfyingly crisp vanilla wafer crust. They’re ideal for parties, a sweet treat after dinner, or even just because. I love serving them chilled, perhaps with a dollop of whipped cream and a few fresh berries for a burst of color and flavor. For variations, don’t be afraid to get creative! Consider adding a touch of lemon zest to the batter for brightness, or a swirl of fruit puree for a fruity twist. You could even experiment with different cookie crum extractbs for the crust, like grabeef ham crackers or shortbread.
I truly hope you give this recipe a try. It’s a fantastic way to impress yourself and others without spending hours in the kitchen. Enjoy every delightful bite!
Frequently Asked Questions:
Can I make these mini cheesecakes ahead of time?
Absolutely! These mini cheesecakes are perfect for making ahead. Once they’ve cooled completely, you can store them in an airtight container in the refrigerator for up to 3 days. This makes them a fantastic option for entertaining or busy weeknights.
What if I don’t have mini muffin tins?
No problem at all! You can adapt this recipe using a standard muffin tin and paper liners. The baking time might need to be slightly adjusted, so keep an eye on them and check for doneness. Alternatively, you can use ramekins, but ensure the crust is pressed firmly into the bottom.
How do I prevent my cheesecakes from cracking?
While cracking is less common with mini cheesecakes due to their smaller size, it can still happen. The most common causes are over-mixing the batter (which incorporates too much air) or baking at too high a temperature. This recipe’s simplicity helps minimize these risks, but ensuring you don’t overfill the tins and bake them gently will contribute to smooth tops.
Super Easy Mini Cheesecakes with Vanilla Wafer Crust
Quick and easy mini cheesecakes featuring a buttery vanilla wafer crust and a smooth, creamy filling, topped with cherry pie filling. Perfect for a simple dessert.
Ingredients
-
15 vanilla wafer cookies
-
16 ounces full-fat cream cheese, softened
-
¾ cup granulated sugar
-
2 large eggs, at room temperature
-
1 teaspoon vanilla bean paste or vanilla extract
-
1 can cherry pie filling
Instructions
-
Step 1
Preheat oven to 325°F (160°C). Line a muffin tin with cupcake liners. -
Step 2
Crush vanilla wafer cookies into fine crumbs. Press about 1 tablespoon of crumbs into the bottom of each cupcake liner to form the crust. -
Step 3
In a medium bowl, beat the softened cream cheese and granulated sugar until smooth and creamy. -
Step 4
Beat in the eggs one at a time until just combined. Stir in the vanilla bean paste or extract. -
Step 5
Spoon the cream cheese mixture over the vanilla wafer crusts in the muffin tin, filling each liner about two-thirds full. -
Step 6
Bake for 18-20 minutes, or until the edges are set and the centers are slightly jiggly. -
Step 7
Let the cheesecakes cool in the muffin tin for 10 minutes, then transfer to a wire rack to cool completely. Chill in the refrigerator for at least 2 hours. -
Step 8
Top each mini cheesecake with cherry pie filling before serving.
Important Information
Nutrition Facts (Per Serving)
It is important to consider this information as approximate and not to use it as definitive health advice.
Allergy Information
Please check ingredients for potential allergens and consult a health professional if in doubt.