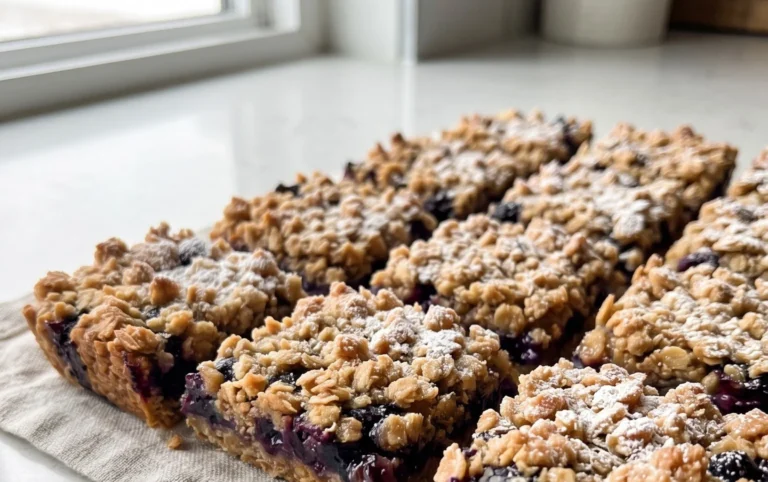
Easy Homemade Cereal Bars- Quick Snack Idea
Cereal bars are the unsung heroes of busy mornings, quick snacks, and post-workout fuel. There’s something undeniably comforting and satisfying about a perfectly chewy, slightly sweet, and utterly customizable cereal bar. Think about it: that delightful crunch of your favorite cereal mingling with the gooey embrace of binding ingredients, all packed into a convenient, portable rectangle. It’s no wonder these treats have earned a permanent spot in lunchboxes and pantry shelves alike. What makes these cereal bars truly special is their incredible versatility. They are a blank canvas for your culinary creativity. Whether you crave a burst of fruity goodness, a chocolatey indulgence, or a nutty power-up, you can tailor these bars to your exact desires. Forget those overly processed, sugar-laden store-bought versions; we’re about to dive into a world where you control the ingredients and the delicious outcome!
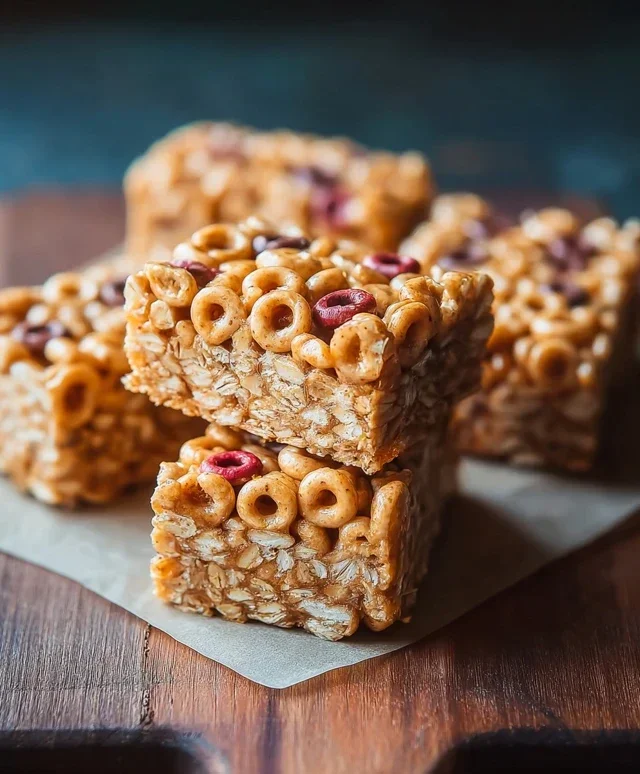
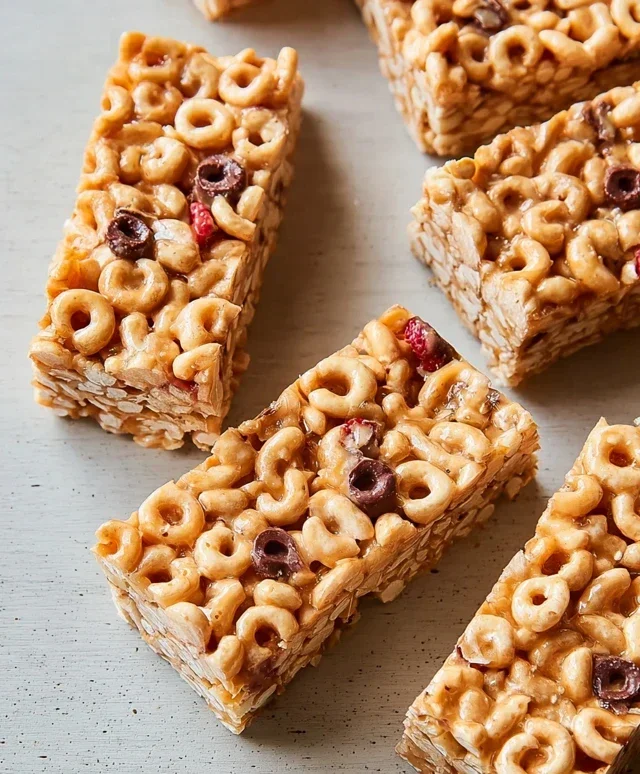
No-Bake Cereal Bars: Your New Favorite Snack!
Feeling that mid-afternoon slump? Or perhaps you’re just looking for a quick and satisfying breakfast on the go? I’ve got you covered with these incredibly simple, no-bake cereal bars. Forget those store-bought versions packed with who-knows-what; we’re making them from scratch with ingredients you probably already have in your pantry. The best part? They are totally customizable. Love crunchy cereal? Use that! Prefer something a little sweeter? Adjust the syrup. Want an extra protein boost? We can do that too! These bars are perfect for lunchboxes, post-workout snacks, or just a treat to curb those sweet cravings.
Ingredients:
Making Your Cereal Bars: Step-by-Step
This recipe is so straightforward, you’ll be amazed at how quickly you can whip up a batch. We’re talking minimal effort for maximum deliciousness. Let’s get started!
Step 1: Preparing Your Base
First things first, let’s get your cereal ready. Pour your 3 cups of cereal of choice into a large mixing bowl. If you’re using a cereal that has very large flakes or pieces, like some granola or puffed wheat, you might want to give it a gentle crush with your hands. This helps to ensure that the sticky mixture binds everything together more effectively and creates a more uniform bar. Don’t pulverize it into dust; we still want some satisfying crunch! If you’re using a very fine cereal like rice krispies, this step is less critical.
Step 2: Creating the Sticky Binder
Now, let’s make that magic binder! In a separate, microwave-safe bowl or a small saucepan, combine your 2/3 cup of peanut butter (or your chosen nut/seed butter) and your 1/2 cup of agave, honey, or brown rice syrup. If you’re opting for the optional salt, add your 1/2 teaspoon of salt now. If you’re adding the protein powder for an extra boost, whisk it into the nut butter and syrup mixture at this stage as well. This is important to make sure the protein powder is evenly distributed and doesn’t clump up.
Step 3: Heating the Binder
Next, we need to gently heat this mixture to make it pliable and easy to mix. If you’re using a microwave, heat it in 30-second intervals, stirring well after each interval, until the mixture is smooth, melted, and well combined. Be careful not to overheat it, as this can cause the sugars to burn or the nut butter to separate. If you’re using a saucepan, heat it over low heat, stirring constantly, until everything is melted and smoothly incorporated. The goal is a runny, luscious mixture that will coat your cereal beautifully.
Step 4: Combining Everything Together
Once your binder is ready and smooth, it’s time to bring it all together. Pour the warm, sticky binder mixture directly over the cereal in your large mixing bowl. Now, using a sturdy spatula or a wooden spoon, gently fold and stir the cereal until every single piece is coated in the peanut butter and syrup mixture. This might take a little patience, especially if you’re using a lot of cereal. Make sure to scrape the bottom and sides of the bowl to ensure no dry cereal remains. The key here is to be gentle to avoid crushing the cereal too much, but thorough enough that you get an even coating.
Step 5: Pressing the Bars
Now for the shaping! Line an 8×8 inch baking pan or a similar-sized container with parchment paper. Leave some overhang on the sides; this will make it super easy to lift the entire block of cereal bars out once they’re set. Spoon the coated cereal mixture into the prepared pan. This is where the magic happens – you need to press it down really, really firmly. Use the bottom of a glass, the back of a spoon, or even your hands (lightly greased with a bit of oil if it’s too sticky) to compress the mixture into a solid, even layer. The firmer you press, the better your bars will hold their shape and the less likely they are to crum extractble. Really pack it in there!
Step 6: Chilling and Cutting
Finally, it’s time for the bars to set. Place the pan in the refrigerator for at least 1-2 hours, or until the mixture is firm to the touch. The chilling process allows the nut butter and syrup to solidify, holding everything together. Once completely set, use the parchment paper overhang to lift the entire slab out of the pan onto a cutting board. Now, using a sharp knife, cut the slab into your desired bar shapes. You can make them large and chunky, or smaller and more snack-sized. For cleaner cuts, you can even warm your knife slightly under hot water before slicing. These bars are best stored in an airtight container in the refrigerator to maintain their texture. Enjoy your delicious, homemade cereal bars!
Conclusion:
I hope you’re as excited as I am to get into your kitchen and whip up these incredibly versatile cereal bars! This recipe is truly a winner because it’s so simple to make, requires minimal ingredients, and offers a delightful balance of chewy and crunchy textures. They’re perfect for a quick breakfast on busy mornings, a satisfying afternoon snack, or even a healthier dessert option. The beauty of these cereal bars lies in their adaptability – feel free to experiment with different types of cereal to find your perfect combination. Don’t be afraid to add in your favorite nuts, seeds, dried fruits, or even a sprinkle of chocolate chips for an extra decadent touch.
I highly encourage you to give this recipe a try. You might be surprised at how easy it is to create delicious, homemade cereal bars that are far superior to anything store-bought. Get creative, have fun, and enjoy the fruits of your labor!
Frequently Asked Questions:
Q: Can I make these cereal bars gluten-free?
Absolutely! Simply choose a certified gluten-free cereal as your base. Many brands offer gluten-free oat or corn-based cereals that work wonderfully in this recipe. You might also consider using gluten-free rolled oats for added texture.
Q: How should I store these cereal bars?
Store your cereal bars in an airtight container at room temperature for up to a week. If you live in a very warm climate or prefer them a bit firmer, you can store them in the refrigerator. They also freeze well for longer storage; just wrap them individually.
Q: Can I substitute the type of sweetener?
Yes, you can! While the recipe calls for a specific sweetener for optimal texture and flavor, feel free to experiment with other liquid sweeteners like honey, maple syrup, or agave nectar. Keep in mind that the consistency might change slightly depending on the sweetener used.
Easy Cereal Bars
Quick and customizable cereal bars perfect for a healthy snack or breakfast on the go.
Ingredients
-
3 cups cereal of choice
-
2/3 cup peanut butter or nut butter of choice
-
1/2 cup agave, honey, or brown rice syrup
-
1/2 tsp salt (optional)
-
3 tbsp protein powder (optional)
Instructions
-
Step 1
Line an 8×8 inch baking pan with parchment paper, leaving an overhang on the sides. -
Step 2
In a large bowl, combine the cereal of choice, peanut butter or nut butter of choice, and agave, honey, or brown rice syrup. -
Step 3
If using, add the optional salt and protein powder to the bowl. -
Step 4
Mix all ingredients thoroughly until well combined and the cereal is evenly coated. -
Step 5
Press the mixture firmly and evenly into the prepared baking pan. -
Step 6
Chill in the refrigerator for at least 30 minutes, or until firm. -
Step 7
Use the parchment paper overhang to lift the bars out of the pan. Cut into 12 bars.
Important Information
Nutrition Facts (Per Serving)
It is important to consider this information as approximate and not to use it as definitive health advice.
Allergy Information
Please check ingredients for potential allergens and consult a health professional if in doubt.