Refreshing Watermelon Cake Recipe- Easy & Delicious
Watermelon cake is more than just a dessert; it’s a vibrant celebration of summer’s bounty. Imagin extracte biting into a slice that’s both incredibly refreshing and delightfully sweet, with a texture that’s unbelievably light and airy. This isn’t your average cake; it’s a testament to how simple, wholesome ingredients can be transformed into something truly spectacular. People absolutely adore this watermelon cake because it’s a guilt-free indulgence, packed with the natural sweetness and hydration of the fruit itself, making it a perfect treat for those hot days when you crave something sweet but don’t want to feel weighed down. What truly makes this watermelon cake special is its unique preparation, where actual watermelon forms the “cake” layers, frosted with a creamy, dairy-free “icing.” It’s a visually stunning creation that never fails to impress, and its naturally gluten-free and vegan nature makes it a crowd-pleaser for virtually everyone.
Watermelon Cake
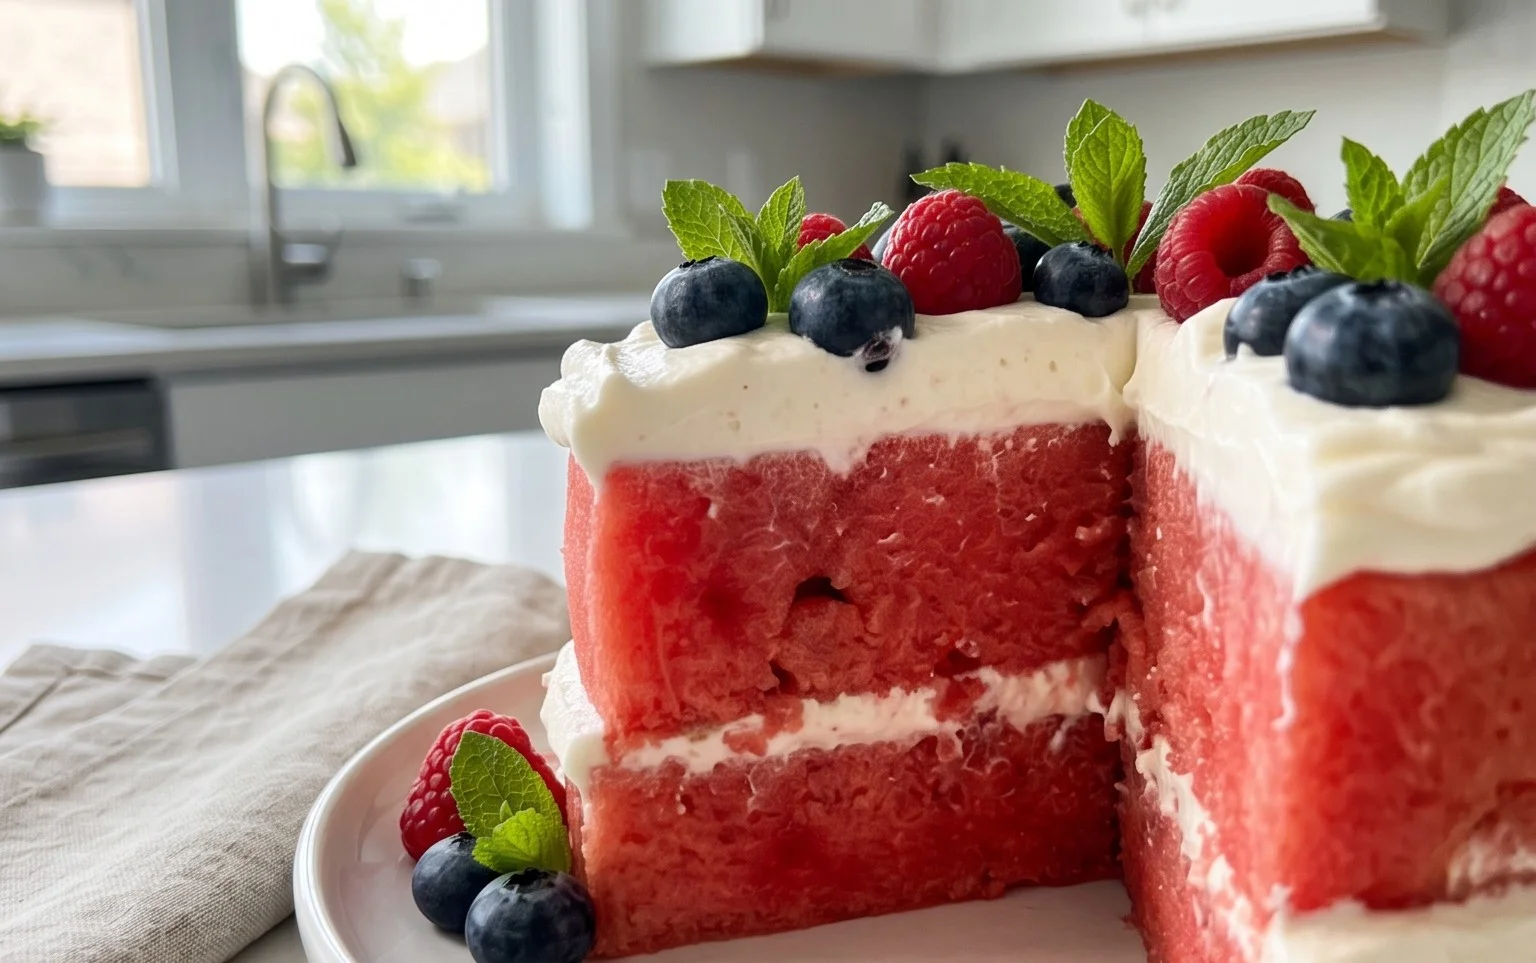
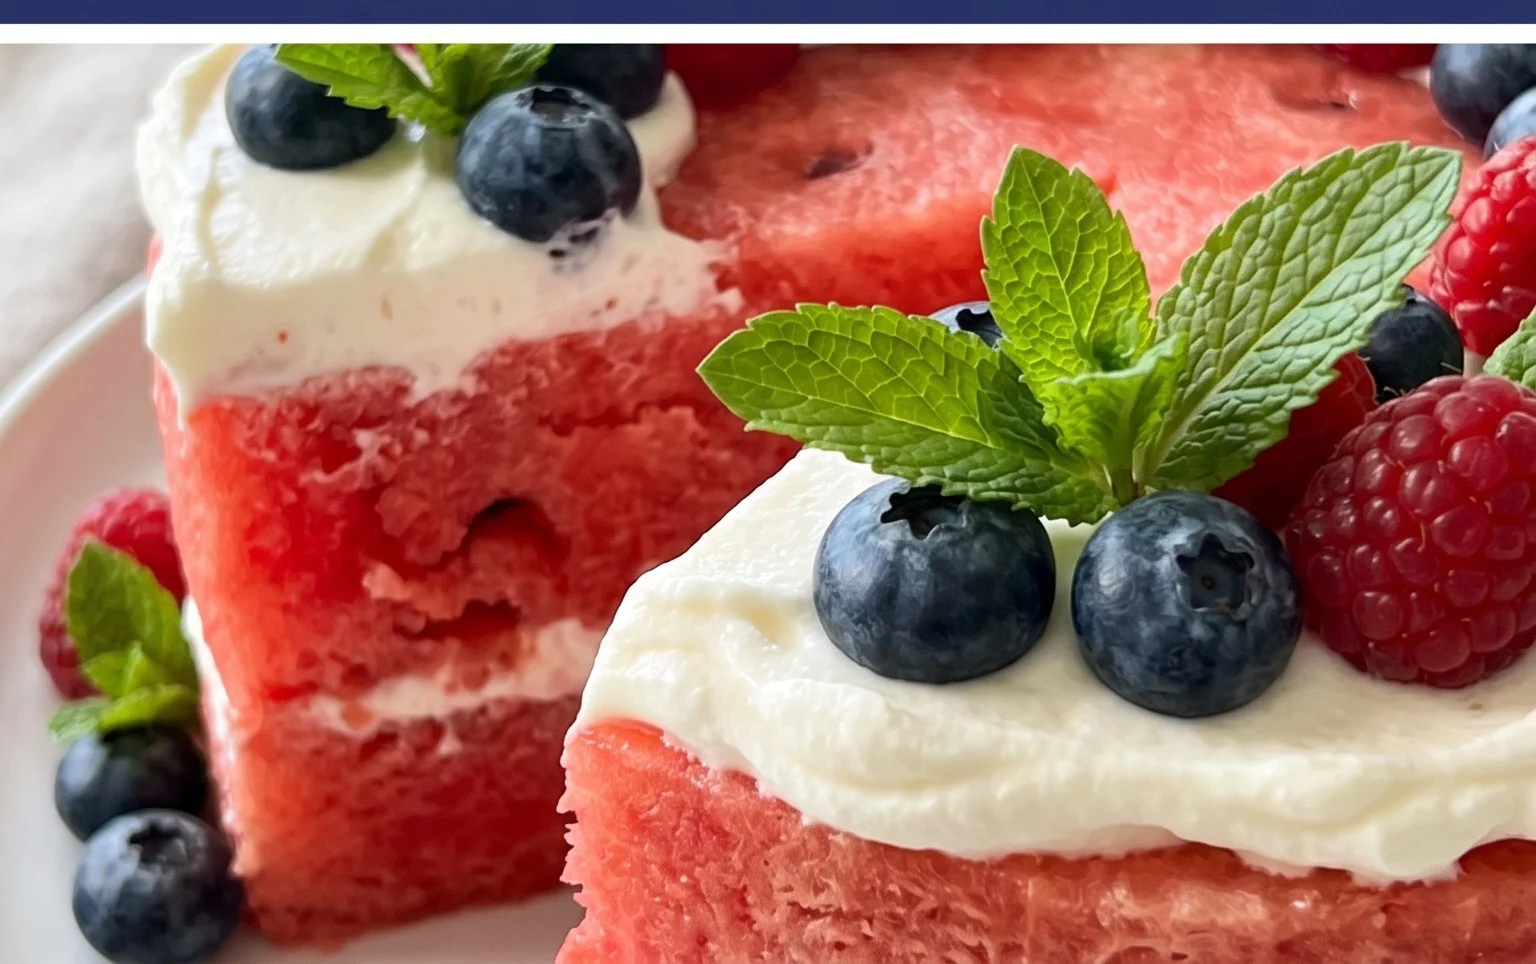
Welcome to a delightful and surprisingly simple way to celebrate summer or any occasion that calls for a burst of fresh, vibrant flavor: the Watermelon Cake! Forget heavy batters and oven time; this “cake” is a celebration of nature’s sweetest bounty. It’s a beautiful centerpiece, a refreshing treat, and a fantastic way to get your fruit intake in the most fun way possible. Imagin extracte a gorgeous tiered creation made entirely of juicy watermelon, adorned with a jewel-toned mosaic of fresh berries and accented with fragrant mint. It’s a showstopper that requires no baking and minimal effort, making it perfect for parties, picnics, or just a healthy indulgence. Let’s dive into how you can create this edible masterpiece!
Ingredients:
Crafting Your Watermelon Cake
This recipe is all about preparation and assembly. The “baking” is done by nature! We’ll be carving and decorating, so grab your sharpest knives and get ready to unleash your inner fruit artist.
Step 1: Preparing the Watermelon Layers
First, we need to create our “cake” layers from the watermelons. Take your large watermelon. You want to slice off the top and bottom ends to create flat surfaces. Then, carefully slice off the rind, following the curve of the melon. Aim to get as much of the pink flesh exposed as possible, leaving a cylindrical or slightly squared-off shape. This will be your bottom cake layer. Repeat this process with the smaller watermelon to create your top layer. The size difference between the two will give your cake a tiered appearance. Don’t worry if the shapes aren’t perfectly uniform; it’s a rustic, natural beauty. For stability, ensure the cut sides are as flat as you can make them. You can even trim a little more from the sides if you want a more sculpted look.
Step 2: Securing the Layers and Initial Skewer Placement
Once you have your watermelon “cakes,” it’s time to assemble them. Carefully place the smaller watermelon layer on top of the larger one. Now, to ensure your cake stays together, we’ll use wood skewers. Insert a few wood skewers vertically through both layers, pushing them down gently until they are firmly embedded. Space them out evenly to provide good support. Think of it like inserting dowels in a traditional cake. You might need 3-4 skewers for the bottom layer and a couple more for the top layer, depending on the size of your watermelon sections. Don’t push them all the way through the bottom if you plan to serve it on a platter; just ensure they are deeply inserted to hold the weight.
Step 3: Berry Preparation and Design Planning
Now for the fun part – decorating! Wash all your berries gently and pat them dry. This is crucial because excess water can make the berries slide off. For the grapes, you can leave them whole or slice them in half. You’ll want to have a good quantity of each berry type to create a vibrant mosaic. Before you start sticking them on, take a moment to visualize your design. Do you want a gradient effect with darker berries at the bottom and lighter ones at the top? Or perhaps a pattern of alternating colors? Having a general idea will help streamline the decorating process. It’s like painting with fruit!
Step 4: Adorning Your Watermelon Cake
This is where the magic happens. We’ll be using wood toothpicks to attach the fruit. Start with your largest berries or grapes, as they can provide a good base. Insert the pointed end of a wood toothpick into a berry (like a blackberry or a halved grape) and then gently push the other end into the watermelon flesh. Work your way around the cake, covering the exposed watermelon surface. Use a variety of berries to fill in any gaps and create your desired pattern. For smaller berries like raspberries and blueberries, you can group them together on a single toothpick or use multiple toothpicks for smaller clusters. Don’t be afraid to press them in firmly but carefully to ensure they adhere well. You can also use small clusters of berries to cover the skewer tops if they are visible.
Step 5: The Finishing Touches with Mint and Final Assembly Check
Once the berry mosaic is complete, it’s time for the finishing touches. Fresh mint leaves add a wonderful aroma and a beautiful pop of green. You can gently tuck mint leaves around the base of the cake, between berry clusters, or even create a decorative sprig on top. If you notice any areas that look a bit bare or if any berries have shifted, use additional toothpicks to secure them. Give your cake a gentle nudge to ensure it’s stable and all the fruit is firmly attached. You can also carefully trim any stray bits of watermelon rind or flesh that might be visible. Your stunning, no-bake Watermelon Cake is now ready to be admired and devoured! Serve it chilled for the ultimate refreshing experience. This is a dessert that truly embodies summer’s joy.
Conclusion:
There you have it! This Watermelon Cake recipe is an absolute showstopper, perfect for summer gatherings or whenever you crave a light, refreshing, and visually stunning dessert. It’s incredibly simple to make, requiring no baking and just a handful of fresh ingredients. The vibrant color and sweet, juicy watermelon base, combined with the creamy frosting and fresh fruit toppings, create a delightful symphony of flavors and textures. I truly believe you’ll love how easy it is to create this impressive treat that’s both healthy-ish and decadent.
For serving, I recommend chilling it thoroughly before slicing. It pairs wonderfully with a scoop of vanilla bean ice cream, a dollop of whipped cream, or even just enjoyed on its own. Feel free to get creative with the variations! You can incorporate other berries, add a sprinkle of toasted coconut, or even drizzle it with a touch of honey or agave nectar. Don’t be afraid to experiment and make it your own. I encourage you all to give this amazing Watermelon Cake a try; you won’t be disappointed!
Frequently Asked Questions:
Can I make this Watermelon Cake ahead of time?
Yes, absolutely! You can assemble the cake a day in advance and store it covered in the refrigerator. The flavors will meld even further, making it even more delicious. Just make sure to add any delicate toppings like fresh mint right before serving.
What kind of frosting works best for this recipe?
While cream cheese frosting is fantastic, a light whipped cream frosting or even a coconut cream frosting are also excellent choices that complement the watermelon’s natural sweetness beautifully. The key is to keep it relatively light so it doesn’t overpower the fruit.
Is this a good option for a gluten-free dessert?
This Watermelon Cake is naturally gluten-free, making it a perfect choice for those with gluten sensitivities or celiac disease. It’s a fantastic way to enjoy a festive dessert without any worries.
Watermelon Cake
A refreshing and visually stunning ‘cake’ made entirely from fresh fruit, perfect for summer celebrations. This recipe uses a large watermelon as the base, decorated with berries and grapes.
Ingredients
-
1 large Watermelon
-
1 small Watermelon
-
Wood Skewers
-
Wood Toothpicks
-
Grapes
-
Blueberries
-
Blackberries
-
Raspberries
-
Fresh Mint
Instructions
-
Step 1
Slice the large watermelon into a round, cake-like shape, approximately 1-1.5 inches thick. Pat it dry thoroughly with paper towels. -
Step 2
Use wood skewers to secure the watermelon round onto a serving platter. This acts as the base for your ‘cake’. -
Step 3
Slice the small watermelon into various shapes for decoration, such as cubes or balls. You can also use a melon baller for smaller decorative elements. -
Step 4
Arrange the grapes, blueberries, blackberries, and raspberries around the sides and top of the large watermelon base. Use wood toothpicks to secure any fruit that needs extra support. -
Step 5
Garnish the watermelon cake with fresh mint leaves for a pop of color and aroma. -
Step 6
Chill the watermelon cake for at least 30 minutes before serving to allow the flavors to meld and the cake to firm up slightly.
Important Information
Nutrition Facts (Per Serving)
It is important to consider this information as approximate and not to use it as definitive health advice.
Allergy Information
Please check ingredients for potential allergens and consult a health professional if in doubt.