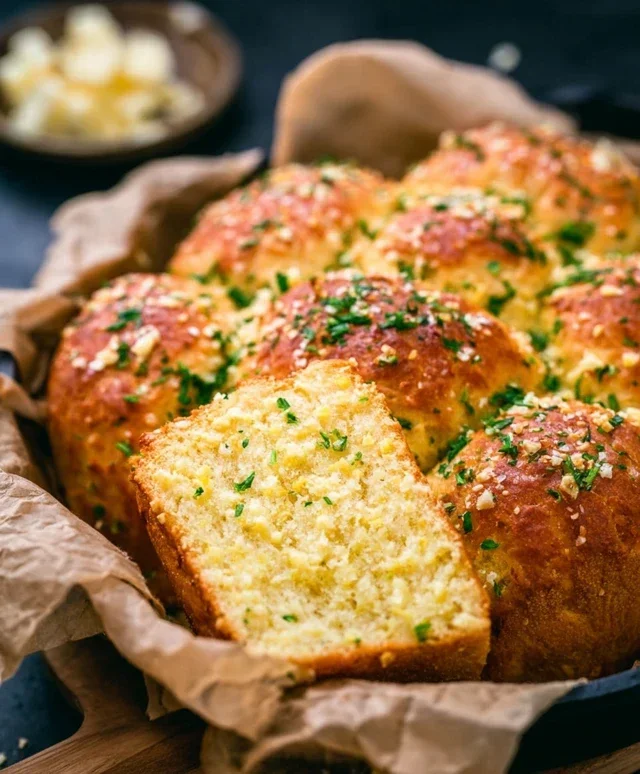
Garlic Butter Keto Bread-Irresistible Low Carb Delight
Garlic Butter Keto Bread is the ultimate game-changer for anyone embracing a low-carb lifestyle, and believe me, I understand why! For so long, bread felt like a forbidden luxury, a taste of the past we had to leave behind. But this incredible Garlic Butter Keto Bread brings it all back, with a glorious, golden crust and a soft, pillowy interior that’s simply divine. Imagin extracte slathering on even more butter, or dipping a warm slice into your favorite keto soup – it’s pure comfort food bliss without the carb coma. What makes this recipe so special is its incredible simplicity and the sheer satisfaction of achieving that perfect, satisfying bread texture using only keto-friendly ingredients. Get ready to fall in love with bread all over again, the delicious keto way!
Your New Favorite Keto Staple
Get Ready for Flavor!
Garlic Butter Keto Bread
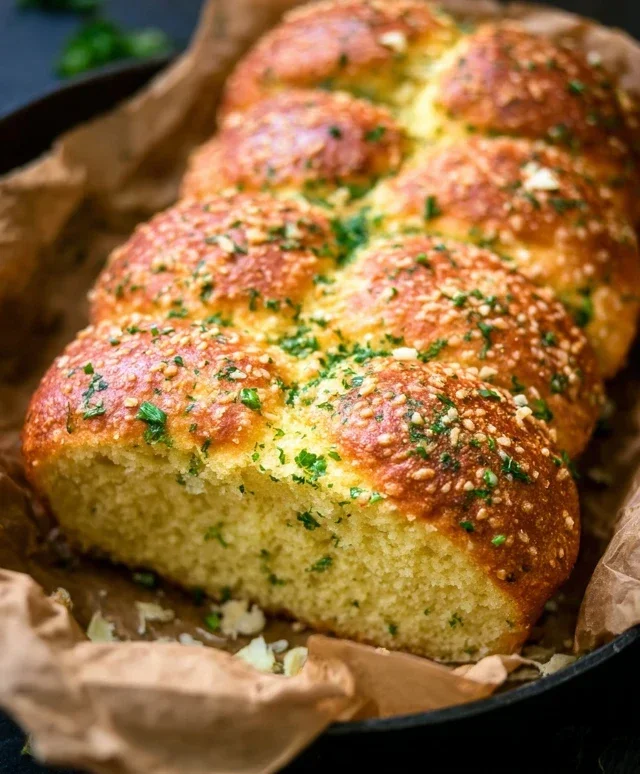
Welcome to a recipe that’s going to revolutionize your keto meals! This Garlic Butter Keto Bread is incredibly easy to make, requires minimal ingredients, and delivers a wonderfully soft and flavorful bread that’s perfect for toasting, dipping, or enjoying on its own. Say goodbye to dry, crum extractbly keto breads and hello to pure deliciousness. I’ve been looking for a reliable, go-to keto bread recipe for ages, and this one absolutely fits the bill. It’s surprisingly light and airy, a far cry from some of the denser options out there. The garlic butter infusion takes it to a whole new level, making it irresistible.
Ingredients:
Garlic Butter Keto Bread Instructions:
Let’s get baking! This recipe is straightforward, and the results are truly rewarding. I love how quickly it comes together, making it perfect for a weeknight treat or a weekend indulgence.
1. Prepare the Dry Ingredients and Preheat the Oven
First things first, let’s get our dry ingredients prepped. In a medium mixing bowl, I like to whisk together the almond flour, psyllium husk powder, baking powder, and salt. Whisking ensures that everything is evenly distributed, which is crucial for a consistent texture in your bread. You don’t want any pockets of leavening agent or clumps of almond flour. While you’re at it, go ahead and preheat your oven to 350°F (175°C). It’s always best to have your oven ready to go so the bread can bake as soon as it’s mixed. I also like to prepare my baking vessel. For this recipe, a standard loaf pan (about 8.5 x 4.5 inches) is perfect. I usually line it with parchment paper, leaving some overhang on the sides. This makes it incredibly easy to lift the finished bread out of the pan without it sticking.
2. Combine the Wet Ingredients and Mix the Dough
In a separate bowl, I beat the four large eggs until they’re well combined. Then, I add the melted unsalted butter, the full-fat plain Greek yogurt, and the white vinegar. The Greek yogurt adds a wonderful softness and moisture to the bread, and the vinegar reacts with the baking powder to help create a lighter texture. Give this wet mixture a good whisk until everything is smooth and uniform. Now, it’s time to bring the wet and dry ingredients together. Gradually add the dry ingredients to the wet ingredients, mixing until a dough forms. Don’t overmix at this stage; just mix until you no longer see any dry flour. The dough will be quite thick and a little sticky, which is exactly what we’re looking for. It’s not like traditional wheat dough; this is a keto dough, and it behaves differently.
3. Form the Dough and Prepare for Baking
Once your dough has formed, transfer it to your prepared loaf pan. You can use a spatula or slightly damp hands to gently press and spread the dough evenly into the pan. Try to get the top as smooth as possible, as this will influence how the crust looks. This dough doesn’t rise dramatically like conventional bread, so what you see in the pan is pretty much the final shape you’ll get. I like to give the top a good smooth out so it bakes up nicely and is ready for its delicious topping.
4. Bake the Bread
Place the loaf pan in the preheated oven. Bake for approximately 40-50 minutes. You’ll know the bread is done when it’s golden brown on top and a toothpick inserted into the center comes out clean. Baking times can vary slightly depending on your oven, so it’s always good to keep an eye on it after the 40-minute mark. If the top is browning too quickly, you can loosely tent it with aluminum foil for the remainder of the baking time. The aroma that fills your kitchen during this stage is absolutely divine – a promise of the deliciousness to come!
5. Prepare the Garlic Butter Topping and Finish
While the bread is baking, let’s get our amazing garlic butter topping ready. In a small bowl, combine the 1/2 cup of softened unsalted butter, the minced garlic, and the chopped fresh parsley. Mix these ingredients together until they are well combined. This is your flavor bomb! As soon as the bread comes out of the oven, while it’s still hot, generously spread this garlic butter mixture all over the top. The heat of the bread will melt the butter, allowing it to seep into the crust and infuse it with incredible garlic and herb flavor. This step is non-negotiable for maximum deliciousness!
6. Cool and Serve
Now comes the hardest part: waiting for it to cool. Let the bread cool in the loaf pan for about 10-15 minutes before attempting to remove it. Then, carefully lift it out using the parchment paper overhang and place it on a wire rack to cool completely. This is important; slicing into the bread while it’s still very hot can make it a bit gummy. Once cooled, you can slice it into your desired thickness. Enjoy it toasted, with a smear of butter, or as a side to your favorite keto meal. This Garlic Butter Keto Bread is fantastic with soups, stews, or even just on its own. I often find myself just grabbing a slice! It stores well in an airtight container at room temperature for a couple of days, or you can refrigerate it for longer storage. You can also freeze slices for future enjoyment.
Conclusion:
So there you have it – your guide to creating incredibly delicious and satisfying Garlic Butter Keto Bread! This recipe truly shines because it delivers that comforting, bready texture and rich, garlicky flavor that many keto dieters miss, all while keeping carbs incredibly low. It’s surprisingly easy to whip up, making it perfect for both weeknight dinners and weekend treats. The versatility of this bread is a major selling point; it’s fantastic served warm alongside your favorite keto meals, used as a base for garlic butter keto bread pizza, or even toasted and topped with cream cheese. Don’t be afraid to experiment with variations – adding fresh herbs like chives or parsley, or a sprinkle of Parmesan cheese can elevate it even further. I truly encourage you to give this recipe a try; I’m confident you’ll be delighted with the results and the joy of having a delicious keto-friendly bread option at your fingertips.
Frequently Asked Questions:
Can I freeze this Garlic Butter Keto Bread?
Yes, absolutely! Once completely cooled, you can wrap individual slices or the entire loaf tightly in plastic wrap and then in foil. It should keep well in the freezer for up to 2-3 months. Thaw at room temperature or gently reheat in the oven or toaster.
What can I serve this Garlic Butter Keto Bread with?
This bread is incredibly versatile! It pairs wonderfully with hearty keto stews, chilis, roasted meats and vegetables, or even as a side for salads. You can also toast it and top it with avocado, smoked salmon, or your favorite keto-friendly spread for a delicious snack or breakfast.
Is this recipe truly low carb?
Yes, this Garlic Butter Keto Bread is specifically designed to be very low in carbohydrates, making it ideal for anyone following a ketogenic or low-carb lifestyle. The primary ingredients are almond flour and coconut flour, which are naturally low in net carbs compared to traditional wheat flour.
Garlic Butter Keto Bread
A delicious and easy garlic butter keto bread recipe, perfect for low-carb diets.
Ingredients
-
1 cup almond flour
-
1/4 cup psyllium husk powder
-
1 teaspoon baking powder
-
1/2 teaspoon salt
-
2 large eggs
-
1/4 cup melted butter
-
1/4 cup warm water
-
2 cloves garlic, minced
-
2 tablespoons chopped fresh parsley
Instructions
-
Step 1
Preheat oven to 350°F (175°C) and grease and line a small loaf pan. -
Step 2
In a large bowl, whisk together almond flour, psyllium husk powder, baking powder, and salt. -
Step 3
In a separate bowl, whisk together eggs, melted butter, and warm water. -
Step 4
Add the wet ingredients to the dry ingredients and mix until a dough forms. Knead for a minute. -
Step 5
Shape the dough into a loaf and place it in the prepared loaf pan. -
Step 6
Bake for 25-30 minutes, or until golden brown and firm. -
Step 7
While the bread is baking, melt an additional 2 tablespoons of butter. Stir in the minced garlic and chopped parsley. -
Step 8
Once the bread is out of the oven, brush the garlic butter mixture over the top. Let cool slightly before slicing.
Important Information
Nutrition Facts (Per Serving)
It is important to consider this information as approximate and not to use it as definitive health advice.
Allergy Information
Please check ingredients for potential allergens and consult a health professional if in doubt.