Easy Pickled Red Onions- Quick Flavor Boost
Pickled red onions are more than just a condiment; they’re a vibrant culinary superhero, ready to elevate any dish with their delightful tang and beautiful fuchsia hue. I’ve become utterly obsessed with these little jewels, and for good reason! They transform the humble onion into something truly extraordinary, offering a perfect balance of sweet, sour, and slightly peppery notes that cut through richness and add a pop of brightness to everything they touch. Imagin extracte them gracing your tacos, perking up a simple salad, or providing a zesty counterpoint to roasted meats. What makes these pickled red onions so special is their incredible versatility and the ease with which you can create them at home. They’re a pantry staple that brings instant gourmet flair to your everyday meals, proving that sometimes, the simplest ingredients can yield the most spectacular results.
Pickled Red Onions
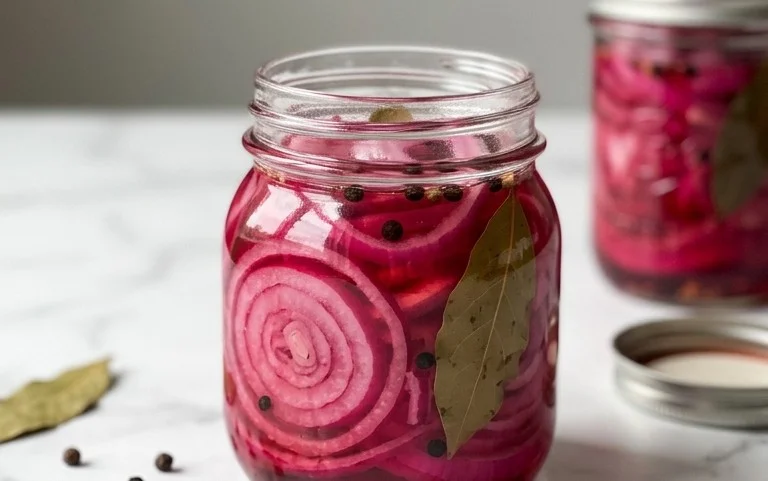
There are few condiments that can elevate a dish quite like a vibrant batch of homemade pickled red onions. Their bright, tangy flavor and beautiful fuchsia hue instantly transform everything from tacos and avocado toast to grilled cheese sandwiches and salads. Forget the store-bought versions that can sometimes be overly sweet or lack that fresh crunch; making your own is incredibly simple and yields far superior results. This recipe is a game-changer for anyone looking to add a quick, flavorful punch to their meals. The beauty of this method is its simplicity – just a few core ingredients and minimal effort are all it takes. Plus, they keep in the refrigerator for weeks, meaning you’ll always have this delicious addition on hand. I love having a jar of these ready to go in my fridge, it’s like a secret weapon for making ordinary meals extraordinary.
Ingredients:
Preparing Your Onions
The first step in creating these beautiful pickled red onions is to properly prepare your star ingredient: the red onion. Begin extract by peeling the outer layers of the red onion. You’ll want to remove any papery skin that might be loose or dry. Once peeled, the goal is to slice the onion thinly. The thinner the slices, the more surface area there is for the pickling liquid to penetrate, resulting in a more evenly pickled and tender onion. I find that using a sharp knife or a mandoline slicer can be incredibly helpful here. If using a mandoline, be sure to use the safety guard to protect your fingers. Aim for slices that are about 1/8 to 1/4 inch thick. You want them to be thin enough to soften quickly but not so thin that they become mushy. As you slice, you can separate the rings into individual pieces or leave them in larger rings depending on your preference. Some people like to have distinct rings in their final product, while others prefer bite-sized pieces. Both work perfectly well!
Making the Pickling Brine
While your onions are being prepped, it’s time to whip up the pickling brine. This simple mixture is what imparts all that wonderful flavor and tang. In a small saucepan, combine the 1 cup of white vinegar and 1 cup of water. White vinegar is a classic choice for pickling because it has a clean, sharp acidity that doesn’t overpower other flavors. It also has a good shelf life for preserving. The water helps to mellow out the intensity of the vinegar, creating a more balanced brine.
Next, add the 1 tablespoon of sugar. As noted in the ingredients, you have flexibility here. The sugar adds a touch of sweetness that balances the acidity of the vinegar, creating a more rounded flavor profile. If you’re watching your sugar intake or prefer a tarter pickle, feel free to reduce or omit the sugar entirely. Alternatively, a sugar substitute like stevia or erythritol can be used in a similar quantity, though you might need to adjust to taste. Finally, stir in the 2 teaspoons of kosher salt. Kosher salt is preferred for its larger, flakier crystals, which dissolve nicely and are easy to measure. Its clean saltiness is also ideal for pickling.
Heating and Infusing the Brine
Now, place the saucepan over medium heat on your stovetop. Stir the mixture gently until the sugar and salt have completely dissolved. You don’t need to bring this to a rolling boil; just heat it enough to ensure all the solids are incorporated. Once dissolved, remove the saucepan from the heat. This heated brine is crucial because it helps the flavors meld together more effectively and begin extracts the “cooking” process for the onions, making them tender more quickly. It’s also what helps to draw out some of the onion’s natural moisture and soften its texture.
The Pickling Process
Once your brine is ready and the onions are sliced, it’s time to combine them. Place your sliced red onions into a clean glass jar or a heatproof bowl. A mason jar is ideal because it can be senon-alcoholic aled for storage, but any glass container will work. Carefully pour the warm pickling brine over the onions, ensuring that they are completely submerged. You might need to gently press down on the onions with a spoon to make sure they are fully covered by the liquid. This even submersion is key to ensuring uniform pickling throughout all the onion slices.
Cooling and Chilling for Flavor Development
This is where the magic truly happens. Allow the mixture to sit at room temperature for about 30 minutes to an hour. During this time, the onions will begin extract to soften and absorb the tangy, sweet, and salty flavors of the brine. You’ll notice the onions starting to change color, becoming a more vibrant pink. After this initial cooling period, cover the jar or bowl tightly and transfer it to the refrigerator. The longer these pickled red onions chill, the better they become. I usually recommend letting them sit in the fridge for at least an hour before using, but they truly shine after 24 hours. The cold temperature further solidifies the pickling process and allows the flavors to deepen and meld.
Enjoying Your Homemade Pickles
Once your pickled red onions have had ample time to chill and develop their flavor, they are ready to be enjoyed! You can drain them before serving or serve them with a little bit of their pickling liquid. These bright, crunchy onions are incredibly versatile. Sprinkle them over your favorite tacos, pile them high on a burger, add them to a vibrant salad, or use them to garnish a beautiful charcuterie board. They also make a fantastic addition to sandwiches, wraps, and even scrambled eggs. The possibilities are truly endless! Store any leftovers in an airtight container in the refrigerator, where they will stay fresh and delicious for up to 2-3 weeks. The brine itself can also be reused for other pickling projects, though its flavor will change over time. Enjoy the bright, zesty addition they bring to your culinary creations!
Conclusion:
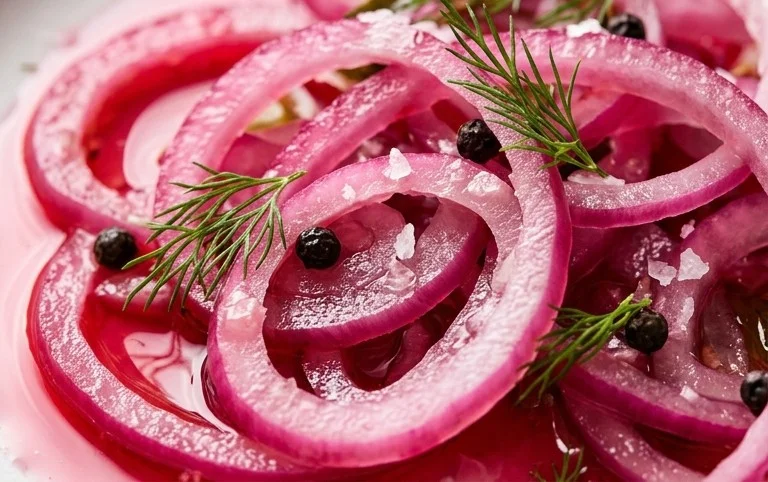
And there you have it! Mastering the art of making pickled red onions is a culinary game-changer. This simple recipe delivers a burst of vibrant flavor and a delightful crunch that elevates so many dishes. The beautiful pink hue alone is enough to impress, but it’s the sweet-tangy taste that truly shines. I find myself reaching for these pickled red onions constantly, adding a quick, flavorful punch to everything from tacos and salads to sandwiches and charcuterie boards. Don’t be intimidated; it’s incredibly straightforward and the payoff is immense. So go ahead, give this recipe a try! You’ll be amazed at how much joy these little gems bring to your cooking. Experiment with the serving suggestions and don’t hesitate to get creative with variations. Happy pickling!
Frequently Asked Questions:
Q: How long do pickled red onions last?
A: Properly stored in an airtight container in the refrigerator, your pickled red onions should stay fresh and delicious for at least 2-3 weeks. The brine continues to cure them over time, often making them even tastier as the days go by!
Q: Can I adjust the sweetness or tangin extractess?
A: Absolutely! The beauty of homemade pickled red onions is the ability to customize. For a sweeter pickle, simply increase the amount of sugar. If you prefer them tangier, add a splash more vinegar. Taste the brine before adding the onions and adjust to your preference.
Q: What if I don’t have red grape juice vinegar?
A: No problem! While red grape juice vinegar is classic, you can substitute it with other vinegars like apple cider vinegar, white grape juice vinegar, or even plain white vinegar. Each will impart a slightly different nuance to your pickled red onions, so feel free to experiment!
Pickled Red Onions
Quick and easy pickled red onions, perfect for adding a tangy crunch to tacos, sandwiches, salads, and more.
Ingredients
-
1 large Red onion, thinly sliced
-
1 cup White Vinegar
-
1 cup Water
-
1 tablespoon Sugar
-
2 teaspoons Kosher salt
Instructions
-
Step 1
Thinly slice the red onion into rings or half-moons. -
Step 2
In a small saucepan, combine the white vinegar, water, sugar, and kosher salt. -
Step 3
Heat the mixture over medium heat, stirring until the sugar and salt are completely dissolved. -
Step 4
Place the sliced red onions into a heatproof jar or bowl. -
Step 5
Pour the hot vinegar mixture over the onions, ensuring they are fully submerged. -
Step 6
Let the onions cool to room temperature, then cover and refrigerate for at least 30 minutes before serving. They will turn a vibrant pink.
Important Information
Nutrition Facts (Per Serving)
It is important to consider this information as approximate and not to use it as definitive health advice.
Allergy Information
Please check ingredients for potential allergens and consult a health professional if in doubt.