Easy Pickled Red Onions- Quick & Delicious Recipe
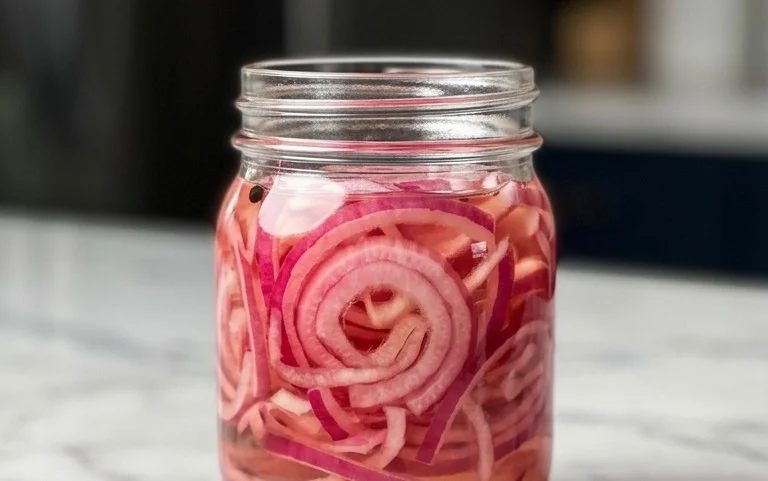
Pickled red onions are truly a revelation, transforming a humble ingredient into a vibrant, flavor-packed condiment that elevates everything they touch. If you’ve ever wondered what that tangy, slightly sweet, and beautifully pink addition is on your tacos, salads, or avocado toast, chances are it was these amazing pickled red onions. People adore them for their incredible versatility and the immediate burst of flavor they bring. They’re the perfect antidote to rich or bland dishes, adding a welcome zing that cuts through fat and awakens the palate. What makes them so special is their magical transformation; raw, sharp onions mellow into a tender, almost candy-like bite, with a gorgeous jewel-toned hue that’s as pleasing to the eye as it is to the taste. They’re ridiculously easy to make, proving that the most delightful culinary creations often come from the simplest ingredients and a little bit of pickling magic.
Pickled Red Onions
There’s something truly magical about pickled red onions. They transform humble onions into jewel-toned strands of tangy, slightly sweet deliciousness that can elevate almost any dish. From tacos and salads to sandwiches and charcuterie boards, these vibrant beauties add a pop of flavor and visual appeal that’s hard to beat. The best part? They are incredibly easy to make at home, requiring minimal effort and just a few pantry staples. Forget those store-bought versions with questionable ingredients; crafting your own pickled red onions is a rewarding and simple culinary endeavor.
The beauty of this recipe lies in its simplicity and the transformative power of pickling. The sharp bite of the raw onion mellows into a pleasant tang, while the sugar adds just enough sweetness to balance the acidity of the vinegar. The optional red pepper flakes offer a subtle warmth that can be adjusted to your preference. You’ll be amazed at how quickly these go from a raw ingredient to a vibrant, ready-to-use condiment.
Ingredients:
Instructions:
Step 1: Preparing the Onions
First things first, let’s get our onions ready. You’ll want to peel your red onions. For the best results in terms of both aesthetics and texture, I like to slice them thinly. A mandoline slicer is fantastic for achieving uniform thinness, but a sharp knife will do the job beautifully. Aim for slices that are about 1/8th of an inch thick. This thickness ensures they pickle quickly and evenly, becoming tender without becoming mushy. If you’re using larger onions, you might want to trim off the root end and the very tip of the stem. You can then slice them vertically, pole to pole, or horizontally, depending on your preference. Vertical slicing tends to create longer, more delicate strands, while horizontal slicing results in more ring-like pieces. I generally prefer vertical for their elegant appearance.
Step 2: Creating the Brine
Now, let’s make the pickling liquid, or brine, that will work its magic. In a medium saucepan, combine the water, white vinegar, sugar, and sea salt. If you’re using the red pepper flakes, add them now as well. Gently stir the mixture to help the sugar and salt begin extract to dissolve. Place the saucepan over medium heat. We’re not looking to bring this to a rolling boil, but rather to heat it until the sugar and salt are completely dissolved. Stir occasionally to ensure everything is well incorporated. This heating process also helps to meld the flavors of the brine, creating a more robust pickling liquid. Once you no longer see any sugar granules or salt crystals at the bottom of the pan, remove it from the heat.
Step 3: Combining Onions and Brine
It’s time to unite our thinly sliced onions with the warm, flavorful brine. You can do this directly in your clean jar, or in a heatproof bowl if you prefer to transfer them later. If you’re using a jar, make sure it’s large enough to hold all the onions and the brine comfortably. Carefully place the sliced red onions into your chosen vessel. Once the brine is ready (and just slightly cooled, not scalding hot, to avoid cooking the onions too much), pour it evenly over the onions. Ensure that all the onion slices are fully submerged in the brine. This is crucial for proper pickling. If any pieces are floating, gently press them down with a spoon or another clean utensil.
Step 4: The Waiting Game (and Transformation!)
This is where the magic truly happens, and it requires a little patience. Once the onions are submerged in the brine, let the mixture cool down at room temperature for about 15-30 minutes. During this time, you’ll already start to notice a subtle change in the color of the onions. They’ll begin extract to lose some of their vibrant purple hue and become a deeper, more translucent pink. After this initial cooling period, cover the jar tightly and transfer it to the refrigerator. Now, the real pickling process begin extracts. For the best flavor and texture, I recommend letting them pickle for at least 30 minutes, but they truly shine after a few hours or even overnight. The longer they sit, the more intense the flavor will become.
Step 5: Enjoying Your Pickled Delights
After the recommended pickling time (which, in my opinion, is at least a few hours for optimal tangin extractess!), your pickled red onions are ready to be enjoyed! You can serve them immediately, or store them in the refrigerator for up to two weeks. They actually tend to get even better as they sit. To serve, simply scoop them out of the brine with a slotted spoon, allowing any excess liquid to drain off. These are incredibly versatile. Scatter them over avocado toast for a burst of flavor, add them to your favorite burger or taco for a zesty crunch, toss them into a vibrant salad, or pile them high on a charcuterie board for a sophisticated touch. Don’t discard the brine! It’s packed with flavor and can be used to pickle other vegetables or as a base for salad dressings.
Notes on Sugar and Vinegar
The type of sugar you use can subtly influence the final flavor. Granulated white sugar provides a clean, straightforward sweetness. You can also experiment with brown sugar (light or dark) for a slightly richer, molasses-like undertone, or even maple syrup for a distinct natural sweetness. However, be mindful that liquid sweeteners might slightly alter the brine consistency. For the vinegar, white vinegar offers a neutral, sharp acidity. Apple cider vinegar is another popular choice that adds a fruitier note, while red grape juice vinegar can impart a deeper color and a more complex flavor profile. Experimenting with different vinegars can lead to unique and delicious variations of this fundamental recipe.
Conclusion:
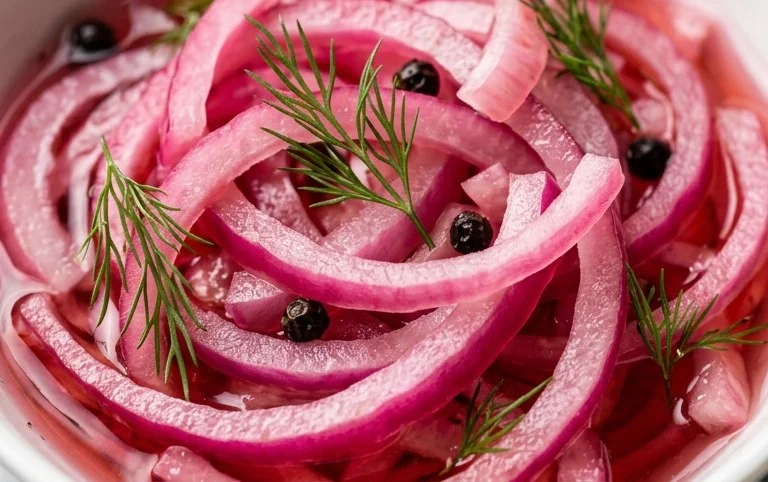
You’ve now mastered the art of creating beautiful, tangy pickled red onions! This recipe is truly a game-changer in the kitchen. The vibrant color and zesty punch they bring to any dish are simply unparalleled. Forget store-bought options that are often too sweet or lack that perfect crispness. Making them yourself allows you to control the flavor profile and ensure peak freshness. These pickled red onions are incredibly versatile and elevate everything from tacos and sandwiches to salads and charcuterie boards. Don’t be afraid to experiment with serving suggestions – the possibilities are truly endless!
I highly encourage you to give this recipe a try. It’s remarkably simple, requiring minimal active time and delivering maximum flavor impact. Once you taste the delightful tang of homemade pickled red onions, you’ll wonder how you ever lived without them. They add a wonderful textural contrast and a bright acidity that cuts through richness beautifully. Get ready to impress yourself and anyone you share your culinary creations with!
Frequently Asked Questions:
How long do pickled red onions last?
When stored properly in an airtight container in the refrigerator, your pickled red onions should stay delicious for at least 2-3 weeks. The brine helps to preserve them, and their flavor often continues to deepen and improve over time within that period.
Can I make them spicier?
Absolutely! For a spicier kick, you can add a pinch of red pepper flakes to the brine mixture before pouring it over the onions. You could also include a sliced jalapeño or a few peppercorns for an extra layer of heat and flavor. Experiment to find your perfect level of spice!
What if I don’t have red grape juice vinegar?
No problem! While red grape juice vinegar offers a classic flavor, you can substitute it with other vinegars. Apple cider vinegar or white grape juice vinegar are excellent alternatives and will still yield delicious pickled red onions. You might notice a slight difference in the final flavor profile, but they will still be wonderfully tangy and bright.
Pickled Red Onions
Quick and easy pickled red onions, perfect for adding a tangy crunch to tacos, salads, sandwiches, and more.
Ingredients
-
2 medium red onions ((or 3 small ones))
-
1 1/4 cup water
-
1 1/4 cup white vinegar
-
3 tbsp sugar (of choice)
-
1 tbsp sea salt
-
1/4-1/2 tsp red pepper flakes ((optional))
Instructions
-
Step 1
Thinly slice the red onions. A mandoline slicer works best for uniform slices. -
Step 2
In a small saucepan, combine water, white vinegar, sugar, and sea salt. Heat over medium heat, stirring until the sugar and salt are dissolved. Do not boil. -
Step 3
If using, stir in the red pepper flakes. -
Step 4
Place the sliced onions into a heatproof jar or container. -
Step 5
Pour the hot pickling liquid over the onions, ensuring they are fully submerged. -
Step 6
Let cool at room temperature, then cover and refrigerate. They will be ready to eat in about 30 minutes, but are best after a few hours or overnight.
Important Information
Nutrition Facts (Per Serving)
It is important to consider this information as approximate and not to use it as definitive health advice.
Allergy Information
Please check ingredients for potential allergens and consult a health professional if in doubt.