Easy Homemade Bread Recipe- Delicious & Simple to Bake
Homemade bread, in its simplest form, is a symphony of flour, water, yeast, and salt, transformed by time and heat into something truly magical. There’s an undeniable, almost primal, joy in the aroma that fills your kitchen as a crusty loaf bakes – a scent that speaks of comfort, tradition, and pure deliciousness. We love homemade bread because it’s a tangible expression of care, a delicious reward for our patience. It’s a blank canvas for creativity, perfect for slathering with butter, dipping into soup, or building the ultimate sandwich. What makes this particular recipe special is its accessibility; it’s designed to be approachable for begin extractners while delivering a taste and texture that seasoned bakers will adore. Get ready to experience the unparalleled satisfaction of pulling your own golden-brown masterpiece from the oven.
Homemade Bread: The Rewarding Journey to a Perfect Loaf
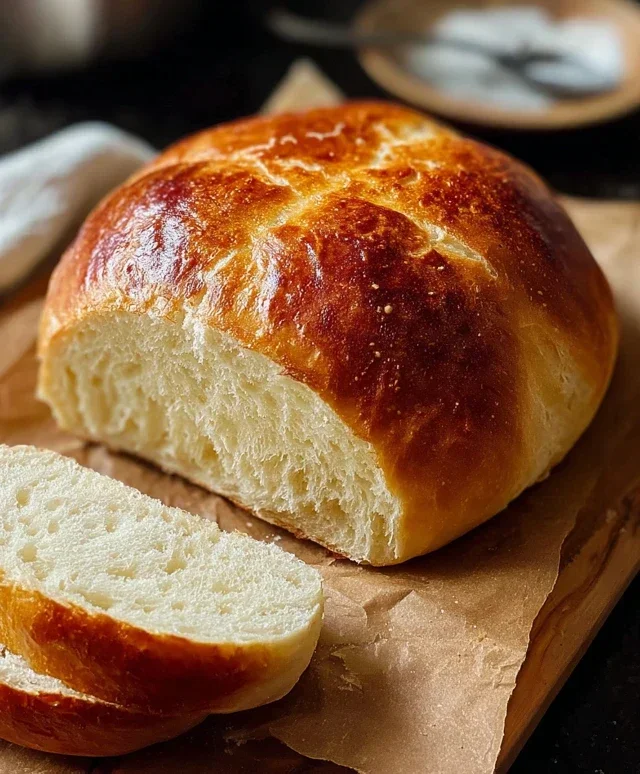
There’s something undeniably comforting about the aroma of freshly baked bread filling your home. The crisp crust, the soft, yielding interior – it’s a simple pleasure that’s surprisingly achievable with just a few basic ingredients and a little patience. Forget the store-bought loaves that often lack soul; today, we’re embarking on a journey to create your very own delicious, homemade bread from scratch. This recipe is a fantastic starting point for any aspiring baker, yielding a versatile loaf perfect for sandwiches, toasting, or simply enjoying with a smear of butter.
The process of making bread is more than just following steps; it’s a tactile experience, a connection to a tradition that spans centuries. From the gentle kneading to the magical rise of the dough, you’ll witness the transformation of humble ingredients into something truly special. Don’t be intimidated by the idea of working with yeast; it’s a living organism that, with the right warmth and nourishment, will do the hard work for you.
Ingredients:
Getting Started: The Magic of Yeast and Dough Development
Before we begin extract, let’s talk about your ingredients. For the water, the temperature is crucial. Too hot, and you’ll kill the yeast; too cool, and it won’t activate properly. A good test is to stick your finger in – it should feel comfortably warm, like a baby’s bath. If you have a thermometer, aim for that 105-115 degree Fahrenheit range. As for the flour, both all-purpose and bread flour will work, but bread flour, with its higher protein content, will give you a chewier texture and a better rise. You might need slightly more or less flour than the recipe calls for depending on the humidity in your kitchen and the type of flour you use, so pay attention to how the dough feels.
Step-by-Step Bread Making:
1. Activate the Yeast: In a large mixing bowl (or the bowl of your stand mixer), combine the warm water and your chosen sweetener (honey or sugar). Sprinkle the active dry yeast over the surface. Let it sit for about 5-10 minutes. You’ll know the yeast is alive and ready when it becomes foamy and bubbly. This is called “blooming” and indicates that the yeast is active and begin extractning to consume the sugars, producing carbon dioxide gas, which is what makes our bread rise. If you don’t see foam, your yeast might be old or the water wasn’t the right temperature, and you’ll need to start again with fresh yeast.
2. Mixing the Dough: Once your yeast has bloomed, add the salt and oil to the bowl. Begin extract adding the flour, about one cup at a time, mixing after each addition. If you’re using a stand mixer, use the dough hook attachment on low speed. If you’re mixing by hand, use a sturdy spoon or your hands to incorporate the flour. Continue adding flour until the dough starts to pull away from the sides of the bowl and forms a shaggy mass. It will still be a little sticky at this stage, and that’s perfectly normal. Resist the urge to add too much extra flour at this point, as this can result in a dense loaf.
3. Kneading the Dough: This is where the gluten develops, giving our bread its structure and chegrape juicess. If you’re using a stand mixer, increase the speed to medium-low and let it knead for 6-8 minutes. The dough should become smooth, elastic, and slightly tacky, but not stick to your fingers when lightly touched. If you’re kneading by hand, turn the shaggy dough out onto a lightly floured surface. Push the dough away from you with the heel of your hand, then fold it back over itself. Rotate the dough a quarter turn and repeat. Continue this process for about 10-12 minutes, until the dough is smooth and elastic. You can test for proper gluten development by gently stretching a small piece of dough; it should stretch thin enough to see light through it without tearing (the “windowpane test”).
4. First Rise (Bulk Fermentation): Lightly grease a clean bowl with a little oil. Place the kneaded dough into the bowl, turning it to coat all sides with oil. Cover the bowl tightly with plastic wrap or a clean, damp kitchen towel. Place the bowl in a warm, draft-free place to rise. This can be on your counter if your kitchen is warm, or in a slightly warmed oven (turned off, but with the light on) or near a sunny window. Let the dough rise for 1 to 1.5 hours, or until it has doubled in size. This first rise is crucial for developing flavor and texture.
5. Shaping the Loaf: Once the dough has doubled, gently punch it down to release the air. Turn the dough out onto a lightly floured surface. For a standard loaf, shape the dough into your desired form. You can create a round “boule” by gently tucking the edges underneath itself to create surface tension, or shape it into a “batard” by flattening it into a rectangle, then rolling it up tightly from one end, pinching the seam closed. Place the shaped loaf onto a baking sheet lined with parchment paper or into a greased loaf pan.
6. Second Rise (Proofing): Loosely cover the shaped loaf with plastic wrap or a kitchen towel. Let it rise again in a warm place for another 30-45 minutes, or until it has almost doubled in size. This second rise is called proofing and is important for the final texture and appearance of your bread. While the loaf is proofing, preheat your oven to 375 degrees Fahrenheit (190 degrees Celsius).
7. Baking Your Masterpiece: Once the loaf has proofed, you can optionally score the top with a sharp knife or razor blade. This allows the bread to expand more evenly in the oven and creates beautiful patterns. Carefully place the baking sheet or loaf pan into the preheated oven. Bake for 30-40 minutes, or until the crust is golden brown and the internal temperature reaches 190-200 degrees Fahrenheit (88-93 degrees Celsius). You can test for doneness by tapping the bottom of the loaf; it should sound hollow.
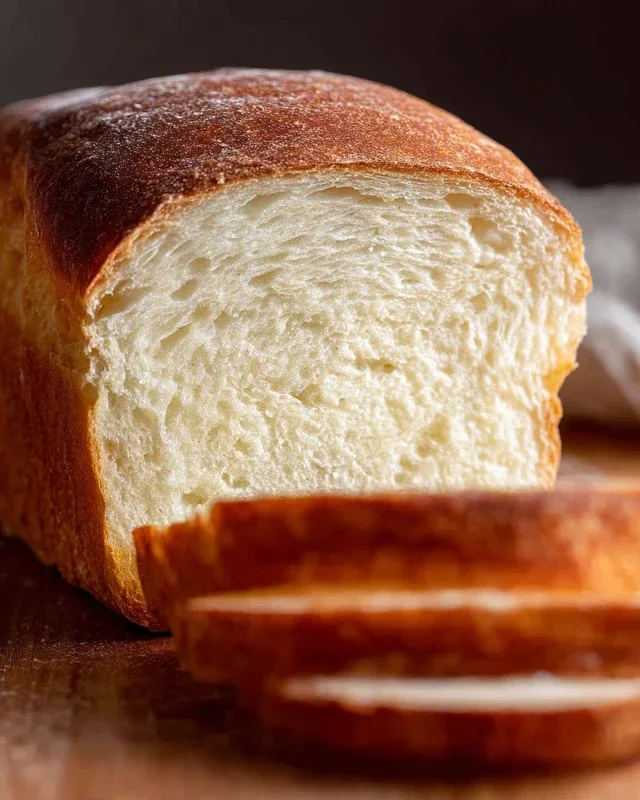
Cooling and Enjoying: The Final Reward
When your bread is done, immediately remove it from the pan and place it on a wire rack to cool completely. This is perhaps the hardest part – resisting the urge to slice into it while it’s still warm! Cooling is essential for the internal structure to set. Once it’s cooled, slice it with a serrated knife and savor the incredible flavor and texture of your homemade creation. You’ve done it! Enjoy the fruits of your labor – a truly rewarding experience that will have you baking bread again and again.

Conclusion:
Baking your own homemade bread is a deeply rewarding experience, transforming simple ingredients into a crusty, aromatic masterpiece. This recipe breaks down the process into manageable steps, proving that delicious, artisanal bread is well within your reach. The unparalleled satisfaction of pulling a warm, fragrant loaf from your oven, knowing you created it with your own hands, is truly special. Enjoy it sliced thick and buttered, as the perfect companion to soups and stews, or as the base for incredible sandwiches. Don’t be afraid to experiment with variations – adding herbs, seeds, or even a touch of honey can elevate your homemade bread to new heights. So, gather your ingredients, embrace the process, and embark on your own delightful bread-baking adventure. You won’t regret the incredible aroma filling your kitchen or the taste of truly fresh bread!
Frequently Asked Questions:
Why is my bread dense?
Density often stems from insufficient gluten development or over-proofing. Ensure you’re kneading the dough thoroughly until it’s smooth and elastic. Proper proofing is crucial – the dough should double in size. Over-proofing can cause the structure to collapse during baking, leading to a dense loaf. Also, make sure your yeast is active!
Can I freeze this homemade bread?
Absolutely! Once completely cooled, you can slice the bread and freeze individual portions in airtight bags or wrap the entire loaf tightly. It’s a fantastic way to enjoy your delicious homemade bread even weeks after baking. Just thaw at room temperature or toast slices directly from frozen.
What if I don’t have a stand mixer?
No problem at all! You can absolutely knead this dough by hand. It requires a bit more arm power and patience, but the result is just as wonderful. Aim for about 10-15 minutes of consistent kneading until the dough is smooth and passes the windowpane test.
Homemade Bread
A simple and delicious recipe for classic homemade bread, perfect for sandwiches or toast.
Ingredients
-
2 cups warm water (105-115 degrees) ((474g))
-
1 Tablespoons active dry yeast*
-
1/4 cup honey ((85g))
-
2 teaspoons salt
-
2 Tablespoons canola oil ((30 ml))
-
4 – 5 1/2 cups all-purpose flour* ((500g-688g))
Instructions
-
Step 1
In a large bowl, combine the warm water and honey. Sprinkle the yeast over the water and let it sit for 5-10 minutes until frothy. -
Step 2
Stir in the salt and canola oil. -
Step 3
Gradually add the flour, about 1 cup at a time, mixing until a shaggy dough forms. You may not need all of the flour. -
Step 4
Turn the dough out onto a lightly floured surface and knead for 8-10 minutes until smooth and elastic. Place the dough in a greased bowl, cover, and let rise in a warm place for 1-1.5 hours, or until doubled in size. -
Step 5
Punch down the dough and shape it into a loaf. Place in a greased loaf pan. -
Step 6
Cover and let rise again for 30-45 minutes, or until nearly doubled. -
Step 7
Preheat oven to 375°F (190°C). Bake for 30-35 minutes, or until the crust is golden brown and the internal temperature reaches 190-200°F (88-93°C). -
Step 8
Remove from pan and let cool completely on a wire rack before slicing.
Important Information
Nutrition Facts (Per Serving)
It is important to consider this information as approximate and not to use it as definitive health advice.
Allergy Information
Please check ingredients for potential allergens and consult a health professional if in doubt.