Best Fried Apple Pies Homemade Delicious Recipe
The Best Fried Apple Pies Recipe (Homemade) is a culinary treasure, a nostalgic embrace of sweet, spiced comfort that transports us back to simpler times. There’s a reason these golden-brown pockets of joy are so universally loved: the perfect marriage of crisp, flaky crust and a warm, gooey apple filling is simply irresistible. Imagin extracte biting into that satisfying crunch, followed by the burst of tender, cinnamon-kissed apples. It’s a sensory experience that delights every time. What truly makes these homemade fried apple pies so special is the love and care that goes into each one, the way the aroma fills your kitchen, promising pure deliciousness. They’re more than just a dessert; they’re a memory in the making, a treat that always hits the spot.
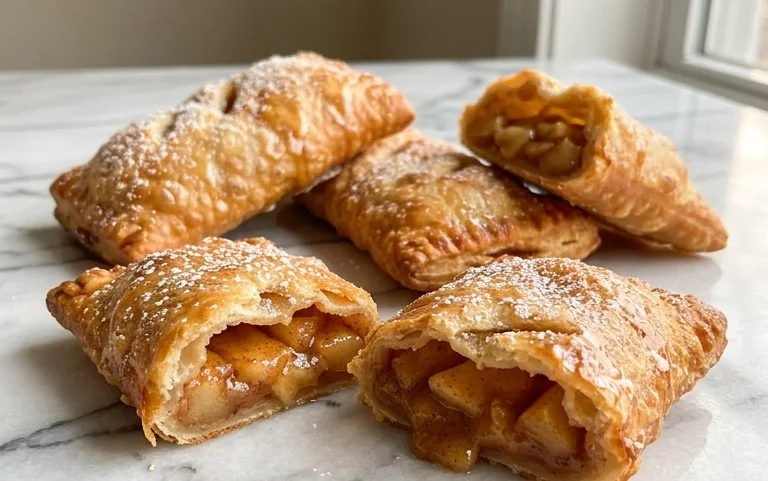
The Best Fried Apple Pies Recipe (Homemade)
There’s something incredibly comforting and nostalgic about a warm, perfectly fried apple pie. Forget those store-bought versions; making them from scratch is a labor of love that pays off in spades. The crispy, golden-brown exterior giving way to a tender, cinnamon-spiced apple filling is pure bliss. Today, I’m sharing my go-to recipe for the best homemade fried apple pies, designed to be approachable for home cooks and utterly delicious. Get ready to impress yourself and anyone lucky enough to share these with you!
Ingredients:
Making the Apple Filling
The heart of any apple pie is its filling, and this one is a winner. We’re going for a perfectly cooked apple that isn’t mushy but is tender enough to be easily spooned.
1. In a medium bowl, combine the diced apples, brown sugar, cinnamon, 1 teaspoon of vanilla, and apple cider. Stir gently to coat the apples evenly. Let this mixture sit for about 10-15 minutes. This allows the sugar to start drawing out some of the apple’s natural juices, which will help create a lovely sauce.
2. After the apples have rested, sprinkle the cornstarch over the mixture. Gently stir again. The cornstarch is our thickening agent, and by adding it now, it will evenly distribute and prevent lumps. You can either cook this filling on the stovetop for a few minutes until slightly thickened, or you can use it as is, and it will thicken as the pies bake and fry. For this recipe, I prefer to give it a quick stovetop simmer: transfer the apple mixture to a small saucepan over medium heat. Cook, stirring occasionally, for about 5-7 minutes, or until the apples are slightly softened and the liquid has thickened to a syrupy consistency. Remove from heat and let it cool completely. It’s crucial that the filling is cooled before you assemble the pies, otherwise, it can make the dough soggy.
Crafting the Perfect Dough
A good pie dough is essential, and this one is designed for ease and deliciousness. Using self-rising flour simplifies things, and the butter adds richness.
3. In a large bowl, combine the sifted self-rising flour and the salt. Add the cubed unsalted butter to the flour mixture. Using your fingertips, a pastry blender, or a food processor, cut the butter into the flour until the mixture resembles coarse crum extractbs, with some pea-sized pieces of butter remaining. These bits of butter are important for creating flaky layers in our dough.
4. In a small separate bowl, whisk together the 2 egg yolks and 1/3 cup of HOT milk. Gradually add this wet mixture to the dry ingredients, mixing until a shaggy dough forms. Be careful not to overmix. Once the dough just starts to come together, turn it out onto a lightly floured surface. Gently knead it a few times until it forms a cohesive ball. It should be slightly sticky but manageable. If it’s too sticky, add a tiny bit more flour; if it’s too dry, add a splash of milk. Wrap the dough in plastic wrap and refrigerate for at least 30 minutes. This chilling time is crucial for making the dough easier to handle and for allowing the gluten to relax, resulting in a more tender crust.
Assembling and Frying Your Pies
Now for the fun part – bringin extractg it all together!
5. Preheat your vegetable or canola oil in a deep skillet or Dutch oven to about 350°F (175°C). You want enough oil to come at least halfway up the sides of your pies. While the oil is heating, take your chilled dough out of the refrigerator. On a lightly floured surface, roll out the dough to about 1/8-inch thickness. Using a 4-5 inch round cutter (or a small bowl), cut out circles of dough. You’ll want about 8-10 circles depending on your cutter size. Re-roll scraps as needed, but try not to overwork the dough.
6. Place about 2 tablespoons of the cooled apple filling onto one half of each dough circle, leaving about a 1/4-inch border. Dip your finger in a little water and moisten the edges of the dough. Fold the other half of the dough over the filling to create a half-moon shape. Press the edges firmly together to seal. You can crimp the edges with a fork for a decorative finish and to ensure a good seal.
7. Carefully place 1-2 pies at a time into the hot oil, making sure not to overcrowd the pan. Fry for about 3-4 minutes per side, or until they are golden brown and puffed. Use a slotted spoon or spider strainer to carefully flip the pies and remove them from the oil. Place the fried pies on a wire rack set over a baking sheet to drain any excess oil.
The Finishing Touch: A Simple Glaze
A light, sweet glaze is the perfect way to elevate these already delicious fried apple pies.
8. While the pies are still warm (but not piping hot), prepare the glaze. In a small bowl, whisk together the 1 tablespoon of milk and the 1/2 cup of powdered sugar until smooth. Add the 1/2 teaspoon of vanilla extract. If the glaze is too thick, add a tiny bit more milk, a teaspoon at a time, until you reach your desired drizzling consistency. Drizzle the glaze generously over the warm fried apple pies. The warmth of the pies will help the glaze set slightly.
Serve these warm, and prepare for rave reviews. They are perfect on their own, or with a scoop of vanilla ice cream. Enjoy every single bite of these delightful homemade fried apple pies!
Conclusion:
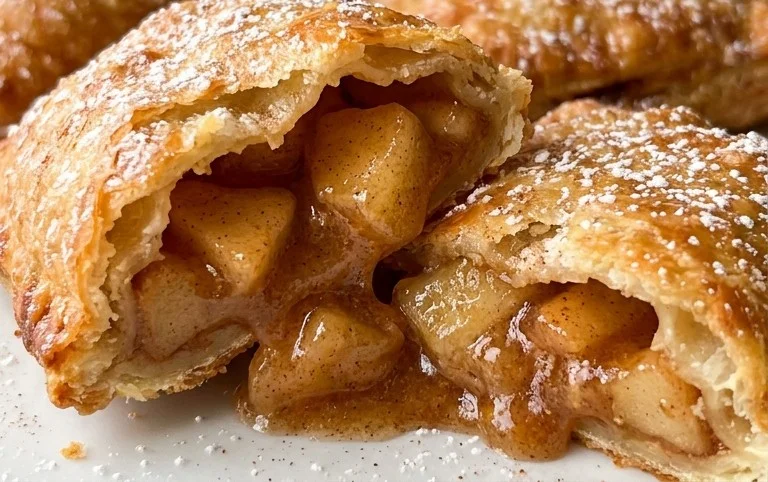
This best fried apple pies recipe is truly a winner because it strikes the perfect balance of flaky, golden-brown crust and a warm, spiced apple filling that bursts with flavor. The simplicity of the ingredients combined with a few key techniques ensures a delicious and comforting dessert that will transport you straight to grandma’s kitchen. These homemade beauties are fantastic served warm, perhaps with a scoop of vanilla ice cream or a drizzle of caramel sauce for an extra decadent treat. Don’t be afraid to get creative with variations! Consider adding a pinch of nutmeg to the filling for extra warmth, a splash of bourbon extract for a grown-up twist, or even a handful of dried cranberries for a touch of tartness. I wholeheartedly encourage you to give this recipe a try; the satisfaction of biting into your own perfectly fried apple pie is simply unparalleled.
Frequently Asked Questions:
Can I make the pie dough ahead of time?
Absolutely! The pie dough can be made up to 2 days in advance and stored in the refrigerator, wrapped tightly in plastic wrap. It may even be a good idea to make it the day before so it’s perfectly chilled and ready to go when you are.
What’s the best oil for frying apple pies?
A neutral-flavored oil with a high smoke point is ideal for frying. Vegetable oil, canola oil, or peanut oil are all excellent choices and will give you that beautiful golden crisp without imparting any unwanted flavors.
My fried apple pies aren’t golden brown. What am I doing wrong?
This usually comes down to oil temperature. Ensure your oil is consistently maintained at the correct temperature (around 350-375°F or 175-190°C). If it’s too low, the pies will absorb too much oil and won’t brown properly. If it’s too high, the crust will burn before the filling is heated through. A kitchen thermometer is a very useful tool for ensuring perfect frying temperatures.
The Best Fried Apple Pies Recipe (Homemade)
Delicious homemade fried apple pies with a perfect balance of sweet and tart apples, encased in a flaky crust and fried to golden perfection.
Ingredients
-
2 large apples, peeled, cored, and diced (1 Granny Smith and 1 Honeycrisp recommended)
-
1/4 cup brown sugar
-
1/2 teaspoon cinnamon
-
1 teaspoon vanilla extract
-
2 teaspoons apple cider
-
1 teaspoon cornstarch
-
2 cups self-rising flour, sifted
-
4 Tablespoons unsalted butter, cubed
-
2 egg yolks
-
1/3 cup HOT milk
-
1/4 teaspoon salt
-
1 Tablespoon milk
-
1/2 cup powdered sugar
-
Vegetable or canola oil, for frying
Instructions
-
Step 1
In a medium bowl, combine diced apples, brown sugar, cinnamon, 1 teaspoon vanilla extract, apple cider, and cornstarch. Stir to coat and set aside. -
Step 2
In a large bowl, combine sifted self-rising flour and salt. Cut in the cubed butter using a pastry blender or your fingers until the mixture resembles coarse crumbs. -
Step 3
In a small bowl, whisk together egg yolks and 1/3 cup HOT milk. Gradually add this mixture to the flour mixture, stirring until a dough forms. Knead briefly on a lightly floured surface until smooth. -
Step 4
Roll out the dough on a lightly floured surface to about 1/8 inch thickness. Cut out circles using a 4-inch round cutter. Place about 2 tablespoons of the apple filling onto one half of each circle, leaving a small border. -
Step 5
Fold the other half of the dough over the filling, pressing the edges to seal. Crimp the edges with a fork. Make a few small slits on top of each pie for steam to escape. -
Step 6
Heat vegetable or canola oil in a deep skillet or Dutch oven over medium-high heat to 350°F (175°C). Carefully fry the apple pies, a few at a time, for 2-3 minutes per side, or until golden brown and cooked through. -
Step 7
Remove pies from oil and drain on paper towels. In a small bowl, whisk together 1 Tablespoon milk and powdered sugar to create a glaze. Drizzle glaze over the warm fried apple pies.
Important Information
Nutrition Facts (Per Serving)
It is important to consider this information as approximate and not to use it as definitive health advice.
Allergy Information
Please check ingredients for potential allergens and consult a health professional if in doubt.