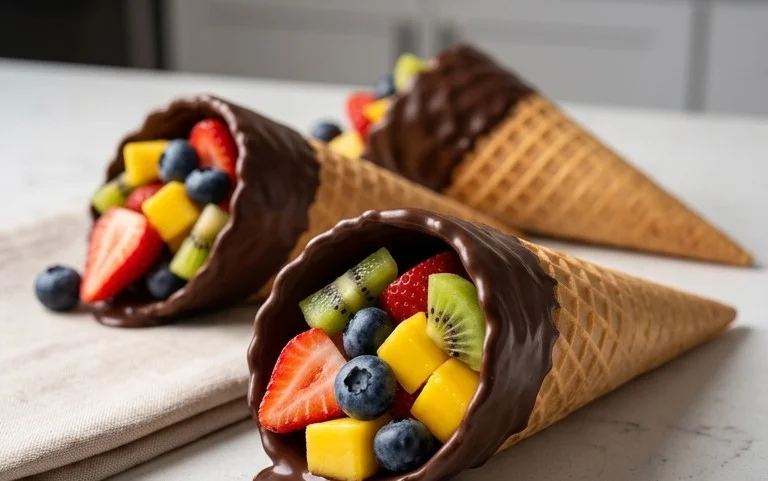
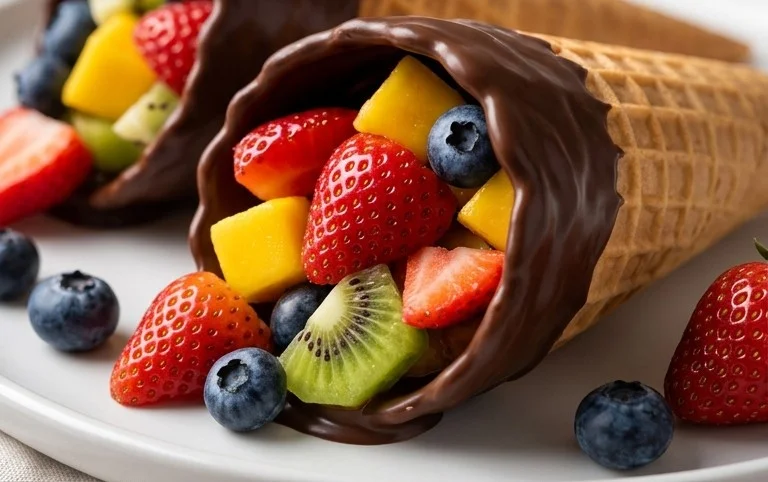
Chocolate Dipped Fruit Cones-Sweet Treat Recipes
Chocolate Dipped Fruit Filled Cones are more than just a dessert; they’re a delightful journey for your taste buds, a playful dance of textures and flavors that’s utterly irresistible. Imagin extracte the satisfying crunch of a perfectly formed cone, giving way to a luscious, fruity filling, all enveloped in a decadent shell of rich, melting chocolate. This isn’t just another sweet treat; it’s an experience designed to spark joy. We love these Chocolate Dipped Fruit Filled Cones because they offer a sophisticated yet whimsical alternative to standard pastries, allowing for endless customization with a variety of fruits and chocolates. What truly makes them special is their inherent charm – they feel like a special occasion, even when you’re just enjoying a quiet afternoon. Prepare to be captivated by these beauties.
Ingredients:
Chocolate Dipped Fruit Filled Cones: A Delightful Treat
Get ready to impress yourself and your loved ones with these utterly delightful Chocolate Dipped Fruit Filled Cones! This recipe is a playful twist on classic ice cream cones, offering a burst of fresh fruit flavor encased in rich, smooth chocolate. They’re surprisingly easy to make and are perfect for parties, a special dessert, or just a fun afternoon treat. The combination of crisp cone, juicy fruit, and decadent chocolate is simply irresistible. Let’s dive in and create some magic!
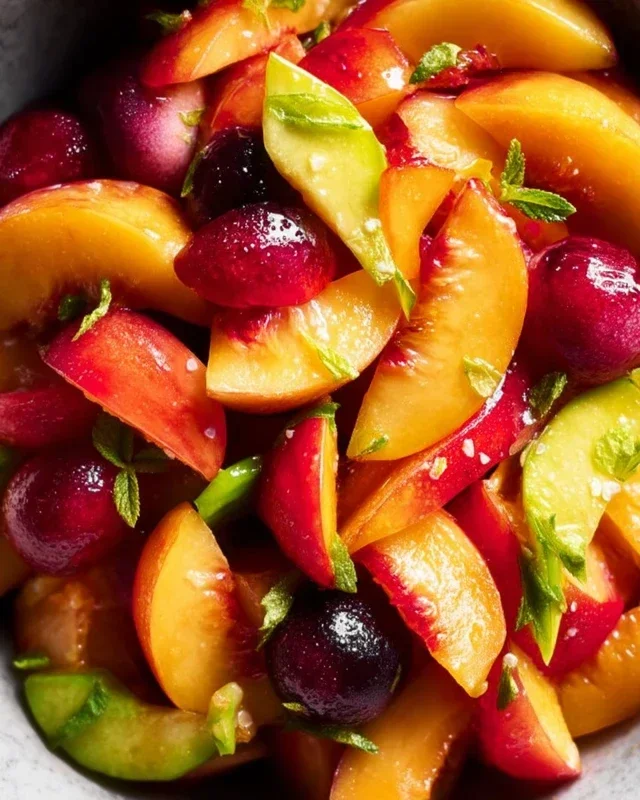
The beauty of these cones lies in their simplicity and the ability to customize them with your favorite fruits and toppings. We’ll be using a selection of classic berries and bananas, but feel free to experiment with chopped apples, pear slices, or even grapes – just make sure they are bite-sized and dry to ensure the chocolate adheres well.
Preparing Your Cones and Fruit
Before we start melting chocolate, it’s essential to have all our components prepped and ready. This will make the dipping process much smoother and more efficient.
First, gather your fruits. Make sure all your berries – strawberries, raspberries, and blueberries – are thoroughly washed and, most importantly, completely dried. Any excess moisture can cause the chocolate to seize or bloom, resulting in a less-than-ideal finish. A clean kitchen towel or paper towels work wonders here. For the strawberries, I like to hull them and then slice them in half or quarters, depending on their size, so they fit nicely inside the cone. Raspberries and blueberries can go in whole.
Next, prepare your banana slices. Choose a ripe but firm banana. Peel it and slice it into rounds about half an inch thick. Again, pat them gently with a paper towel to remove any surface moisture. Bananas are a bit softer, so handle them with a little extra care. If you’re adding nuts, give them a rough chop at this stage.
Now, let’s get our cones ready. You can use either sugar cones or waffle cones, whichever you prefer. The sturdier waffle cones are great if you’re planning to fill them generously, while sugar cones offer a classic crunch. You can even use both for variety!
Melting the Chocolate
This is where the magic truly begin extracts. Melting chocolate perfectly is key to achieving a smooth, glossy coating. We’re going to use a double boiler method, which is gentle and prevents the chocolate from burning.
1. Set up your double boiler: Fill a saucepan with about an inch of water and bring it to a gentle simmer over medium-low heat. You don’t want the water to boil vigorously, just to create steam. Place a heatproof bowl (glass or metal) on top of the saucepan, ensuring the bottom of the bowl doesn’t touch the water.
2. Melt the chocolate: Add your semi-sweet chocolate chips and the coconut oil or vegetable shortening to the heatproof bowl. The coconut oil or shortening is crucial here; it helps the chocolate melt smoothly and gives it a nice shine and a slightly softer texture once set, making it less prone to cracking. Stir the chocolate mixture constantly with a spatula as it begin extracts to melt. Be patient; it can take a few minutes for the chocolate to become completely smooth and glossy. Keep the heat low and steady. If the chocolate seems too thick, you can add a tiny bit more coconut oil, a half teaspoon at a time, stirring well. Avoid adding any water, as this will cause the chocolate to seize.
3. Achieve a smooth consistency: Once the chocolate is fully melted and completely smooth, remove the bowl from the heat. Continue to stir for another minute or two. This residual stirring helps to temper the chocolate slightly, giving it a beautiful sheen and a satisfying snap when it hardens. It should be fluid enough to coat your fruit and cones easily.
Assembling Your Chocolate Dipped Fruit Filled Cones
Now for the fun part – bringin extractg it all together! This is where you get creative.
1. Prepare your workspace: Line a baking sheet or a large platter with parchment paper or wax paper. This will prevent your cones from sticking as the chocolate sets. Have your dried fruit, banana slices, and any optional toppings (like chopped nuts or sprinkles) within easy reach.
2. The Dipping Process: This is where we’ll build our delicious cones layer by layer. Start by dipping your cones into the melted chocolate. You can do this in a couple of ways: either dip the very tip of the cone just to create a chocolate base, or dip about halfway up the cone for a more substantial chocolate shell. If you’re dipping the cone, hold it at an angle and gently rotate it to coat evenly. Allow any excess chocolate to drip back into the bowl. Place the dipped cone on your prepared baking sheet. If you’re only dipping the tip, let that set slightly before moving on to filling.
3. Layering the Fruit: Once the chocolate on the cone has started to set (or if you’re filling first), it’s time to add the fruit. Start by placing a few pieces of fruit at the bottom of the cone to create a base. I like to start with a few blueberries or a raspberry. Then, carefully layer in your banana slices and other berries, pressing them gently into the cone. You want to pack the fruit in snugly, but not so tightly that you risk breaking the cone. Try to fill the cone about two-thirds of the way with fruit.
4. Adding the Chocolate Seal: Now, we’ll use the melted chocolate to seal in the fruit and create a beautiful finish. Take a spoon and gently drizzle or spoon some of the melted chocolate over the fruit at the top of the cone. This not only acts as a delicious seal but also adds another layer of chocolatey goodness. You can aim for an artistic drip effect or a more solid coating. If you’re aiming for a fully chocolate-dipped cone with fruit inside, you would dip the fruit first into the chocolate, then place it inside the cone, and then dip the cone itself. However, filling the cone and then drizzling chocolate over the top is often easier and provides a lovely visual.
5. Decorate and Chill: This is your chance to get fancy! If you’re using chopped nuts, sprinkle them over the still-wet chocolate on top of the cone. Colorful sprinkles are also a fun addition. Once decorated, carefully place the cones upright in a tall glass or a cone holder to keep them stable while they set. Pop them into the refrigerator for about 15-30 minutes, or until the chocolate is completely firm. This will ensure they are easy to handle and that the chocolate coating is perfectly set.
Enjoy these wonderful creations! They’re best enjoyed soon after they’ve set, for the perfect balance of crisp cone, fresh fruit, and solid chocolate. Happy dipping!
Conclusion:
And there you have it – your guide to creating these delightful Chocolate Dipped Fruit Filled Cones! I truly believe this recipe is a winner because it’s not only incredibly easy to make but also offers a fantastic balance of textures and flavors. The crisp cone, the luscious chocolate coating, and the sweet burst of fresh fruit create a symphony in every bite. They’re perfect for a fun afternoon treat, a charming dessert for guests, or even a creative addition to a party spread.
I love serving these alongside a scoop of vanilla ice cream, or as a whimsical addition to a dessert platter. The beauty of this recipe lies in its versatility. Feel free to experiment with different types of fruit – strawberries, raspberries, kiwi, or even chunks of banana work wonderfully. You can also play around with the chocolate; dark, milk, or white chocolate all offer unique taste profiles. Don’t be afraid to get creative with toppings too! A sprinkle of chopped nuts, shredded coconut, or even edible glitter can elevate these cones to another level.
I wholeheartedly encourage you to give this Chocolate Dipped Fruit Filled Cones recipe a try. It’s a simple yet impressive way to add a touch of homemade magic to any occasion. You’ll be amazed at how quickly they disappear!
Frequently Asked Questions:
How should I store the Chocolate Dipped Fruit Filled Cones?
For the best texture, it’s recommended to enjoy these cones relatively soon after making them. If you need to store them, place them in an airtight container in the refrigerator. However, be aware that the cone might soften slightly due to the moisture from the fruit. Try to eat them within a day or two.
Can I use frozen fruit instead of fresh?
While fresh fruit is ideal for its vibrant flavor and texture, you can technically use frozen fruit. Ensure it’s thoroughly thawed and drained of excess moisture before filling the cones. Be mindful that the texture might be slightly softer than with fresh fruit.
What kind of cones work best for this recipe?
Sugar cones or waffle cones are excellent choices. Sugar cones provide a good balance of sweetness and crispness, while waffle cones offer a richer flavor and sturdier structure. Avoid cake cones as they can become soggy quickly.
Chocolate Dipped Fruit Filled Cones
Deliciously sweet and easy-to-make cones filled with fresh fruit and dipped in chocolate.
Ingredients
-
1 cup heavy cream
-
1/4 cup granulated sugar
-
1 teaspoon vanilla extract
-
2 cups chopped fresh strawberries
-
1 cup chopped fresh blueberries
-
1 cup chopped fresh raspberries
-
12 sugar cones
-
8 ounces semi-sweet chocolate chips
-
1 tablespoon coconut oil
Instructions
-
Step 1
In a medium bowl, whip heavy cream until soft peaks form. Gradually add granulated sugar and vanilla extract, whipping until stiff peaks form. This is your whipped cream filling. -
Step 2
Gently fold in the chopped fresh strawberries, blueberries, and raspberries into the whipped cream filling. Be careful not to overmix, as you want to keep some of the fruit chunks visible. -
Step 3
Carefully spoon the fruit-filled whipped cream mixture into the sugar cones, filling them to the brim. Smooth the tops gently. -
Step 4
In a microwave-safe bowl, combine semi-sweet chocolate chips and coconut oil. Microwave in 30-second intervals, stirring in between, until the chocolate is completely melted and smooth. -
Step 5
Dip the top of each filled cone into the melted chocolate, allowing excess chocolate to drip off. -
Step 6
Place the chocolate-dipped cones on a baking sheet lined with parchment paper. Chill in the refrigerator for at least 30 minutes, or until the chocolate has set.
Important Information
Nutrition Facts (Per Serving)
It is important to consider this information as approximate and not to use it as definitive health advice.
Allergy Information
Please check ingredients for potential allergens and consult a health professional if in doubt.