Buster Bar Ice Cream Dessert- Easy Homemade Treat
Get ready to dive into pure nostalgia with this incredible Buster Bar Ice Cream Dessert! If you, like me, have fond memories of that classic ice cream shop treat, then prepare for a delightful journey back in time. This Buster Bar Ice Cream Dessert isn’t just a dessert; it’s an experience. It captures the essence of those perfectly balanced flavors and textures that made the origin extractal so beloved. We’re talking about a symphony of creamy vanilla ice cream, a rich, decadent chocolate coating, and a satisfying crunch that brings it all together. What makes this homemade version so special? It’s the love and care you put into it, allowing you to customize it to your heart’s content and recreate that magical taste right in your own kitchen. Prepare for smiles, happy sighs, and requests for seconds!
The Ultimate Buster Bar Ice Cream Dessert Recipe
Get ready to impress your friends and family with this absolutely irresistible Buster Bar Ice Cream Dessert! This no-bake wonder is a nostalgic trip back to childhood, packed with layers of crunchy, creamy, and chocolatey goodness. It’s the perfect treat for summer gatherings, birthday parties, or just when you’re craving something seriously delicious. Trust me, once you try this, you’ll be making it again and again. It’s surprisingly simple to put together, and the result is a showstopper that tastes just like the beloved ice cream truck classic.
Ingredients:
Crafting Your Buster Bar Masterpiece
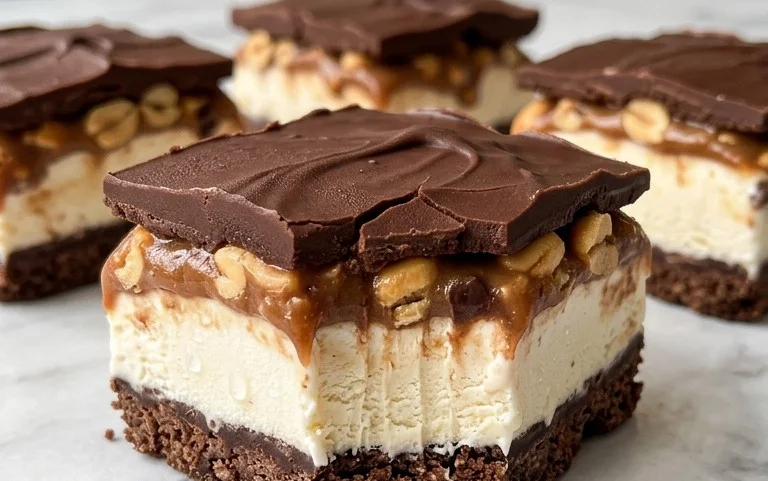
The beauty of this dessert lies in its layered construction. We’ll start with a decadent cookie crust, then add layers of creamy ice cream and a luscious peanut topping, all finished with a rich chocolate shell. Don’t be intimidated by the list; each step is straightforward and leads to an incredible payoff.
Step 1: Building the Crunchy Foundation
The first step to any great dessert is a solid base, and our Buster Bar is no exception. Take your 14.3 oz package of Oreo cookies and crush them into fine crum extractbs. You can do this by placing them in a zip-top bag and crushing them with a rolling pin, or by pulsing them in a food processor until they resemble coarse sand. In a medium bowl, combine these Oreo crum extractbs with 1/2 cup of melted butter. Stir until the crum extractbs are evenly moistened. This mixture will form our delightful crust.
Next, find a suitable baking dish or pan. A 9×13 inch pan is ideal for this recipe, but you could also use a square pan or individual ramekins if you prefer. Press the buttered Oreo crum extractb mixture evenly into the bottom of your chosen pan. Use the back of a spoon or the bottom of a measuring cup to create a firm, compact layer. This crust is going to add a wonderful crunch that complements the creamy ice cream perfectly. Once pressed, place the pan in the freezer while you prepare the next layer. This chilling step helps the crust set and prevents it from mixing too much with the ice cream.
Step 2: Layering the Creamy Dream
Now for the star of the show: the ice cream! Take your 1/2 gallon of vanilla ice cream and let it soften slightly at room temperature. You don’t want it completely melted, just soft enough to spread easily. If it gets too soft, pop it back in the freezer for a few minutes to firm up a bit. Once it reaches the right consistency, spread the softened vanilla ice cream evenly over the chilled Oreo crust. Work quickly to prevent the ice cream from melting too much. Use an offset spatula or the back of a spoon to create a smooth, even layer. Again, place this pan back into the freezer to allow the ice cream to firm up. We’re aiming for a solid layer of ice cream before we move on to the toppings. This ensures that when you slice into the Buster Bar, you get distinct layers of all its delicious components.
Step 3: Crafting the Peanutty Delight
This next layer adds a fantastic nutty texture and flavor. You’ll need 1 pound of Spanish peanuts. If your peanuts are unsalted, you can add a pinch of salt to enhance the flavor, but they are typically not salted in this recipe. You can leave them whole or lightly chop them if you prefer smaller pieces. In a bowl, combine the Spanish peanuts with 2 cups of powdered confectioner’s sugar. Stir these together until the peanuts are well coated with the sugar. This creates a sweet and crunchy topping that will be a delightful surprise with every bite.
Once the ice cream layer is firm, sprinkle this peanut and confectioner’s sugar mixture evenly over the top of the ice cream. Try to distribute it as evenly as possible so you get that delicious crunch in every serving. Gently press the peanut mixture down slightly into the ice cream to help it adhere, but don’t press too hard, or you’ll start to melt the ice cream. Return the dessert to the freezer. This layer is crucial for that classic Buster Bar experience, offering a satisfying crunch that contrasts beautifully with the smooth ice cream.
Step 4: Whipping Up the Chocolate Shell
Now for the grand finnon-alcoholic ale – the chocolate coating! In a medium saucepan, combine 12 ounces of semi-sweet chocolate chips with 1/2 cup of butter and 12 ounces of evaporated milk. Place the saucepan over low heat. Stir constantly, whisking occasionally, until the butter is melted and the chocolate chips have completely dissolved, creating a smooth and glossy sauce. It’s important to keep the heat low to prevent the chocolate from scorching. You want a fluid, pourable chocolate mixture.
Once the chocolate mixture is smooth and all the ingredients are well combined, remove it from the heat. Let it cool slightly for a few minutes. You don’t want it piping hot when you pour it over the frozen dessert, as that could melt the ice cream too quickly. The goal is for it to be warm enough to pour easily but cool enough to set up properly.
Step 5: The Final Embrace – Pouring the Chocolate
This is the moment of truth! Take your partially frozen Buster Bar dessert out of the freezer. Gently and evenly pour the slightly cooled chocolate mixture over the top of the peanut layer. Use a spatula to spread it out, ensuring it covers the entire surface and drips down the sides just a bit. Work efficiently, as the cold dessert will start to set the chocolate quickly. Once the chocolate is poured, immediately place the entire dessert back into the freezer. Let it freeze for at least 4-6 hours, or preferably overnight, until the chocolate shell is completely firm and the entire dessert is frozen solid.
When you’re ready to serve, let the Buster Bar sit at room temperature for about 5-10 minutes to make slicing easier. Then, use a sharp knife to cut it into squares or bars. Each bite will be a symphony of textures and flavors – the crunchy Oreo base, the creamy vanilla ice cream, the sweet and nutty peanut layer, and the rich, smooth chocolate shell. Enjoy every delicious moment!
Conclusion:
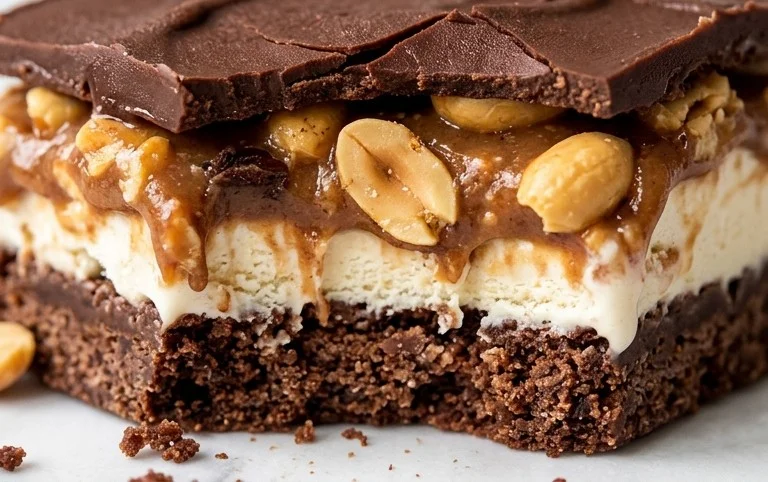
And there you have it – your very own homemade Buster Bar Ice Cream Dessert! This recipe is a guaranteed crowd-pleaser, offering that irresistible combination of creamy ice cream, crunchy peanuts, rich chocolate, and a hint of caramel, all packed into a delightful bar form. It’s fantastic because it’s surprisingly simple to assemble, allowing you to achieve that iconic Buster Bar flavor and texture without a trip to the ice cream shop. Serve these frozen delights as a refreshing summer treat, a decadent after-dinner dessert, or even as a fun activity to make with family and friends. For some delightful variations, consider adding a drizzle of salted caramel sauce before freezing, or folding in some crushed pretzels for an extra salty crunch. You could even experiment with different types of ice cream like coffee or mint chocolate chip for a unique twist. I truly encourage you to give this Buster Bar Ice Cream Dessert a try – you won’t be disappointed by the delicious results!
Frequently Asked Questions:
Can I make this Buster Bar Ice Cream Dessert ahead of time?
Absolutely! This dessert is perfect for making ahead. Once assembled and frozen solid, you can keep them wrapped tightly in plastic wrap and then in an airtight container in the freezer for up to 2-3 weeks. This makes them ideal for parties or when you just want a quick, frozen treat on hand.
What if I don’t have all the exact ingredients?
Don’t worry about minor substitutions! If you can’t find chocolate candy coating, regular semi-sweet or milk chocolate chips melted with a little bit of vegetable oil or coconut oil will work. For the peanuts, other chopped nuts like almonds or pecans could be used, though the classic Buster Bar flavor relies on peanuts.
How do I get a clean cut when slicing the dessert?
For the cleanest cuts, make sure the dessert is fully frozen. Using a large, sharp knife that has been dipped in hot water and dried will help immensely. You may need to re-warm the knife between cuts for the smoothest results.
Buster Bar Ice Cream Dessert
A no-bake ice cream dessert inspired by the classic Buster Bar, featuring a cookie crust, ice cream, peanuts, and a chocolate shell.
Ingredients
-
1 14.3 oz pkg. of Oreo cookies, crushed
-
1/2 C butter, melted
-
1/2 gal. vanilla ice cream, softened
-
1 lb. Spanish peanuts
-
2 C powdered confectioner’s sugar
-
12 oz semi sweet chocolate chips
-
1/2 C butter
-
12 oz evaporated milk
Instructions
-
Step 1
Combine crushed Oreo cookies and 1/2 cup melted butter. Press mixture into the bottom of a 9×13 inch pan to form a crust. -
Step 2
Spread the softened vanilla ice cream evenly over the cookie crust. -
Step 3
Sprinkle the Spanish peanuts over the layer of ice cream. -
Step 4
In a saucepan, melt 1/2 cup butter. Stir in powdered confectioner’s sugar, semi sweet chocolate chips, and evaporated milk until smooth and melted. Heat gently if needed. -
Step 5
Pour the warm chocolate mixture evenly over the peanuts and ice cream. -
Step 6
Freeze for at least 4 hours, or until firm, before cutting into squares and serving.
Important Information
Nutrition Facts (Per Serving)
It is important to consider this information as approximate and not to use it as definitive health advice.
Allergy Information
Please check ingredients for potential allergens and consult a health professional if in doubt.