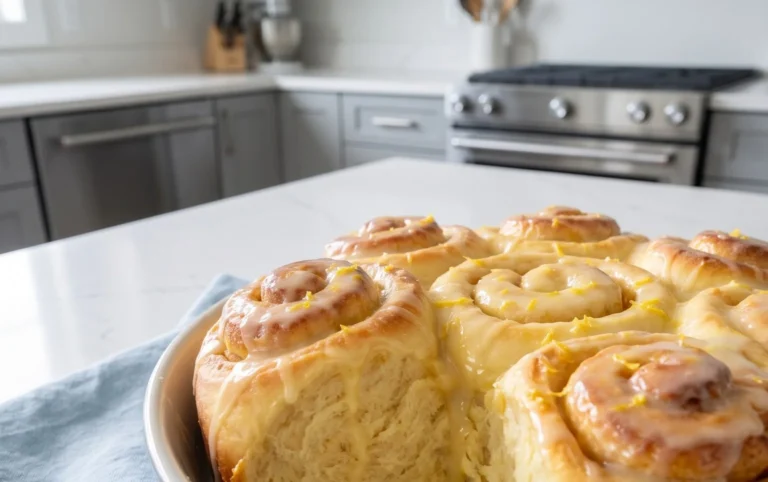
Easy Homemade Bread Recipe-So Simple to Bake
Easy Homemade Bread. Imagin extracte the comforting aroma filling your kitchen, the satisfying crackle as you slice into a warm, crusty loaf, and the pure joy of spreading butter on a piece you made yourself. For so many of us, this isn’t just a dream; it’s a delicious reality waiting to happen. There’s an undeniable magic in transforming simple ingredients like flour, water, yeast, and salt into a culinary masterpiece. People adore homemade bread because it’s not just food; it’s an experience. It’s a connection to tradition, a way to show love to family and friends, and a truly rewarding act of creation. What makes this particular recipe for easy homemade bread so special is its approachability. We’ve stripped away any intimidating steps, focusing on a foolproof method that guarantees success, even for complete begin extractners. Get ready to ditch the store-bought and embrace the incredible satisfaction of your own perfect loaf of easy homemade bread.
Easy Homemade Bread
There’s a special kind of magic that happens when you pull a golden-brown, crusty loaf of homemade bread from your oven. The aroma alone is enough to make your home feel cozy and inviting. For many, the idea of baking bread from scratch sounds intimidating, conjuring images of complicated techniques and fussy starters. But I’m here to tell you that it doesn’t have to be that way! This recipe for Easy Homemade Bread is designed for begin extractners, using simple ingredients and straightforward steps that guarantee a delicious result. Get ready to impress yourself and your loved ones with a loaf that’s far superior to anything you can buy at the store.
Ingredients:
Now that you have your ingredients ready, let’s get baking!
Step-by-Step Instructions
Mixing the Dough
First, we need to activate our yeast and get our dough started. In a large mixing bowl, pour in the 1 ½ cups of warm water. The water should feel comfortably warm to the touch, like a warm bath, not hot. Too hot and you’ll kill the yeast; too cold and it won’t activate properly. Next, sprinkle in the 1 packet (2 ¼ teaspoons) of instant yeast. Give it a gentle stir to help it dissolve. Let this mixture sit for about 5 to 10 minutes. You should see it start to get a little foamy or bubbly on the surface. This is a sign that your yeast is alive and ready to work its magic. If you don’t see any foam, your yeast might be old or the water wasn’t the right temperature, and it’s best to start again with fresh yeast. While the yeast is waking up, add the 2 ½ teaspoons of kosher salt to the bowl. Salt is important not just for flavor, but it also helps control the yeast’s activity and strengthens the gluten structure of the bread.
Combining and Kneading
Once your yeast is foamy, it’s time to add the flour. Gradually add the 3 cups of bread flour (or all-purpose flour) to the water and yeast mixture. You can do this in a few additions, stirring with a wooden spoon or a spatula as you go. Initially, the mixture will be shaggy and sticky. Once most of the flour is incorporated and you have a cohesive, but still sticky, dough, it’s time to get your hands in there and knead! Turn the dough out onto a lightly floured surface. Now comes the fun part – kneading! This process develops the gluten in the flour, which gives bread its structure and chew. Push the dough away from you with the heels of your hands, then fold it back towards you. Rotate the dough and repeat. Continue this for about 8 to 10 minutes. The dough will start out sticky and rough, but as you knead, it will become smoother, more elastic, and less sticky. You’re looking for a dough that springs back slowly when you gently poke it with a floured finger. If it’s too sticky to handle, add a tiny bit more flour, but be careful not to add too much, as this can make your bread dry.
First Rise (Bulk Fermentation)
Once your dough is nicely kneaded, it’s time for its first rest and rise, also known as bulk fermentation. Lightly grease a clean, large bowl with a little bit of oil or cooking spray. Place the kneaded dough into the bowl and turn it over so that the top is also lightly coated in oil. This prevents a dry crust from forming. Cover the bowl tightly with plastic wrap or a clean kitchen towel. Find a warm, draft-free spot in your kitchen for the dough to rise. This could be on top of your refrigerator, in a slightly warm (but turned off) oven, or just on your counter if your kitchen is warm. Let the dough rise for about 1 to 1 ½ hours, or until it has roughly doubled in size. The exact time will depend on the temperature of your kitchen. It’s not an exact science, so visually checking for the doubled size is more important than sticking to a strict timer. You’ll know it’s ready when you can gently poke it with a floured finger, and the indentation stays.
Shaping the Loaf
After the dough has doubled, gently punch it down to release the air. This is a satisfying step! Turn the dough out onto a lightly floured surface again. Now, we’ll shape our loaf. For a simple round loaf (boule), gently pat the dough into a round shape. Then, imagin extracte you’re tucking it in: take the edges of the dough and fold them towards the center, creating a taut surface on top. Pinch the seams together on the bottom to seal them. Alternatively, for a more traditional loaf shape, you can gently flatten the dough into a rectangle and then roll it up tightly, pinching the seams closed. Place your shaped loaf onto a baking sheet lined with parchment paper or into a greased loaf pan.
Second Rise and Baking
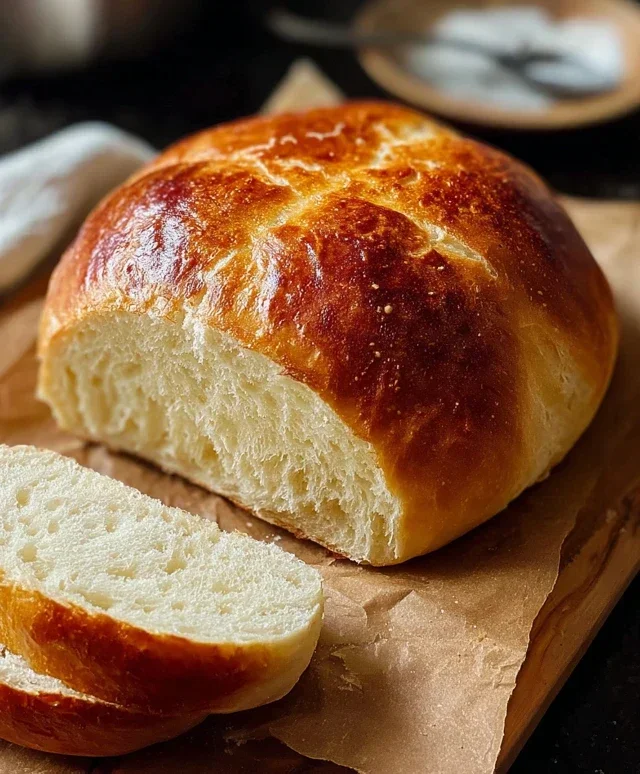
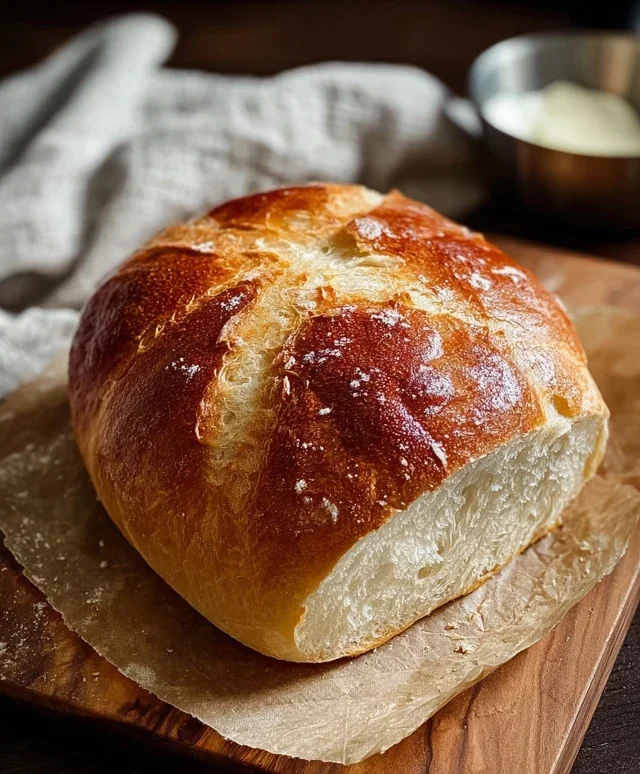
Cover the shaped loaf loosely with plastic wrap or a clean kitchen towel. Let it rise again in a warm place for another 30 to 45 minutes, or until it’s visibly puffed up and looks airy. While the loaf is on its second rise, preheat your oven to 425°F (220°C). This is a crucial step for getting a good crust. Once the oven is preheated and the loaf has had its second rise, you can optionally score the top of the loaf with a sharp knife or a razor blade. This helps control where the bread expands during baking and creates a beautiful pattern. Gently place the baking sheet or loaf pan into the hot oven. For an even crispier crust, you can place a shallow pan filled with hot water on the bottom rack of your oven to create steam. Bake for 30 to 35 minutes, or until the crust is a deep golden brown and the internal temperature of the bread reaches around 200-210°F (93-99°C) when tested with an instant-read thermometer. You can also tap the bottom of the loaf; it should sound hollow.
Once baked, remove the bread from the oven and immediately transfer it to a wire cooling rack. This is very important to prevent the bottom crust from becoming soggy. Let the bread cool completely before slicing. Resist the temptation to slice into it too early – the inside needs time to set properly. Enjoy the incredible flavor and texture of your very own easy homemade bread!
Conclusion:
There you have it – a simple and incredibly rewarding way to make easy homemade bread right in your own kitchen! We’ve explored how this recipe’s minimal ingredients and straightforward steps make delicious, crusty bread accessible to everyone, even if you’ve never baked before. The aroma that fills your home as it bakes is truly magical, and the taste of warm, fresh bread is unparalleled. This recipe is perfect for starting your day with toast, enjoying alongside soups and salads, or as the base for your favorite sandwiches. Don’t be afraid to get creative with variations; consider adding herbs, cheese, or even a touch of sweetness like honey or maple syrup to the dough. I truly encourage you to give this a try – you might just discover a new favorite baking adventure!
Frequently Asked Questions:
Q: My dough didn’t rise much. What could I have done wrong?
A: Several factors can affect dough rise. Ensure your yeast was fresh and activated properly in warm (not hot) water. Make sure your kitchen is warm enough for proofing; a slightly cooler environment can slow down yeast activity. Also, be patient! Sometimes it just takes a little longer than expected.
Q: Can I use a different type of flour?
A: While all-purpose flour is recommended for this easy homemade bread recipe due to its gluten content, you can experiment with adding some whole wheat flour. Start with a small percentage (e.g., 25%) and see how it affects the texture and rise. You may need to adjust the liquid slightly.
Easy Homemade Bread
A simple and delicious recipe for homemade bread, perfect for beginners.
Ingredients
-
1 ½ cups warm water
-
3 cups bread flour
-
1 packet (2 ¼ teaspoons) Instant Yeast
-
2 ½ tsp kosher salt
-
1 tablespoon olive oil
Instructions
-
Step 1
In a large bowl, combine warm water and yeast. Let it sit for 5-10 minutes until foamy. -
Step 2
Add flour, salt, and olive oil to the bowl. Mix until a shaggy dough forms. -
Step 3
Turn the dough out onto a lightly floured surface and knead for 5-8 minutes until smooth and elastic. -
Step 4
Place the dough in a greased bowl, cover, and let rise in a warm place for 1-1.5 hours, or until doubled in size. -
Step 5
Punch down the dough and shape it into a loaf. Place it in a greased loaf pan. -
Step 6
Cover and let rise for another 30-45 minutes. -
Step 7
Preheat oven to 375°F (190°C). Bake for 30-35 minutes until golden brown and the internal temperature reaches 200°F (93°C).
Important Information
Nutrition Facts (Per Serving)
It is important to consider this information as approximate and not to use it as definitive health advice.
Allergy Information
Please check ingredients for potential allergens and consult a health professional if in doubt.