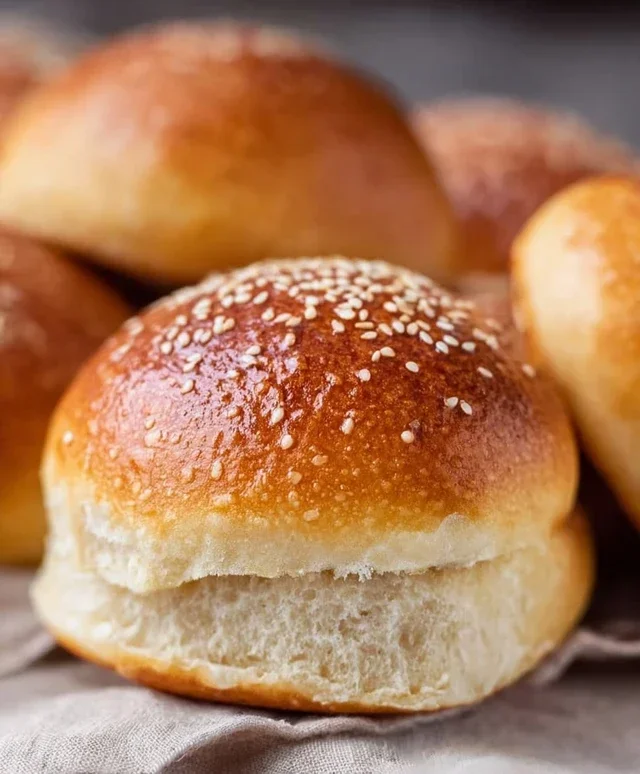
Easy Keto Buns-Quick Delicious Low-Carb Bread
Easy Keto Buns are about to become your new best friend. For so long, achieving that perfect fluffy texture in a low-carb bun felt like an impossible dream. But let me tell you, the search is over! These incredible Easy Keto Buns are so simple to whip up, you’ll be asking yourself why you didn’t try them sooner. They’re incredibly versatile, perfect for sandwiches, burgers, or even just toasted with a smear of butter. What makes them truly special is that they deliver that satisfying, slightly chewy bite we all crave, all while keeping you firmly on track with your ketogenic lifestyle. Forget those crum extractbly, dense disappointments of the past. We’re talking about actual bread-like goodness that will make you feel like you’re not missing out on anything at all. Get ready to elevate your keto meals with these game-changin extractg Easy Keto Buns!
Easy Keto Buns
Are you craving a soft, chewy bun that won’t derail your keto lifestyle? Look no further! These easy keto buns are a game-changer. They are incredibly simple to make, requiring minimal ingredients and effort, yet they deliver a satisfying texture and flavor that will have you reaching for seconds. Forget those dry, crum extractbly keto alternatives; these buns are genuinely delicious and versatile. They’re perfect for your morning avocado toast, as a sandwich roll, or even as a delightful side to your favorite keto soup. I’ve made these countless times, and they never disappoint. The secret lies in the magic combination of melted cheese and almond flour, which creates a surprisingly bread-like consistency. Let’s get baking!
Ingredients:
Notes: For best results, I highly recommend using a low-moisture, whole-milk mozzarella cheese. Pre-shredded cheese can sometimes contain anti-caking agents that might affect the texture, so shredding your own from a block is ideal if you have the time. However, if you’re pressed for time, pre-shredded will work in a pinch.
Cooking Instructions:
Follow these simple steps to create your perfect batch of easy keto buns. I’ve broken them down to make it as straightforward as possible.
Preparation: Melting the Cheesy Base
The first crucial step in creating these amazing keto buns is to melt our cheesy foundation. In a microwave-safe bowl, combine the 3 cups of shredded mozzarella cheese and the 2 ounces of cream cheese. You want to melt these together until they are smooth and well-combined. I usually microwave them in 30-second intervals, stirring well after each interval, until everything is fully melted and gooey. This might take about 1 to 1.5 minutes in total, depending on your microwave’s power. It’s important that there are no lumps of cream cheese left. Once melted, stir them together until you have a smooth, stretchy cheese mixture. This forms the incredibly satisfying chegrape juicess of our keto buns. Let this mixture cool slightly for a few minutes. You don’t want it piping hot when you add the other ingredients, especially the eggs, as it could scramble them. Just warm enough to handle easily is perfect.
Mixing the Dough
Once your cheese mixture has cooled down a little, it’s time to incorporate the dry ingredients and eggs. In a separate medium-sized bowl, whisk together the 1 3/4 cups of almond flour and the 1 tablespoon of baking powder. Ensuring the baking powder is evenly distributed is important for a good rise. Now, add the 3 large eggs to the slightly cooled cheese mixture. Stir vigorously until the eggs are fully incorporated into the cheese. It might look a little stringy at first, but keep stirring, and it will come together. Next, gradually add the almond flour and baking powder mixture to the wet ingredients. Mix everything until a cohesive dough forms. It will be sticky, and that’s perfectly normal for keto doughs. You can use a sturdy spatula or your hands (lightly greased with oil if you prefer) to bring it all together. Make sure there are no pockets of dry almond flour left.
Shaping the Buns
Now for the fun part: shaping our keto buns! Preheat your oven to 350 degrees Fahrenheit (175 degrees Celsius). Line a baking sheet with parchment paper. This prevents sticking and makes cleanup a breeze. Divide the dough into 6-8 equal portions. The size of your buns will depend on how many you divide the dough into. I usually aim for about 6 medium-sized buns. Lightly wet your hands with water or grease them with a little bit of oil. This will help prevent the sticky dough from clingin extractg to your fingers. Roll each portion of dough into a ball and then gently flatten it into a bun shape. You can make them as thick or as thin as you like, but I find a slightly flattened disc shape works best for even baking. Place the shaped buns onto the prepared baking sheet, leaving a little space between them as they will puff up slightly during baking. You can also gently flatten the tops with the palm of your hand or the bottom of a greased glass if you want a more uniform shape.
Baking to Golden Perfection
It’s time to bake these beauties! Place the baking sheet with the shaped buns into your preheated oven. Bake for approximately 15-20 minutes, or until the buns are golden brown on top and firm to the touch. The baking time can vary slightly depending on your oven and the size of your buns. Keep an eye on them, especially during the last few minutes, to prevent them from over-browning. You’re looking for a beautiful golden hue. Once baked, carefully remove the baking sheet from the oven. The buns will be quite soft when they are hot.
Cooling and Enjoying
This is perhaps the hardest part – waiting for them to cool! Let the keto buns cool on the baking sheet for a few minutes before transferring them to a wire rack to cool completely. This allows them to firm up properly. While they are still warm and slightly soft, they are incredibly delicious, but allowing them to cool will improve their structure and make them easier to handle for slicing and toasting. Once cooled, you can slice them in half horizontally and enjoy them with your favorite toppings, as a sandwich base, or simply with a smear of butter. These buns are best enjoyed fresh, but they can be stored in an airtight container at room temperature for a day or two, or in the refrigerator for up to 5 days. You can also freeze them for longer storage. To reheat, simply pop them in the toaster or a warm oven for a few minutes. Enjoy your delicious, homemade keto buns!
Conclusion:
And there you have it – a simple, satisfying recipe for easy keto buns that are sure to become a staple in your low-carb kitchen! What makes these buns so fantastic is their incredible versatility and how effortlessly they fit into a ketogenic lifestyle. Gone are the days of missing out on your favorite sandwiches, burgers, or even just a side of delicious bread. These buns are remarkably quick to prepare, requiring minimal ingredients and common pantry staples. They offer a wonderfully soft texture and a subtly savory flavor that pairs beautifully with a wide range of toppings and meals.
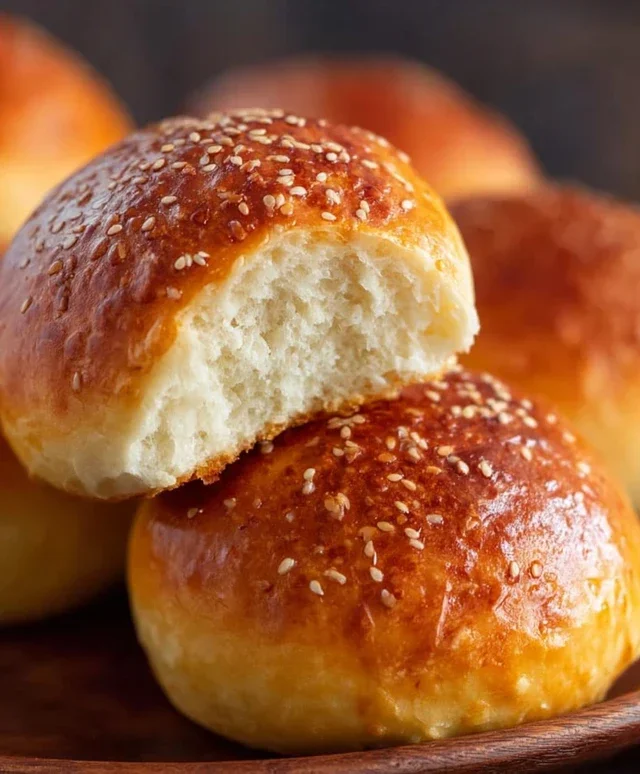
Don’t hesitate to get creative with your serving suggestions! These buns are perfect for building your ultimate keto burger, creating a delightful breakfast sandwich, or simply enjoying warm with a smear of butter. For variations, feel free to experiment with adding herbs like rosemary or chives for an extra flavor kick, or a pinch of garlic powder for a savory twist. You could even sprinkle some sesame seeds on top before baking for a classic bakery look and taste. I truly encourage you to give this recipe a try. It’s a game-changer for anyone following a keto diet!
Frequently Asked Questions:
Can I make these keto buns ahead of time?
Yes, absolutely! These easy keto buns store wonderfully. Once cooled, keep them in an airtight container at room temperature for up to 2 days, or in the refrigerator for up to 5 days. You can also freeze them for longer storage; just thaw them at room temperature or gently warm them in a toaster or oven.
What kind of flour is best for keto buns?
For this particular recipe, almond flour and coconut flour are often the go-to choices as they provide a great texture and are low in carbohydrates. The combination in this recipe ensures a pleasing balance of softness and structure, making them a truly successful keto bread option.
Easy Keto Buns
Simple and delicious keto-friendly buns made with cheese and almond flour.
Ingredients
-
3 cups shredded cheese (mozzarella cheese)
-
2 ounces cream cheese
-
1 3/4 cups almond flour
-
1 tablespoon baking powder
-
3 large eggs
Instructions
-
Step 1
Preheat oven to 375°F (190°C) and line a baking sheet with parchment paper. -
Step 2
In a microwave-safe bowl, combine the shredded cheese and cream cheese. Microwave in 30-second intervals, stirring in between, until melted and smooth. -
Step 3
Stir in the almond flour and baking powder into the cheese mixture until well combined. -
Step 4
Add the eggs, one at a time, and mix until a dough forms. It will be sticky. -
Step 5
Divide the dough into 8 equal portions and roll them into balls. Place them on the prepared baking sheet, leaving some space between them. -
Step 6
Bake for 12-15 minutes, or until golden brown and slightly firm to the touch. -
Step 7
Let the buns cool on the baking sheet for a few minutes before transferring to a wire rack to cool completely.
Important Information
Nutrition Facts (Per Serving)
It is important to consider this information as approximate and not to use it as definitive health advice.
Allergy Information
Please check ingredients for potential allergens and consult a health professional if in doubt.