Mini Cannoli Cups – Delicious Italian Dessert Recipe
Mini Cannoli Cups are about to become your new obsession! There’s something undeniably magical about these bite-sized Italian delights. The crisp, golden shell, that sweet, creamy ricotta filling… it’s a symphony of textures and flavors that just begs to be devoured. What makes these Mini Cannoli Cups so incredibly lovable? For starters, they capture all the authentic charm of their full-sized counterparts but in a perfectly portioned package that’s ideal for parties, picnics, or just a little personal indulgence. They’re incredibly versatile too – imagin extracte them as elegant wedding favors or as a delightful finish to any meal. Unlike their larger cousins, these mini versions are less intimidating to make at home, offering you the chance to recreate that beloved Italian pastry magic right in your own kitchen. Get ready to impress yourself and everyone around you with these charming Mini Cannoli Cups!
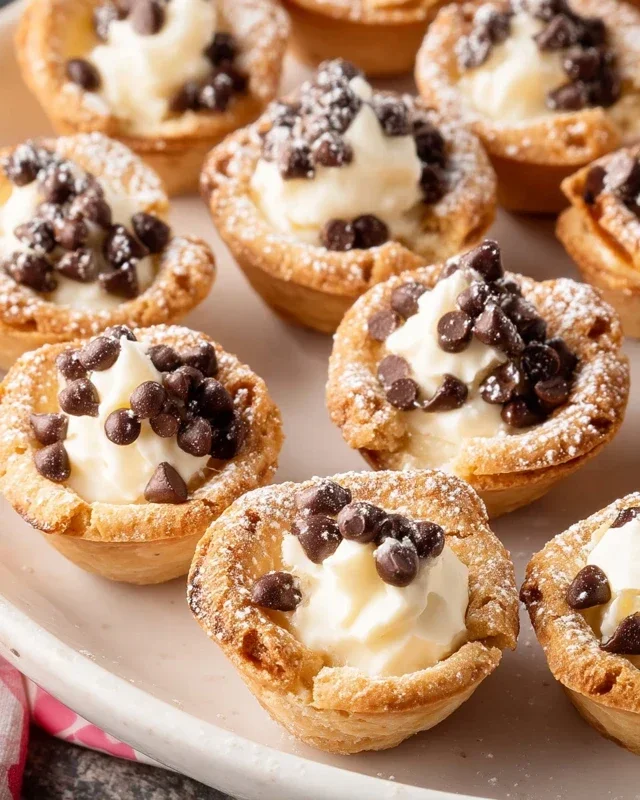
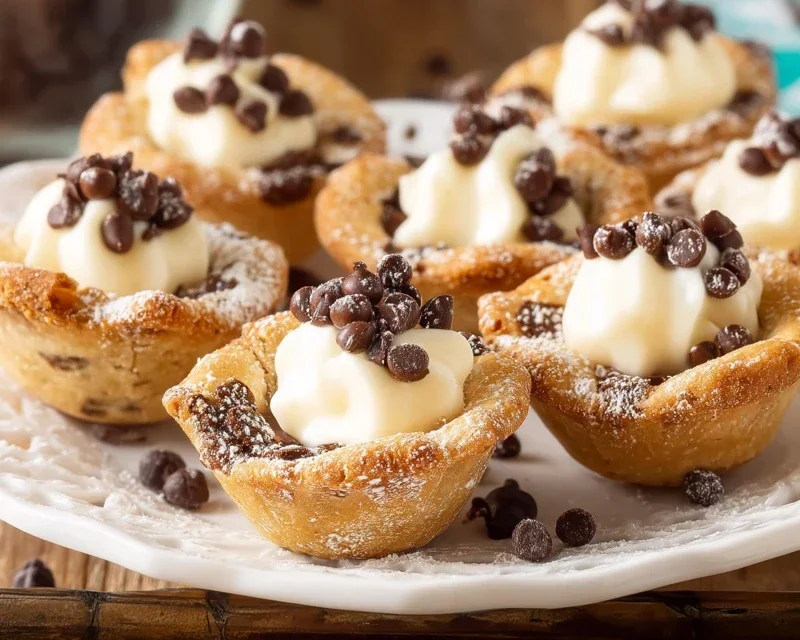
Mini Cannoli Cups
Craving the delightful crispness of a cannoli shell and the sweet, creamy filling, but don’t have the time or desire to roll and fry traditional cannoli tubes? Then these Mini Cannoli Cups are your answer! They’re a fun, easier, and equally delicious way to enjoy those iconic Italian treats. Perfect for parties, a sweet after-dinner indulgence, or just because, these little cups deliver all the flavor without all the fuss. We’re using simple ingredients and readily available shortcuts to bring you a taste of Sicily right in your own kitchen. Get ready to impress yourself and your loved ones with these delightful little desserts.
Ingredients:
Preparing the Filling
The heart of any cannoli is its creamy, dreamy filling. We’ll start by ensuring our ricotta is as dry as possible. This is a crucial step to prevent a watery filling. After draining the ricotta, I like to place it in a fine-mesh sieve lined with a cheesecloth or a few layers of paper towels and let it sit in the refrigerator for at least an hour, or even overnight if I have the time. Gently pressing it occasionally can help speed up the process. Once drained, transfer the ricotta to a medium bowl. Add the powdered sugar, granulated sugar, orange or lemon zest, and vanilla extract. I prefer orange zest for a classic cannoli flavor, but lemon works wonderfully too, adding a brighter note.
Now, for the magic! Use an electric mixer (a hand mixer or a stand mixer with the paddle attachment works perfectly) to beat the ricotta mixture until it’s smooth and creamy. Scrape down the sides of the bowl as needed to ensure everything is incorporated. The goal is a light, airy, and lump-free filling. Taste it and adjust sweetness if desired, though this amount is usually spot on. Once you’re happy with the consistency, cover the bowl and pop it into the refrigerator while we prepare the shells. This allows the flavors to meld and the filling to firm up slightly.
Creating the “Shells”
This is where the magic of using refrigerated pie crusts really shines. Forget the complicated dough-making and frying! We’ll be creating our “shells” by baking them. First, preheat your oven to 375°F (190°C). Lightly grease a standard 12-cup muffin tin. This will help prevent the crusts from sticking.
Unroll the softened pie crusts onto a lightly floured surface. Gently press them together at the seam if they are separated. You want one large, unified circle. Use a round cookie cutter or a glass with a rim slightly larger than the muffin tin cups (around 3-4 inches in diameter) to cut out circles from the pie crust. You should be able to get about 6-8 circles from each pie crust, so 12-16 circles in total, which is perfect for a standard muffin tin.
Carefully press each pie crust circle into the greased muffin tin cups, allowing the edges to extend slightly over the rim. Don’t worry if they don’t fit perfectly; a little rustic charm is part of the appeal! Prick the bottom of each crust a few times with a fork. This helps to prevent the dough from puffing up too much while baking, ensuring a nice, flat base for our filling.
Baking and Cooling
Now for the turbinado sugar and cinnamon mixture. In a small bowl, combine the turbinado sugar and ground cinnamon. This mixture will be sprinkled over the edges of our pie crust “cups” before baking, giving them a beautiful color and a hint of spiced sweetness, reminiscent of a traditional cannoli shell.
Lightly brush the edges of the pie crusts that are showing in the muffin tin with a little water or egg wash. This will help the turbinado sugar mixture adhere. Sprinkle a generous pinch of the turbinado sugar and cinnamon mixture onto these moistened edges. This step adds a delightful crunch and visual appeal.
Bake the pie crust cups in the preheated oven for 12-15 minutes, or until they are golden brown and lightly crisp. Keep a close eye on them, as ovens can vary. Once baked to perfection, carefully remove the muffin tin from the oven. Let the crusts cool in the muffin tin for about 5-10 minutes before gently inverting them onto a wire rack to cool completely. It’s important that they are completely cool before you attempt to fill them, otherwise the filling can melt.
Assembling the Mini Cannoli Cups
Once your pie crust cups are completely cool, it’s time for the best part: filling! Spoon or pipe the prepared ricotta filling into each of the cooled pie crust cups. Don’t overfill them; you want the filling to be nestled nicely within the crust, with a little room for decoration.
Now for the finishing touches! You can pipe the filling directly from a piping bag for a neater look, or simply use a spoon to dollop the filling into the cups. Once filled, gently press a few miniature semisweet chocolate chips into the filling on one side of each cup, or sprinkle with finely chopped pistachios. These add a lovely pop of color and texture. Finally, dust the tops generously with additional powdered sugar for that authentic cannoli finish. Your delicious Mini Cannoli Cups are ready to be devoured! Enjoy immediately for the best texture, or store them in an airtight container in the refrigerator for a few hours.
Conclusion:
And there you have it! Your journey into creating delightful mini cannoli cups is complete. I truly hope you’ve enjoyed making these bite-sized wonders as much as I do. This recipe is fantastic because it delivers all the classic, creamy, ricotta-filled goodness of traditional cannoli in a perfectly portioned, easier-to-handle format. They’re elegant enough for a special occasion but simple enough for a spontaneous treat. The crispy, baked shells provide a satisfying crunch that contrasts beautifully with the smooth, sweet filling. Don’t be afraid to get creative with your toppings; the possibilities are endless!
These mini cannoli cups are incredibly versatile. Serve them as a charming dessert at parties, a sweet ending to a family dinner, or even as a delightful afternoon pick-me-up with your favorite coffee. For serving suggestions, consider dusting them with powdered sugar, drizzling with chocolate sauce, or topping with fresh berries for a burst of color and flavor. For variations, experiment with different extracts in the filling, such as almond or lemon, or even add a touch of cinnamon or finely chopped candied orange peel to the ricotta mixture. You could also try a chocolate-dipped shell for an extra layer of decadence. I encourage you to give these mini cannoli cups a try – they are sure to impress!
Frequently Asked Questions:
Can I make the cannoli shells ahead of time?
Yes, you absolutely can! Baked cannoli shells can be stored in an airtight container at room temperature for up to a week. However, I recommend filling them closer to serving time to ensure the shells remain as crisp as possible. Humidity can affect their texture.
What’s the best way to store leftover filled mini cannoli cups?
For the best texture, it’s ideal to enjoy filled cannoli cups immediately. If you have leftovers, store them in an airtight container in the refrigerator. Be aware that the shells may soften slightly over time due to the moisture from the filling.
Can I use a different type of cheese for the filling?
While ricotta is traditional and provides the signature creamy texture, some people experiment with mascarpone cheese for an even richer flavor. However, ricotta is generally preferred for its lightness and ability to absorb flavors. Ensure your ricotta is well-drained to prevent a watery filling.
Mini Cannoli Cups
Delightful mini cannoli cups featuring a creamy ricotta filling and a crisp pie crust shell, perfect for a sweet treat.
Ingredients
-
1 container whole-milk ricotta cheese (15 oz., drained)
-
1/2 cup powdered sugar
-
2 tablespoons granulated sugar
-
1 teaspoon finely grated orange or lemon zest
-
1/2 teaspoon vanilla extract
-
1 box refrigerated pie crusts, softened as directed on box (2 count )
-
3 tablespoons turbinado sugar (raw sugar)
-
1 teaspoon ground cinnamon
-
1/4 cup miniature semisweet chocolate chips or finely chopped pistachios
-
additional powdered sugar
Instructions
-
Step 1
Preheat oven to 375°F (190°C). Grease and lightly flour 24 mini muffin cups. -
Step 2
In a medium bowl, combine the drained ricotta cheese, 1/2 cup powdered sugar, granulated sugar, orange or lemon zest, and vanilla extract. Mix until well combined and smooth. Stir in chocolate chips or pistachios. -
Step 3
Unroll the refrigerated pie crusts. Use a 3-inch round cookie cutter to cut out circles. Press the circles gently into the prepared mini muffin cups, forming shells. -
Step 4
Bake for 10-12 minutes, or until the crusts are golden brown and lightly crisp. Let cool in the muffin tin for a few minutes before transferring to a wire rack to cool completely. -
Step 5
In a small bowl, combine the turbinado sugar and ground cinnamon. Sprinkle the edges of the cooled cannoli shells with this mixture. -
Step 6
Spoon or pipe the ricotta filling into the cooled cannoli shells. Dust with additional powdered sugar before serving.
Important Information
Nutrition Facts (Per Serving)
It is important to consider this information as approximate and not to use it as definitive health advice.
Allergy Information
Please check ingredients for potential allergens and consult a health professional if in doubt.