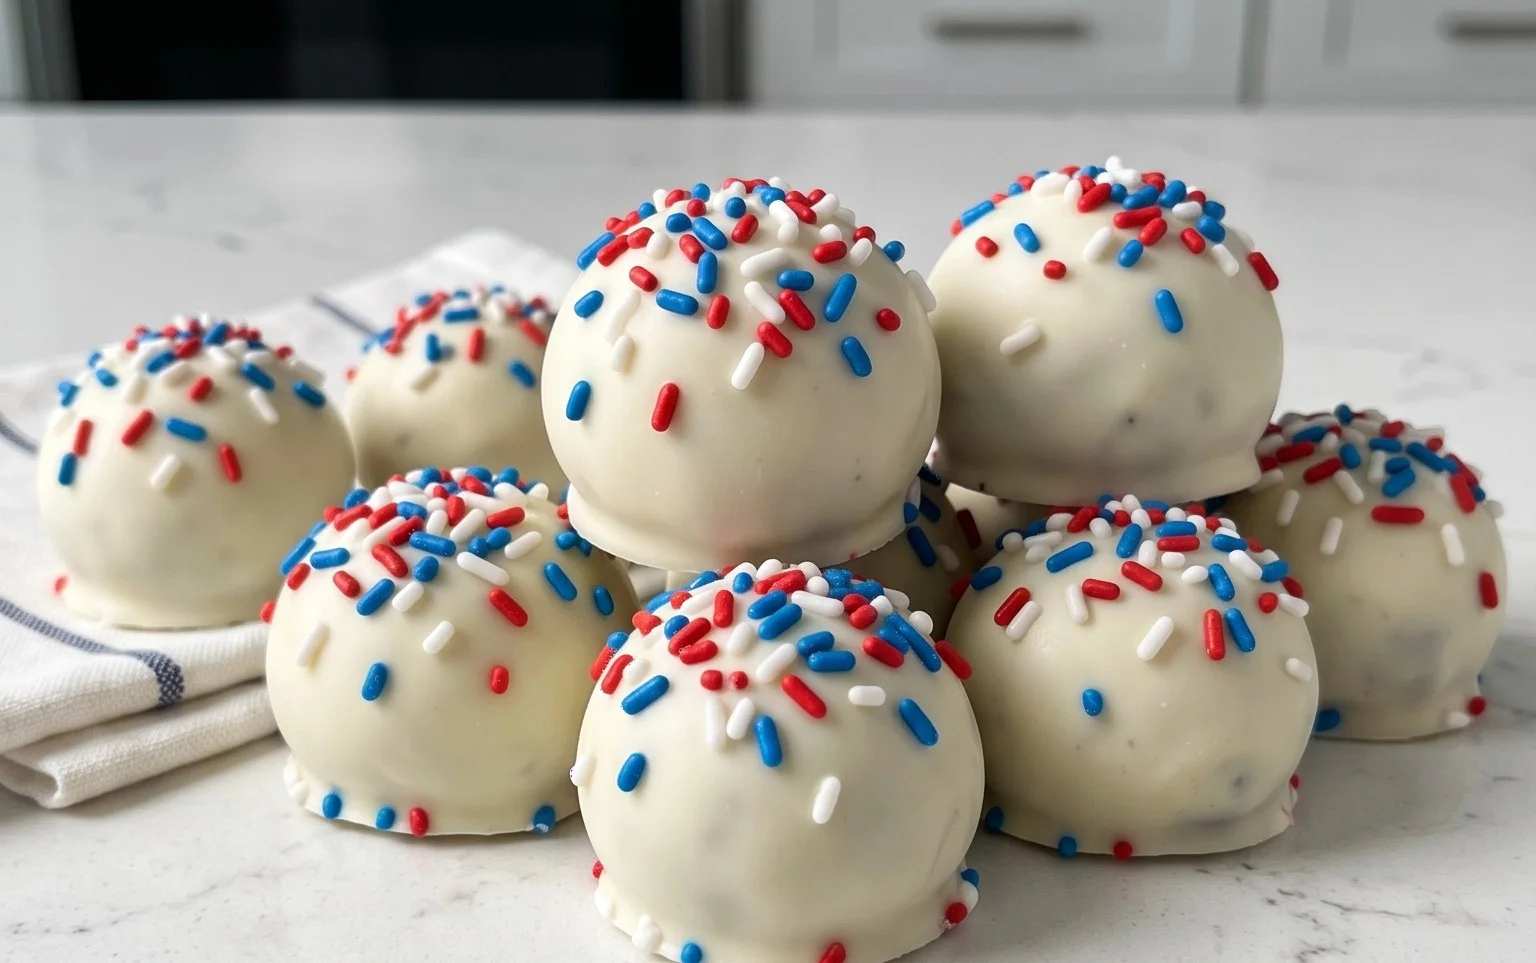
Patriotic Oreo Balls-Festive No-Bake Dessert Ideas
Patriotic Oreo Balls are a surefire way to add a burst of flavor and festivity to any gathering, and trust me, they’re always a massive hit at our house! There’s something undeniably delightful about these no-bake treats. Maybe it’s the perfect balance of rich chocolate and creamy filling, or perhaps it’s the sheer simplicity that makes them so approachable for any home baker. What truly sets these Patriotic Oreo Balls apart, especially during holidays like the Fourth of July or Memorial Day, is their vibrant visual appeal. With a few simple ingredients and a touch of red, white, and blue flair, you can transform humble Oreos into edible masterpieces that taste as good as they look. Get ready to impress your friends and family with these crowd-pleasing Patriotic Oreo Balls!
Patriotic Oreo Balls
These Patriotic Oreo Balls are an absolute showstopper for any Fourth of July barbecue, Memorial Day picnic, or even just a fun summer get-together. They’re surprisingly easy to make, and the vibrant red, white, and blue colors are sure to get everyone in a festive mood. Plus, they taste just like those classic Oreo truffles everyone loves, but with a dazzling patriotic twist. Get ready to impress your friends and family with these delightful, no-bake treats!
Ingredients:
Creating the Oreo Base
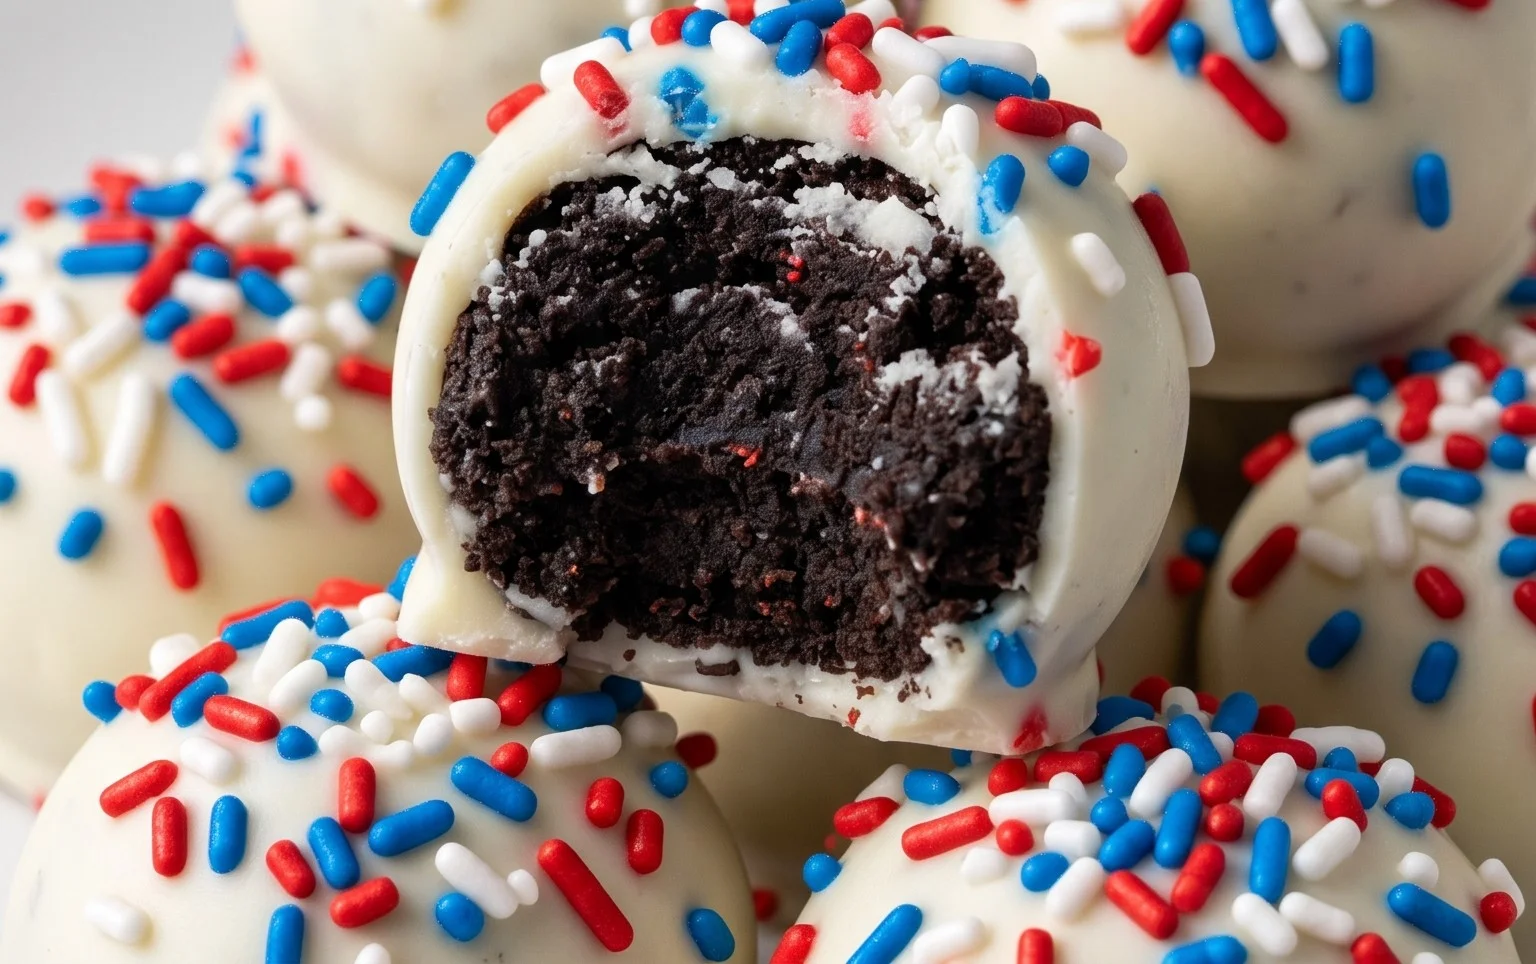
The foundation of these delicious treats is a simple yet incredibly satisfying blend of crushed Oreos and cream cheese. This mixture, once chilled, becomes firm enough to roll into balls and holds its shape beautifully while being dipped in chocolate.
First, let’s get those Oreos ready. You’ll want to crush the entire family-size package of Oreo cookies. Don’t worry about getting them into a super-fine powder; some small chunks are perfectly fine and actually add a nice texture to the finished balls. The easiest way to do this is to place the Oreos in a food processor and pulse until they are finely crushed. If you don’t have a food processor, you can put them in a sturdy zip-top bag and use a rolling pin to crush them. Just make sure to seal the bag well before you start pounding! Once crushed, transfer the Oreo crum extractbs to a large mixing bowl.
Now, it’s time for the cream cheese. Make sure your 8-ounce block of cream cheese has been softened to room temperature. This is crucial for creating a smooth, well-combined mixture. If it’s too cold, it will be lumpy and difficult to incorporate evenly. Add the softened cream cheese to the bowl with the crushed Oreos.
Using a sturdy spoon or your hands (which is often the most effective way!), mix the cream cheese and Oreo crum extractbs together until they are thoroughly combined and form a cohesive dough. It should feel like a thick, slightly sticky dough that you can easily shape. If the mixture seems a bit too dry and crum extractbly, you can add a tiny splash of milk, but usually, the softened cream cheese is enough to bind everything together perfectly.
Shaping and Chilling the Balls
Once your Oreo and cream cheese mixture is ready, it’s time to form them into balls. This part is fun and can even be a great activity to do with kids! Roll the mixture into small, bite-sized balls. Aim for a size that’s easy to handle and pop into your mouth – about 1-inch in diameter is usually perfect. As you roll them, try to make them as uniform in size as possible. This will ensure they all bake (or rather, chill!) evenly and look consistent when decorated.
After you’ve rolled all the balls, arrange them on a baking sheet lined with parchment paper or wax paper. This prevents them from sticking to the sheet. Now, the most important step for this stage: chilling! Place the baking sheet with the Oreo balls into the refrigerator for at least 30 minutes, or until they are firm to the touch. This chilling period is absolutely essential. It firms up the cream cheese, making the balls much easier to dip and preventing them from falling apart in the melted candy. You can even leave them in the fridge for a few hours or pop them in the freezer for about 15-20 minutes if you’re in a hurry, but don’t let them freeze solid.
Dipping and Decorating for a Patriotic Flair
With our chilled Oreo balls ready, it’s time for the festive transformation! We’ll be using red and blue candy melts for our patriotic theme, and a touch of white for the stars.
Divide your chilled Oreo balls into two batches. You’ll want to melt the red candy melts and the blue candy melts separately. The best way to melt candy melts is to do so in the microwave at 50% power, stirring every 30 seconds until smooth. Alternatively, you can use a double boiler. Once melted, dip one batch of Oreo balls into the red candy melts, ensuring they are fully coated. Use a fork or a toothpick to help you lift them out and let the excess chocolate drip back into the bowl. Place the red-dipped balls back onto the parchment-lined baking sheet. Repeat this process with the second batch of Oreo balls, dipping them into the blue candy melts.
Now for the white stars! Place the Ghirardelli white melting wafers in a small microwave-safe bowl. Melt them using the same method as the candy melts – 50% power, stirring every 30 seconds. Once melted and smooth, transfer the white chocolate to a small piping bag or a zip-top bag with a tiny corner snipped off.
While the red and blue coatings are still slightly soft but not fully hardened, it’s time to add our white stars. Drizzle the melted white chocolate in a star pattern or in small dots over the red and blue dipped balls. Immediately after drizzling the white chocolate, sprinkle the white star confetti sprinkles generously over the wet chocolate. The sprinkles will adhere best while the chocolate is still melted. Work quickly so the chocolate doesn’t set before you can add the sprinkles.
Let the dipped Oreo balls sit at room temperature to set completely. This usually takes about 15-30 minutes. If you live in a warm climate or want them to set faster, you can place them back in the refrigerator for about 10 minutes, but be careful not to refrigerate them for too long, as condensation can form on the chocolate.
These Patriotic Oreo Balls are a delightful, no-bake treat that’s perfect for celebrating. They’re a guaranteed crowd-pleaser and look absolutely stunning on any dessert table. Enjoy making and sharing these festive delights!
Conclusion:
And there you have it! These Patriotic Oreo Balls are a guaranteed hit for any celebration, especially those patriotic holidays. They’re incredibly easy to make, requiring minimal baking skills and just a handful of ingredients. The delightful combination of crushed Oreos, cream cheese, and sweet chocolate coating is simply irresistible, and the festive red, white, and blue decorations make them visually stunning. They are perfect for potlucks, BBQs, or just a sweet treat to enjoy at home while you’re feeling patriotic.
For serving suggestions, consider arrangin extractg them on a platter with fresh berries or even alongside other red, white, and blue desserts. They also make fantastic party favors. If you’re feeling adventurous with variations, try using different colored candy melts for the coating or even adding a sprinkle of edible glitter for extra sparkle. Don’t hesitate to experiment! I truly encourage you to give these Patriotic Oreo Balls a try. They are a simple yet incredibly rewarding recipe that will bring smiles to everyone’s faces.
Frequently Asked Questions:
Can I make these ahead of time?
Absolutely! These Patriotic Oreo Balls can be made up to a week in advance. Store them in an airtight container in the refrigerator. They might become a little firmer when chilled, but they will still be delicious.
What’s the best way to store leftover Oreo Balls?
For the best freshness, store any leftover Oreo Balls in an airtight container in the refrigerator. This will help maintain their texture and prevent them from drying out.
Can I use different types of cookies besides Oreos?
While Oreos provide a fantastic base, you can certainly get creative! Other chocolate sandwich cookies or even some types of chocolate chip cookies could work, though the texture and flavor might vary slightly. The classic Oreo flavor, however, is what makes this recipe so special.
Patriotic Oreo Balls
Festive and easy-to-make Oreo balls decorated in red, white, and blue for a patriotic treat.
Ingredients
-
1 lb 2.12 oz Family Size package Oreo Cookies
-
8 ounce block cream cheese, softened to room temperature
-
12 ounce bag red candy melts
-
12 ounce bag blue candy melts
-
⅓ cup Ghirardelli white melting wafers
-
White star confetti sprinkles for topping
Instructions
-
Step 1
Crush the Oreo cookies into fine crumbs using a food processor or by placing them in a sealed bag and crushing with a rolling pin. -
Step 2
In a large bowl, combine the Oreo crumbs and softened cream cheese. Mix until well combined and a dough forms. -
Step 3
Roll the mixture into 1-inch balls and place them on a baking sheet lined with parchment paper. -
Step 4
Melt the red and blue candy melts separately according to package directions. Dip half of the Oreo balls into red candy melts and the other half into blue candy melts. -
Step 5
While the candy melts are still wet, sprinkle with white star confetti sprinkles. -
Step 6
Melt the Ghirardelli white melting wafers according to package directions. Drizzle the white melting wafers over the dipped Oreo balls for extra decoration. -
Step 7
Allow the candy melts to set completely. Refrigerate for about 15-20 minutes to speed up the setting process.
Important Information
Nutrition Facts (Per Serving)
It is important to consider this information as approximate and not to use it as definitive health advice.
Allergy Information
Please check ingredients for potential allergens and consult a health professional if in doubt.