Easy Japanese Tuna Onigiri Recipe Quick
15-min. Easy Japanese Tuna Onigiri is your new go-to for a quick, satisfying, and delightfully delicious meal or snack. Have you ever craved something that’s both comforting and packed with flavor, but only have a few minutes to spare? That’s where the magic of Japanese tuna onigiri comes in. These savory rice balls, often found gracing bento boxes and convenience store shelves in Japan, are beloved for their simplicity and incredibly versatile taste. What makes them truly special is the perfect harmony of fluffy, perfectly seasoned rice cradling a flavorful, often slightly salty tuna filling. It’s the ultimate no-fuss comfort food that tastes like it took hours to prepare, yet you can whip up a batch of this 15-min. Easy Japanese Tuna Onigiri in less time than it takes to decide what to order for takeout.
Why You’ll Love This Recipe:
Effortless Preparation
Authentic Japanese Flavors
Perfect for Any Occasion
15-Minute Easy Japanese Tuna Onigiri
Craving a quick, satisfying, and incredibly flavorful snack or light meal? Look no further than these easy 15-minute Japanese Tuna Onigiri! These rice balls are a staple in Japan for a reason – they’re simple to make, portable, and absolutely delicious. The combination of fluffy rice, savory tuna, and creamy mayonnaise is a classic for a reason. Whether you’re packing a lunch, need a quick energy boost, or just want to try your hand at a bit of Japanese home cooking, this recipe is perfect for you. The beauty of onigiri lies in its simplicity and versatility. While this tuna mayo version is a popular favorite, the basic technique can be adapted to many other fillings. Let’s get started and have these delightful rice balls ready in no time!
Ingredients:
Preparing Your Onigiri
The key to perfect onigiri is the rice. Ideally, you’ll want to use short-grain Japanese rice, which has a slightly sticky texture that holds its shape beautifully. If you’re using freshly cooked rice, make sure it’s still warm but not scalding hot. This warmth helps the rice mold easily and makes it more pliable for shaping. If your rice has cooled completely, you can gently warm it up in the microwave for about 30-60 seconds before proceeding. This makes a significant difference in how easy it is to work with.
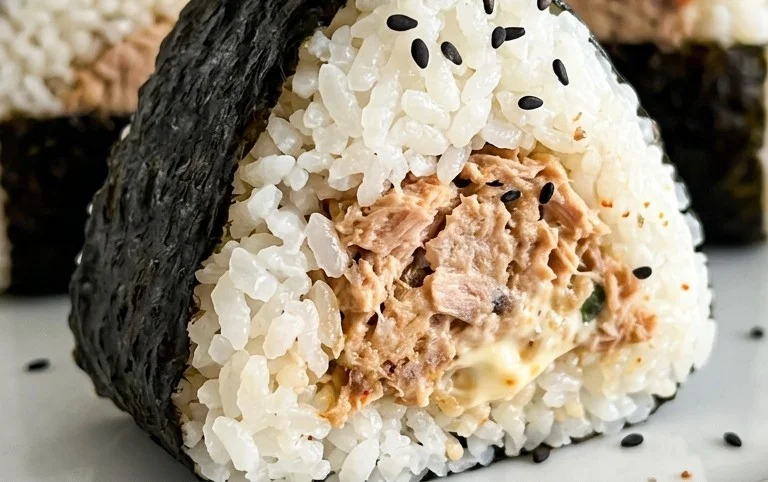
The tuna filling is incredibly straightforward. For the best flavor and texture, I recommend using canned tuna packed in oil. The oil adds richness and moisture to the tuna. If you’re using tuna in water, simply drain it very well. You can even gently press out any excess liquid with a spoon or by squeezing it in a fine-mesh sieve. Then, flake the tuna with a fork.
Now, let’s talk about the mayonnaise. Japanese mayonnaise, like Kewpie, is known for its richer, creamier, and slightly tangier flavor compared to Western-style mayonnaise. It makes a world of difference in the final taste of your onigiri. However, if you don’t have Japanese mayo on hand, regular mayonnaise will still work perfectly well. Just add it to the flaked tuna along with the salt. Stir everything together until the tuna is evenly coated. This simple mixture is surprisingly addictive!
Shaping Your Onigiri
This is where the magic happens! You’ll want to have a small bowl of water and a little bit of salt nearby. Wetting your hands with water prevents the rice from sticking to them, and a pinch of salt adds a subtle seasoning to the exterior of the onigiri, enhancing the overall flavor.
Step 1: Prepare the Rice Mixture
In a medium bowl, combine the warm cooked short-grain rice with the 1/2 tsp of salt. Gently mix the salt into the rice using a rice paddle or a spoon. Be careful not to mash the rice too much; you want to keep the grains distinct. The warmth of the rice will help distribute the salt evenly.
Step 2: Form the Rice Balls
Lightly wet your hands with water, then sprinkle a tiny pinch of salt onto your palms. Take about 1/3 cup of the salted rice and place it in the palm of one hand. Create a small indentation in the center of the rice with your thumb. This indentation is where you’ll place the tuna filling.
Step 3: Add the Tuna Filling
Spoon about 1-2 tablespoons of the tuna-mayo mixture into the indentation you made in the rice. Don’t overfill it, or it will be difficult to close the onigiri.
Step 4: Enclose and Shape
Gently bring the edges of the rice up and over the filling, enclosing it completely. Now, using both hands, begin extract to shape the rice into your desired onigiri form. The most common shapes are a triangle or a ball. For a triangle, cup one hand and use the fingers of your other hand to gently press the sides into a triangular shape. Rotate and press gently to form defined edges. If you prefer a ball, simply cup your hands and gently roll the rice into a sphere. The key is to apply firm but not crushing pressure. You want the onigiri to hold its shape without becoming dense or hard. Repeat this process with the remaining rice and filling until you have 2-3 onigiri.
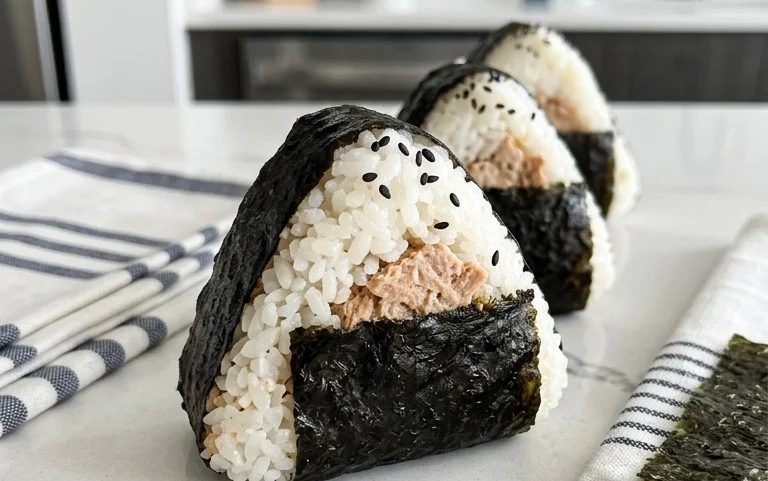
Step 5: Wrap with Nori and Garnish
Take one sheet of nori and cut it into strips, about 1 inch wide. For a triangular onigiri, you’ll typically wrap a strip around the base. For a ball-shaped onigiri, you can wrap a strip around the middle. The nori adds a wonderful umami flavor and a satisfying crispness. If you’re using sesame seeds for garnish, sprinkle them onto the still-damp surface of the onigiri before wrapping with nori, or press them onto the nori itself. This is entirely optional, but it adds a lovely visual appeal and a nutty crunch.
And there you have it! Delicious, homemade Japanese Tuna Onigiri ready to be enjoyed. These are best eaten fresh, but they can also be stored at room temperature for a few hours or in the refrigerator for up to a day. If refrigerating, you might want to warm them up slightly before eating, as the rice can become quite firm when cold. Enjoy your quick and tasty culinary adventure!
Conclusion:
There you have it! Your guide to whipping up delicious and incredibly easy Japanese Tuna Onigiri in just 15 minutes. This recipe truly shines because of its simplicity and speed, making it the perfect solution for a quick lunch, a satisfying snack, or even a light dinner when you’re short on time. The fluffy rice, savory tuna filling, and the delightful umami of nori come together in a harmonious bite that’s both comforting and incredibly flavorful. Don’t be afraid to get creative with your fillings and enjoy this versatile staple!
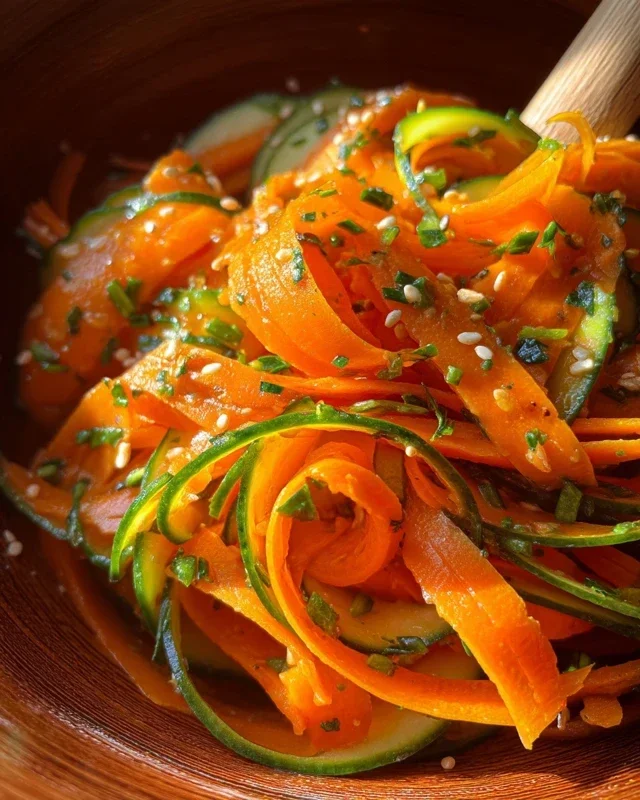
I highly encourage you to give this 15-min. Easy Japanese Tuna Onigiri a try. It’s a fantastic way to experience a taste of Japanese home cooking without any fuss. Serve these onigiri warm or at room temperature. They are wonderful on their own, or consider pairing them with a light miso soup, a simple green salad, or some pickled gin extractger for an extra burst of flavor. For variations, feel free to experiment! Beyond the classic tuna mayo, consider adding a sprinkle of furikake (rice seasoning), some chopped chives, a dash of soy sauce, or even some finely diced cucumber for crunch.
Frequently Asked Questions:
Can I make the rice ahead of time?
Absolutely! You can cook your sushi rice in advance and let it cool to room temperature. This can save you even more time when you’re ready to assemble your onigiri. Just ensure it’s stored properly in an airtight container.
What if I don’t have nori sheets?
No problem! While nori adds a lovely visual appeal and a distinct flavor, you can still enjoy your onigiri without it. You can also use thinly sliced omelets or even skip the wrapping altogether. The flavor will still be fantastic!
How long do the onigiri stay fresh?
Onigiri are best enjoyed the same day they are made for optimal texture and flavor. However, they can be stored in an airtight container in the refrigerator for up to 2 days. It’s recommended to bring them back to room temperature before eating, or a quick gentle warming in a microwave can revive them.
15-min. Easy Japanese Tuna Onigiri
Quick and simple Japanese tuna onigiri, perfect for a light meal or snack.
Ingredients
-
2 sheets nori (or 1/2 sheet)
-
1 tsp sesame seeds
-
2 cups cooked short grain rice
-
1/2 tsp salt
-
5.29 oz canned tuna (in oil or water)
-
2 tbsp Japanese mayo
Instructions
-
Step 1
Drain the canned tuna and place it in a small bowl. Add the Japanese mayonnaise and salt, and mix well until combined. -
Step 2
Lightly wet your hands with water and sprinkle a little salt on your palms to prevent sticking. Take about 1/2 cup of cooked rice and flatten it into your palm. -
Step 3
Place a spoonful of the tuna mixture in the center of the flattened rice. Don’t overfill. -
Step 4
Carefully fold the rice around the tuna filling and shape it into a triangle or ball. Gently press to form a compact onigiri. -
Step 5
Cut the nori sheets into strips or desired shapes. Wrap the nori around the onigiri, if using. -
Step 6
Garnish with sesame seeds, if desired.
Important Information
Nutrition Facts (Per Serving)
It is important to consider this information as approximate and not to use it as definitive health advice.
Allergy Information
Please check ingredients for potential allergens and consult a health professional if in doubt.